Graphic EQ, Parametric EQ, effects, and Premium Rack
Reference Manual
140
Using the Premium Rack
The procedure to set up the I/O patches for the rack are the same as those for the effect rack
(page 132).
For the premium rack, only racks 1–2 can be used via send/return. Racks 3–8 are only for
patching as inserts. (Refer to “Virtual rack operations” on page 119.)
NOTE
• If you are inserting a processor into a channel that handles a stereo source, assign the R channel
insert-out and insert-in to the R input and output of the processor in the same way as steps 5 and
6.
• For details on editing the parameters, refer to the next section “Editing the Premium Rack
parameters.”
• Adjust the digital gain and the processor parameters so that the signal does not reach the
overload point at the input or output stage of the processor.
Mounting a processor
There are two ways to mount each processor:
• DUAL .....................The processor is used on two mono channels.
• STEREO ................The processor is used on one stereo channel.
The DUAL button and STEREO button indicate how many rack space units are occupied by
the Premium Rack processor.
The U76 occupies two rack spaces. Other processors occupy one rack space. If you mount a
two-space Premium Rack processor in the rack, you will be unable to mount any more
processors below those rack spaces. Also, you cannot mount a two-space processor in an
even-numbered rack.
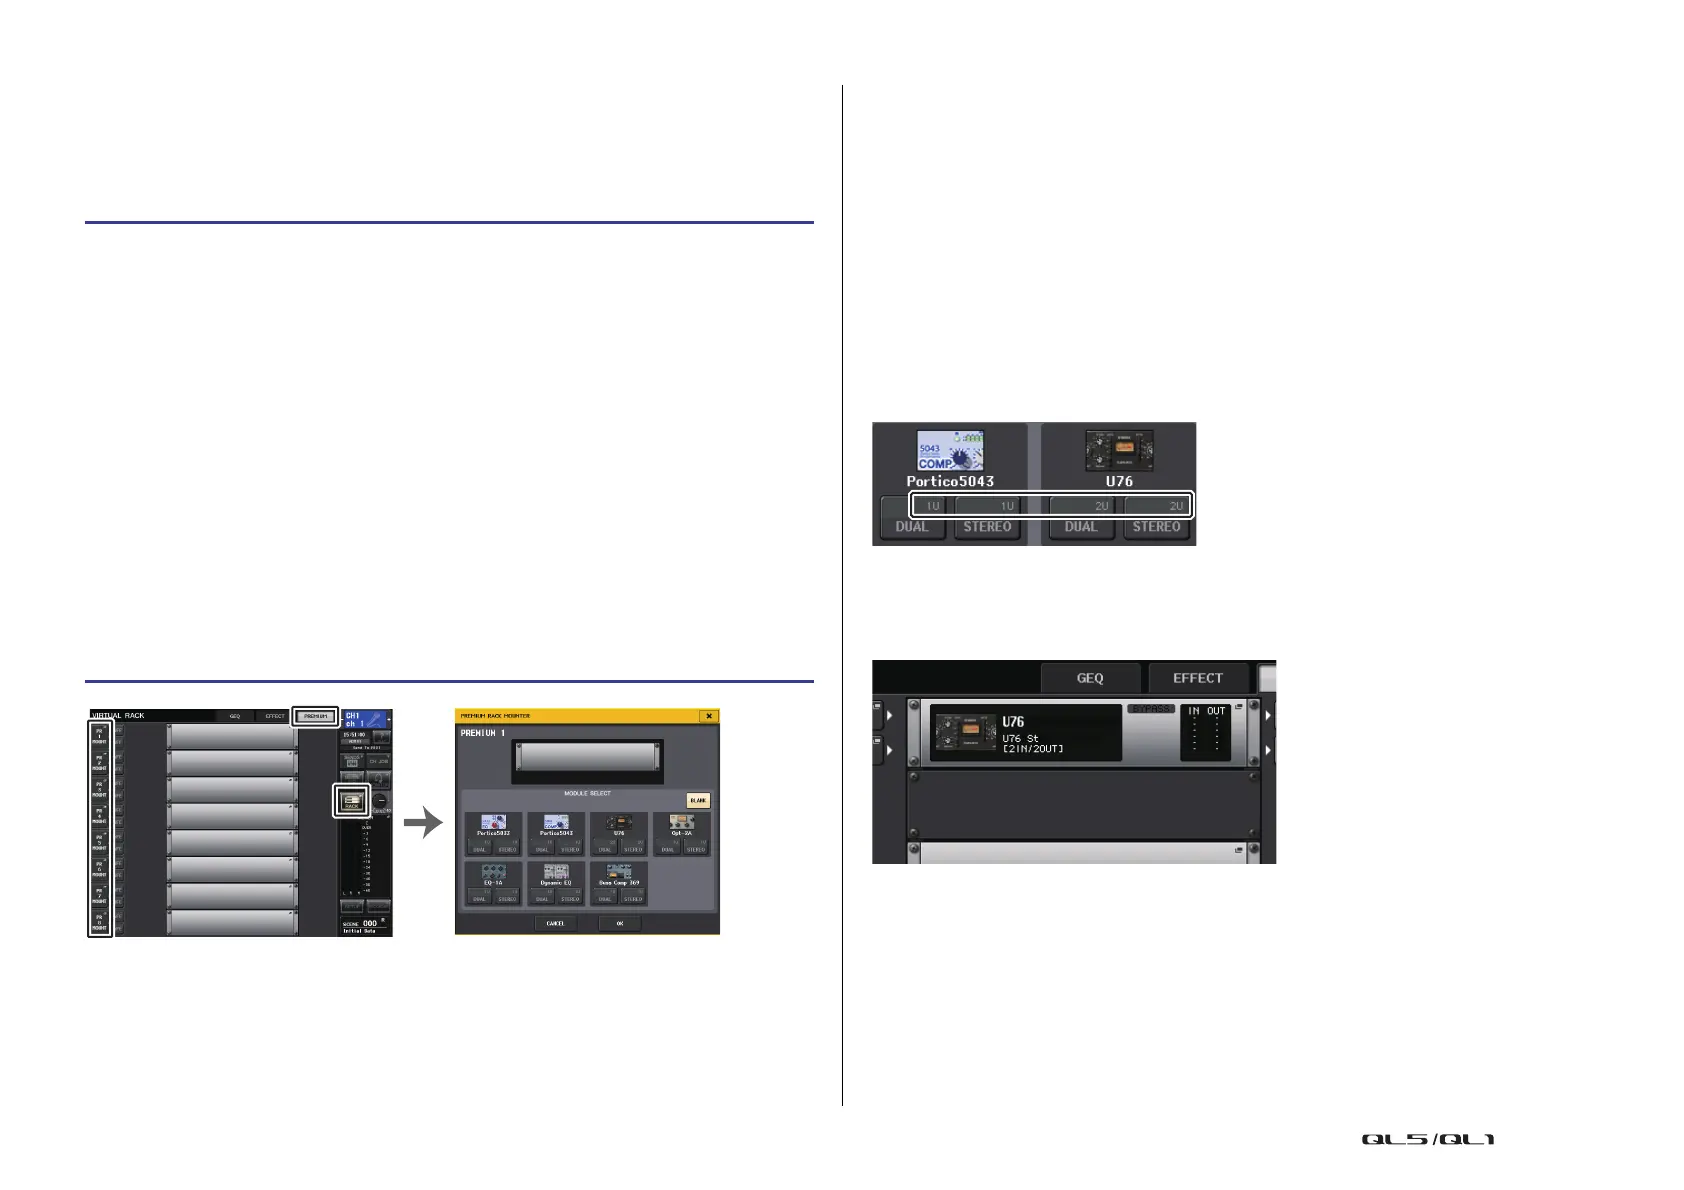
STEP
1. In the Function Access Area, press the RACK button.
2. Press the PREMIUM tab in the upper part of the VIRTUAL RACK window.
3. To mount a Premium Rack in the rack, press the rack mount button for that rack in
the PREMIUM RACK field.
4. Select the processor to mount and the mounting method in the MODULE SELECT
field in the PREMIUM RACK MOUNTER window, and press the OK button.
5. Press the INPUT PATCH L button to open the CH SELECT window, and select the
input source.
6. Press the OUTPUT PATCH L button to open the CH SELECT window, and select the
insert-in of the same channel as the output destination.
7. Use the Bank Select keys and the [SEL] key to select the channel into which you
inserted the effect.
8. Press the popup button in the INSERT field in the SELECTED CHANNEL VIEW screen.
9. In the INSERT/DIRECT OUT popup window, turn on the INSERT ON/OFF button for
the channel into which you inserted the processor.
10. Adjust the processor parameters.
11. Using the fader of the channel you selected as the rack’s output destination in step
6, adjust the level as appropriate.
PREMIUM RACK MOUNTER
window
VIRTUAL RACK window
(PREMIUM RACK field)
 Loading...


