Graphic EQ, Parametric EQ, effects, and Premium Rack
Reference Manual
130
Inserting Automixer in channels post-fader
This section explains how to mount Automixer in a virtual rack, and insert Automixer input and
output into channels (excluding ST IN channels) post-fader (POST ON). For details on
Automixer operations, refer to the following section “Using Automixer.”
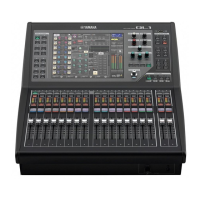
Using Automixer
Channel display
The auto mix gain meter for each channel and man (yellow), auto (green), and mute (red)
settings are shown for channels 1–8 and channels 9–16.
If you select the channel 1–8 or 9–16 region, the display channel for the channel control field
will switch to 1–8 or 9–16.
(For 8ch Automixer, only channels 1–8 are shown.)
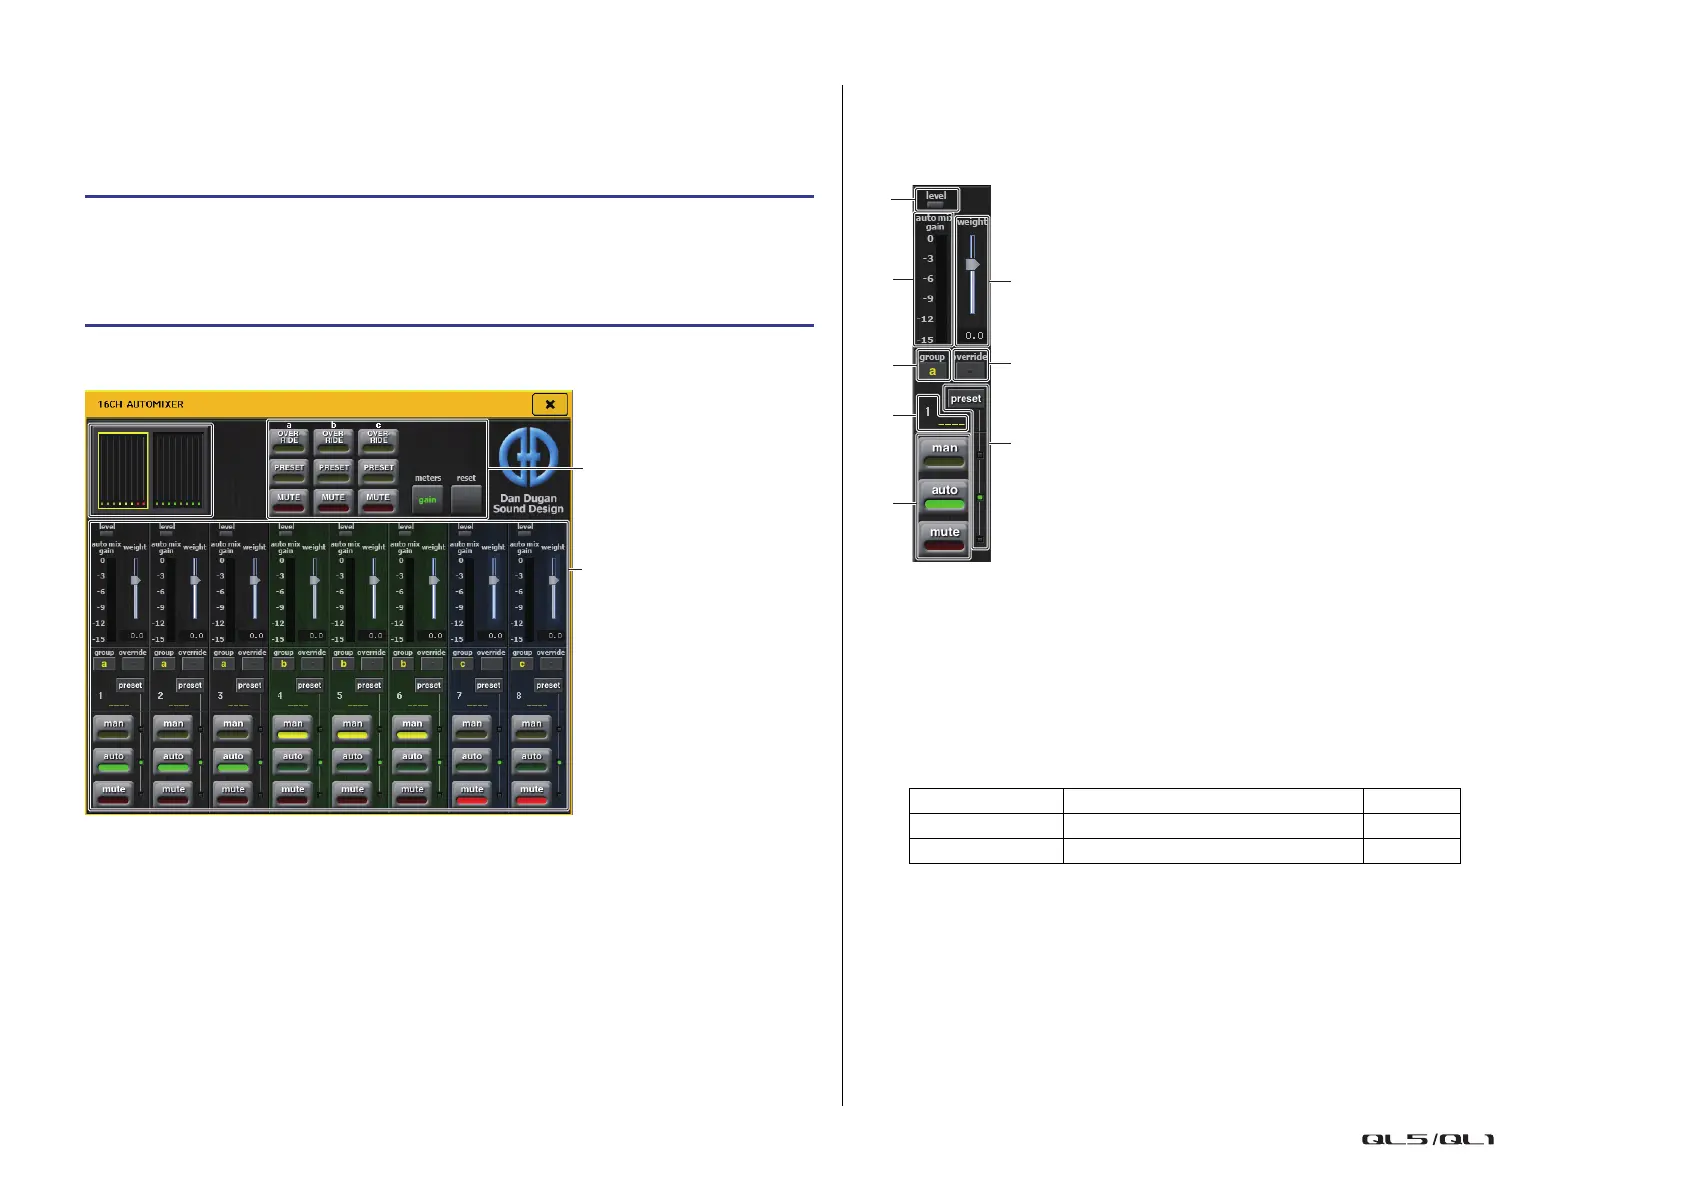
Channel control field
Each channel is always in man, auto, or mute mode. The indicator for the enabled channel
mode will light. To select a mode, either press the button for that mode or press the PRESET
button in the master field.
1 Level indicator
Lights green when the audio is at an optimum level for Automix.
NOTE
• If the level indicator flashes, increase the input gain.
• If the level indicator lights up red, reduce the input gain.
2 Meter indicator
There are three display modes. Pressing the meters button in the master field will switch
modes.
NOTE
Meters should normally be set in gain mode.
3 weight
Adjusts the correlative sensitivity between input channels. When there is no input, adjust
the weight setting so that all auto mix gain meters are at about the same level.
Use the [TOUCH AND TURN] knob to change the channel weight settings by adjusting
the weight slider.
Automixer calculates the ratio of input level for specific channels for all input mixes in
the group. The following example explains the weight control mechanism.
STEP
1. Refer to steps 1–8 in “Virtual rack operations” on page 119 to mount Automixer in
rack 1 and set its input source and output destination.
2. Refer to “Inserting an external device into a channel” on page 18 to insert
Automixer in post-fader (POST ON field).
Master field
Channel control field
gain Displays the gain for Automixer. Green
input Displays the input level. Yellow
output Displays the output level. Blue
8
5
3
7
6
4
2
1
 Loading...


