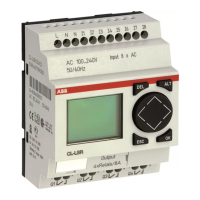
Inside the logic relay
228
1SVC 440 795 M0100
The fifth segment is outside of the circuit diagram. The logic
relay uses this to contact the “outside world”: output relays
Q1 to Q… are switched and inputs I1 to “I…” are re-read.
The logic relay also copies all new switch states to the status
image.
The logic relay only uses this status image for one cycle. This
ensures that each rung is evaluated with the same switching
states for one cycle, even if the input signals at I1 to I12, for
example, change their status several times within a cycle.
Evaluation in the circuit diagram and high-speed
counter functions
When using high-speed counter functions, the signal state is
continuously counted or measured irrespective of the
processing of the circuit diagram. (C13, C14 high-speed
up/down counters, C15, C16 frequency counters)
CL operation and implications for circuit diagram
creation
The logic relay evaluates the circuit diagram in these five
segments in succession. You should therefore remember two
points when you create your circuit diagrams:
• The changeover of a relay coil does not change the
switching state of an associated contact until the next
cycle starts.
• Always wire forwards, upwards or downwards. Never wire
backwards.
 Loading...