Version 7.0 77 Mediant 3000
Hardware Installation Manual 6. Hardware Maintenance and Repair
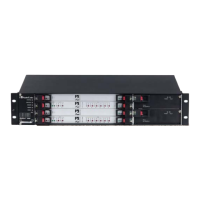
6.2.1 Replacing Blades for Mediant 3000 Simplex
The procedure below describes how to replace a blade for Mediant 3000 Simplex.
Note:
Do not use excessive force when inserting the blade into the chassis cage.
To replace a blade for Mediant 3000 Simplex:
1. Perform a software-based "graceful" lock on the device so that no new calls are
accepted and current calls are terminated only after a user-defined interval. This can
be done using the Web interface, as described in the User's Manual.
2. Power down the device.
3. Physically remove the blade:
a. Using a Philips screwdriver, unfasten the screws located at both ends of the blade
that secure the blade to the chassis.
b. Press the blade's red ejector buttons on each of the two black ejector/injector
latches to release the blade from the slot.
c. Simultaneously rotate the ejector/injector latches outward to disengage the blade
from the slot.
d. Pull on the two ejector/injector latches and gently slide the blade out of the slot.
4. Physically insert the new blade:
a. Choose the appropriate slot in the chassis.
b. Ensure that the blade's red ejector buttons on each of the two black
ejector/injector latches are pressed-in (i.e., black ejector/injector latches in the
open, pulled out position).
c. Hold the blade horizontally and insert it into the slot, aligning its edges with the
groves inside the slot.
d. Ease the blade all the way into the slot, using your thumbs until the
ejector/injector latches touch the chassis and the blade is flush with the chassis
slot.
e. Lock the blade into place by pressing the two black ejector/injector latches on
both ends inward, toward the middle, until you hear a click.
f. Using a Philips screwdriver, fasten the screws located at both ends of the blade to
secure it to the chassis and to ensure that it has an earth connection to the
chassis.
5. Power on the device.
6. Perform a software-based unlock of the device. This can be done using the Web
interface, as described in the User's Manual.
7. Load the backup ini files and other configuration files to the device (refer to the User's
Manual).
 Loading...