User's Manual 228 Document #: LTRT-50614
MP-20x Multimedia Home Gateway
14.4.3.1 Enabling SNMP in the Web Interface
Simple Network Management Protocol (SNMP) enables Network Management Systems
(NMSs) to remotely configure and monitor your device. Your ISP may use SNMP to identify
and resolve technical problems. Technical information regarding the properties of the
device's SNMP agent should be provided by your ISP.
The procedure below describes how to configure the SNMP agent embedded on
the device.
To configure the device's SNMP agent:
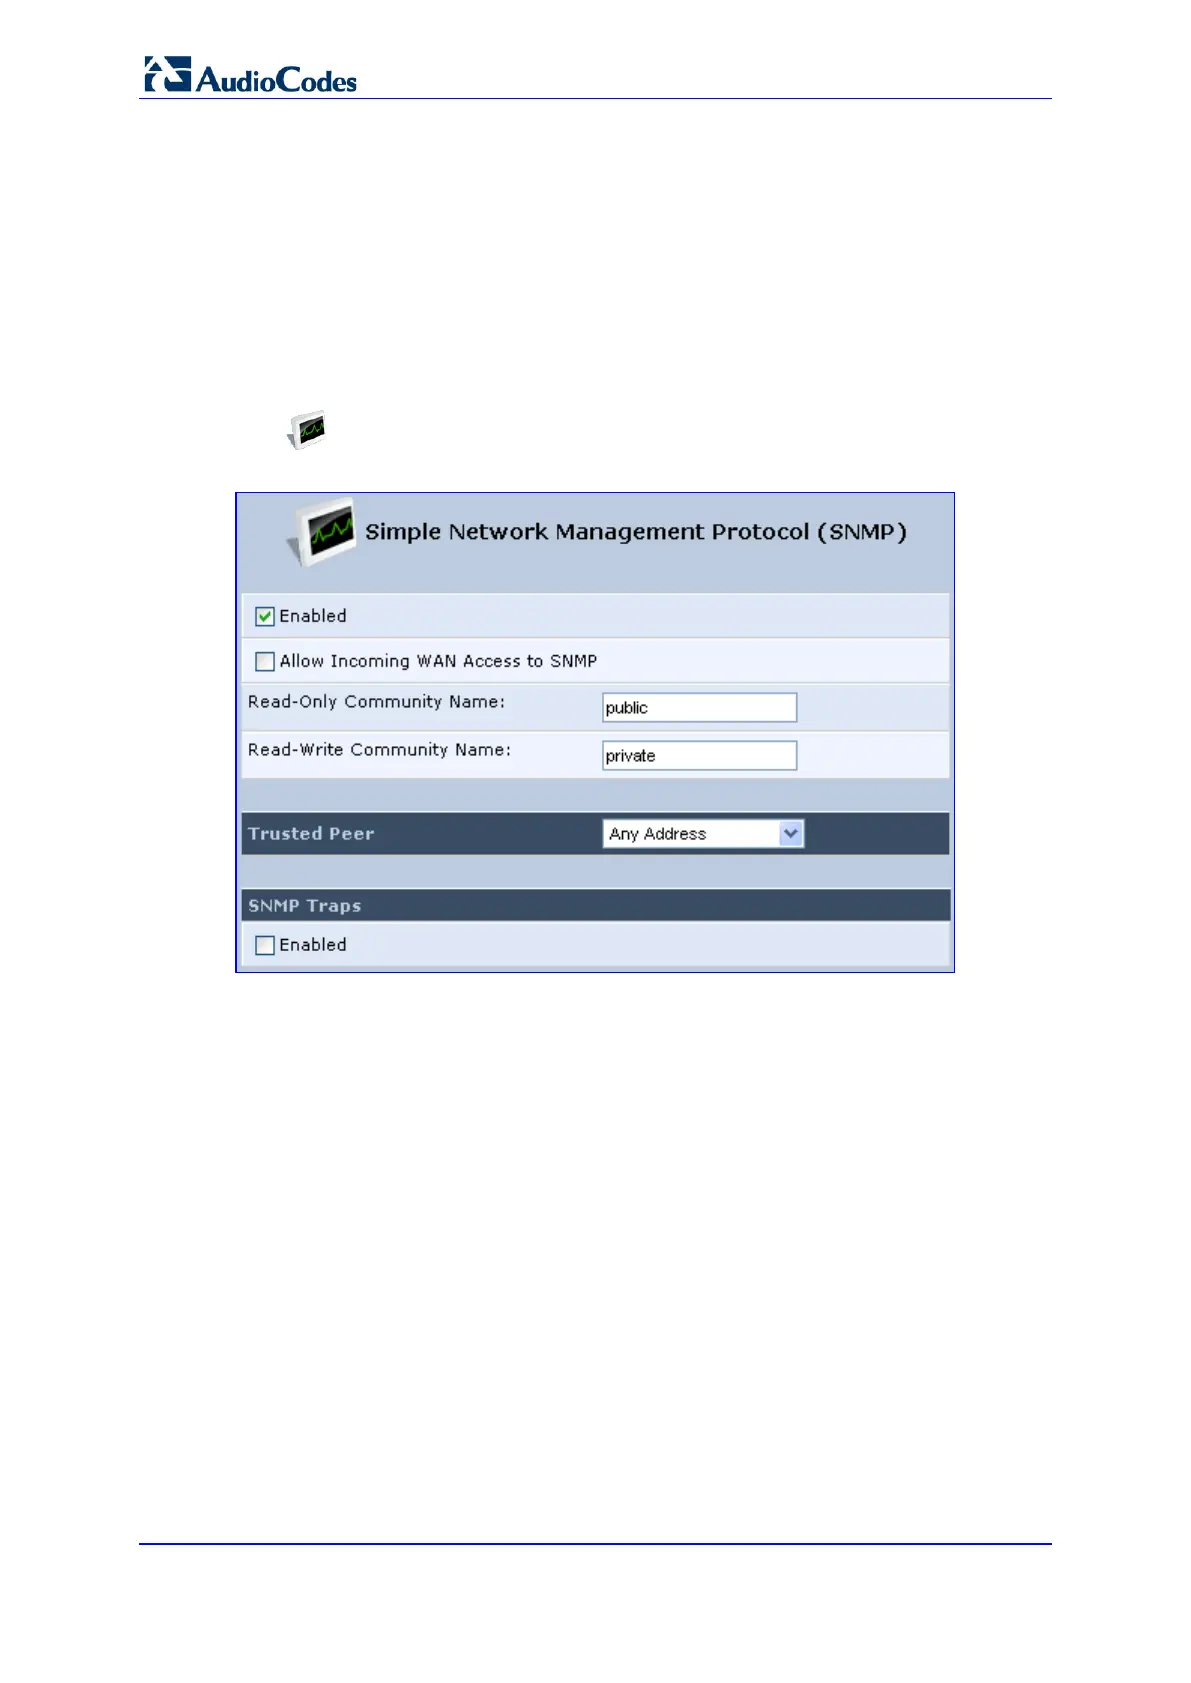
1. In the 'Advanced' screen, click the Simple Network Management Protocol (SNMP)
icon; the 'Simple Network Management Protocol (SNMP)' screen appears.
Figure 14-13: Simple Network Management Protocol (SNMP) Screen
2. Select the 'Enabled' check box to enable SNMP.
3. Select the ‘Allow Incoming WAN Access to SNMP’ check box to allow access to the
device's SNMP agent over the Internet.
4. In the ‘Read-Only Community Names’ and ‘Read-Write Community Names’
fields, enter the SNMP community strings. These strings are passwords used in
SNMP messages between the management system and the device. A read-only
community allows the manager to monitor the device. A read-write community allows
the manager to monitor and configure the device.
5. From the ‘Trusted Pair’ drop-down list, enter the IP address, or subnet of addresses
that identify which remote management stations are allowed to perform SNMP
operations on the device.
6. Under the SNMP Traps group, select the ‘Enabled’ check box to allow the device to
send messages (traps) to a remote management station to notify the manager about
the occurrence of important events or serious conditions.
• Version: SNMP version - SNMP v1 or SNMP v2c traps.
• Destination: remote management station's IP address.
• Community: community name that is associated with the trap messages.
7. Click OK to save your settings.
 Loading...