15
Preparation
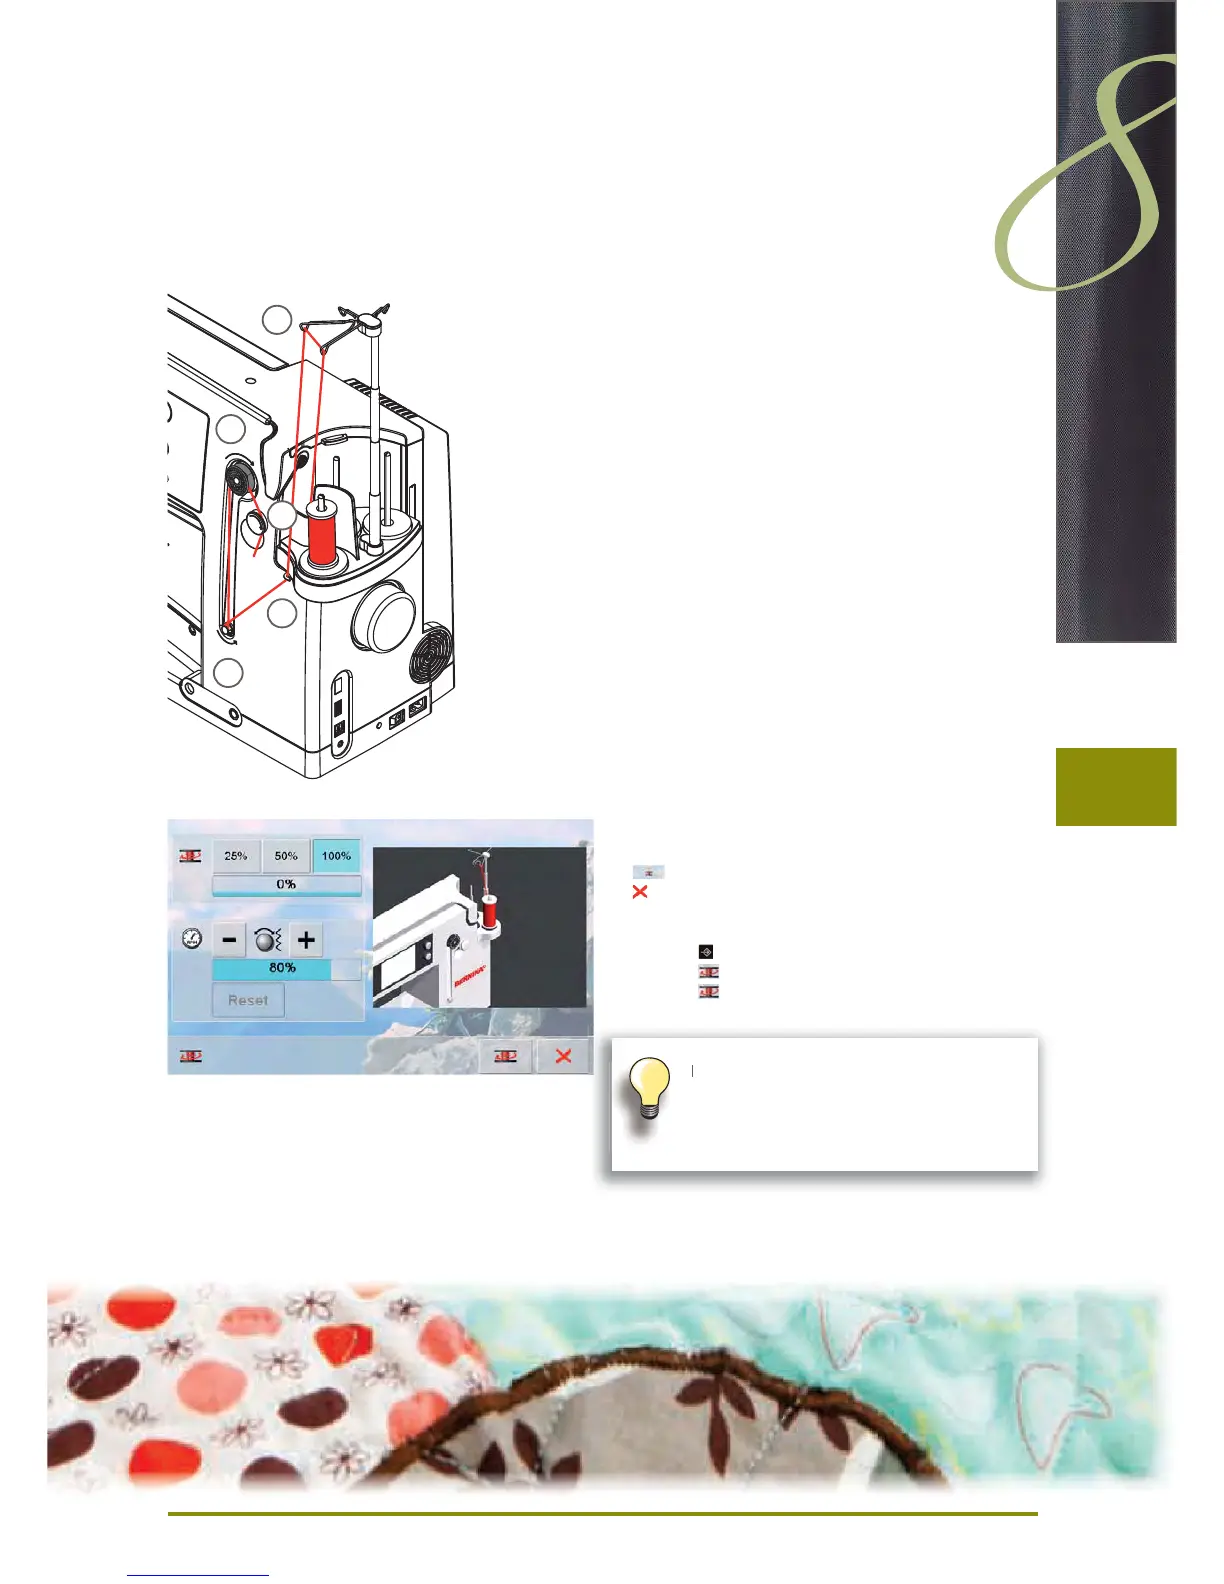
Winding the Bobbin
Preparation
turn power switch on (to «I») ►
place empty bobbin on Pin, white mark in front ►
the bobbin winding screen appears ►
the amount of bobbin fill is recognized by the system ►
and displayed by bar below the selectable bobbin fill
place thread spool on the front spool pin and thread the
►
respective guides 1 on the telescope
Winding the Bobbin
hold thread with both hands, guide the thread in the ►
thread guide on the swivel plate 2 in the direction of the
arrows and around the bobbin pre-tension 3
wind the thread one to two times around the empty ►
bobbin 4 following the direction of the arrows and pull
any excess thread in the direction of the arrows, cut off
on the thread cutter 5
select the bobbin filling, standard = 100% ►
«Start» field = touch bobbin symbol ►
adjust the winding speed with the «+» or «-» icon or with ►
the stitch width knob
winding process stops as soon as the selected fill
►
percentage is reached
remove the bobbin and pull the thread over the thread
►
cutter
the screen is closed ►
Interrupting the winding process
the winding process can be interrupted by touching the ►
icon, and the screen can be closed by touching the
icon
Continuing the winding process ►
touch ‣
touch ‣ , the screen for winding appears
touch ‣
to start winding process
1
3
2
4
5
It is possible to wind the bobbin while
embroidering.
We recommend to reducing the winding
speed.
 Loading...