28
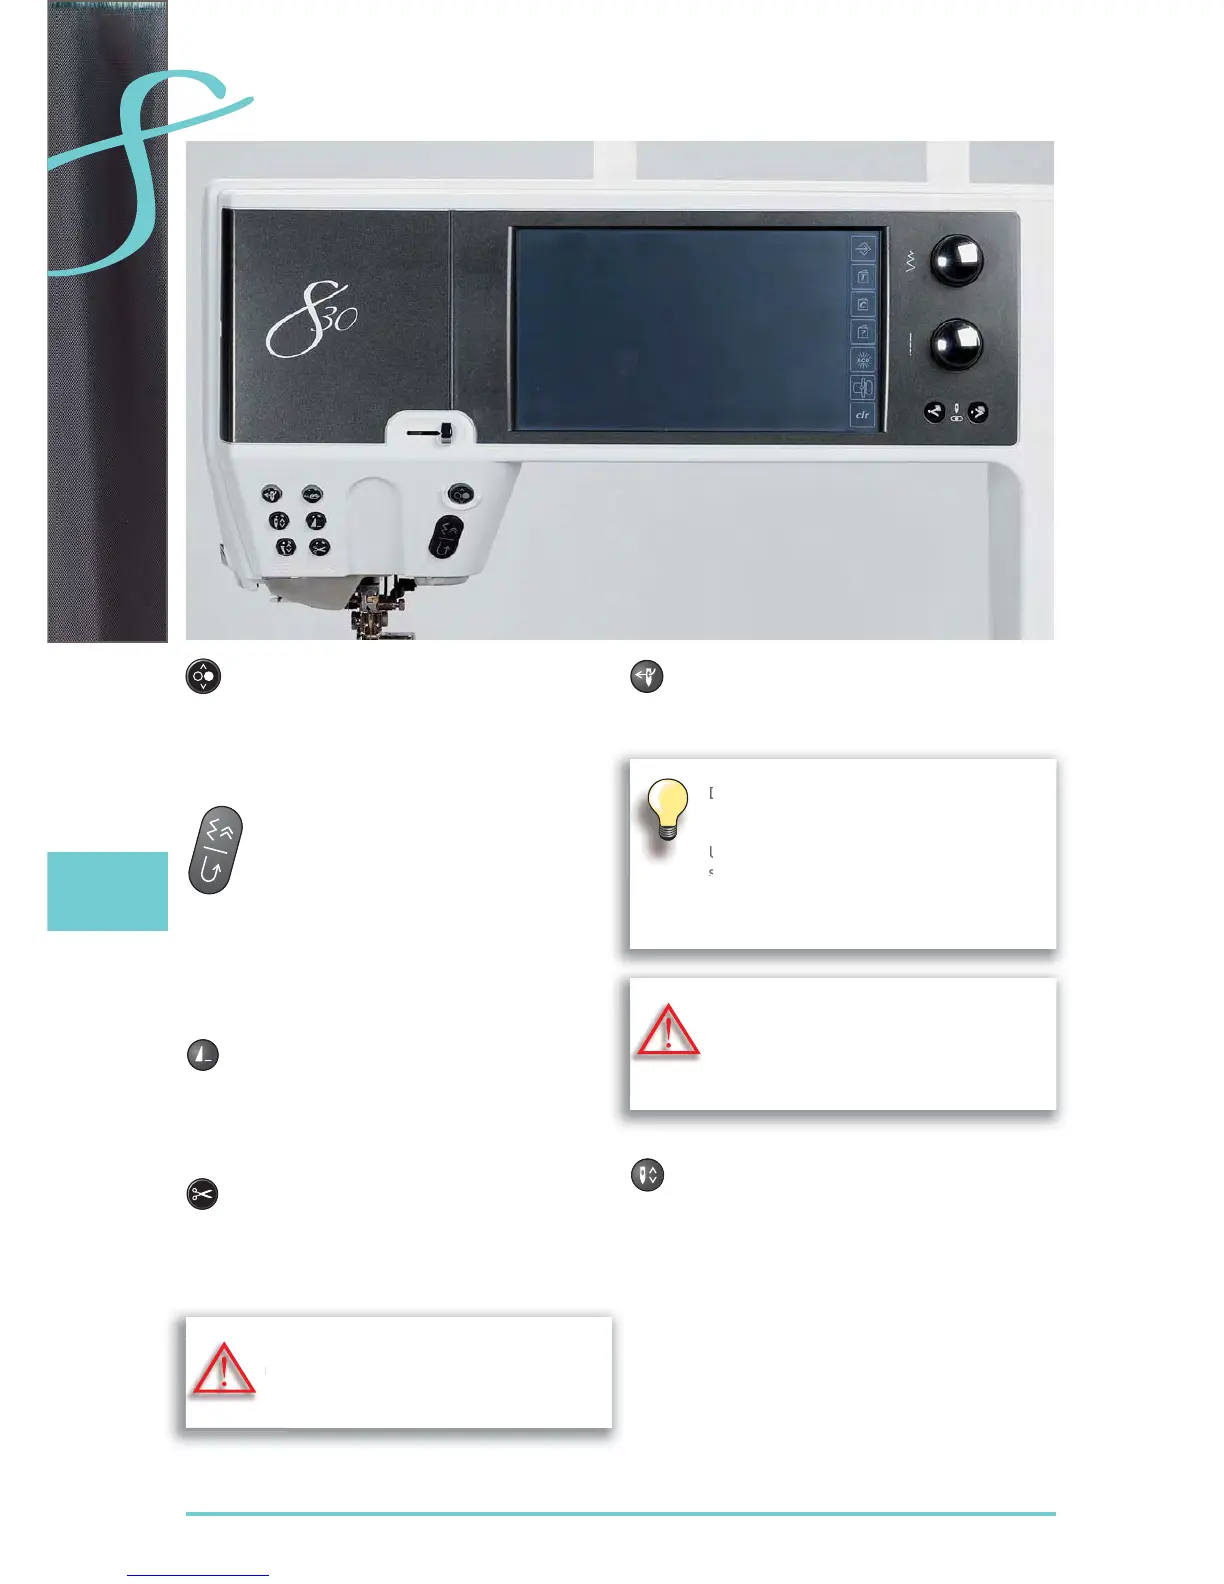
Overview
Function Buttons
Start/Stop Button
starts and stops the sewing computer when ►
operating it without foot control
slightly raise the presser foot when turning or
►
moving the project while sewing - hover
position
Quick Reverse Button/Backstepping
secures the seam beginning and end: sews in ►
reverse as long as the button is pressed
used to program the buttonhole length ►
used to program the darning length ►
used to determine end of stitching in straight ►
stitch Securing stitch no. 5
used for securing in Quilters Securing
►
Program no. 1324
switching for accurate stitch-by-stitch reverse ►
sewing - Backstepping
Pattern End
a stop symbol which appears during sewing ►
indicates that the function is activated
sewing computer stops at the end of the active
►
single pattern or the active pattern of a
combination
Automatic Thread Cutter
upper and lower threads are cut automatically ►
2-6 securing stitches can be programmed in ►
the setup program - these are sewn before the
thread is cut
Automatic Needle Threader
touch button = completes the threading ►
process and threads the needle
Needle Stop Up/Down
In the default setting the needle symbol is
displayed above the presser foot indicator.
touch the button briefly: ►
the needle is raised or lowered (as when ‣
tapping the foot control with your heel)
touch the button longer: ►
the needle is lowered, the needle symbol is ‣
displayed below
the sewing computer stops with the needle
‣
down
this becomes your default setting ‣
touch the button longer again: ►
the needle is raised, the needle symbol is ‣
displayed above
the sewing computer stops with the needle ‣
up
Double, triple and wing needles require
manual threading after the button has been
pressed.
Use the automatic needle threader for needle
sizes 70 - 120. Metallic threads, thick threads
like cordonnet and difficult to work with
threads should be threaded by hand.

 Loading...