32.10
Replacing seal in brake unit (master
cylinder)
with optional ABS only
For enhanced clarity the illustrations show the com-
ponents with the brake unit removed
Left brake-control assembly:
– Drain the rear brake circuit
Right brake-control assembly:
– Drain the front brake system
a
....................................................See Group 34
– Remove handlebar lever
e
Attention:
Do not allow brake fluid to come into contact with
painted parts of the motorcycle - brake fluid de-
stroys paint. Use a lint-free cloth to close off the
open bore and prevent residual brake fluid from run-
ning out!
L
Note:
If no circlip is present, the entire brake unit must be
replaced.
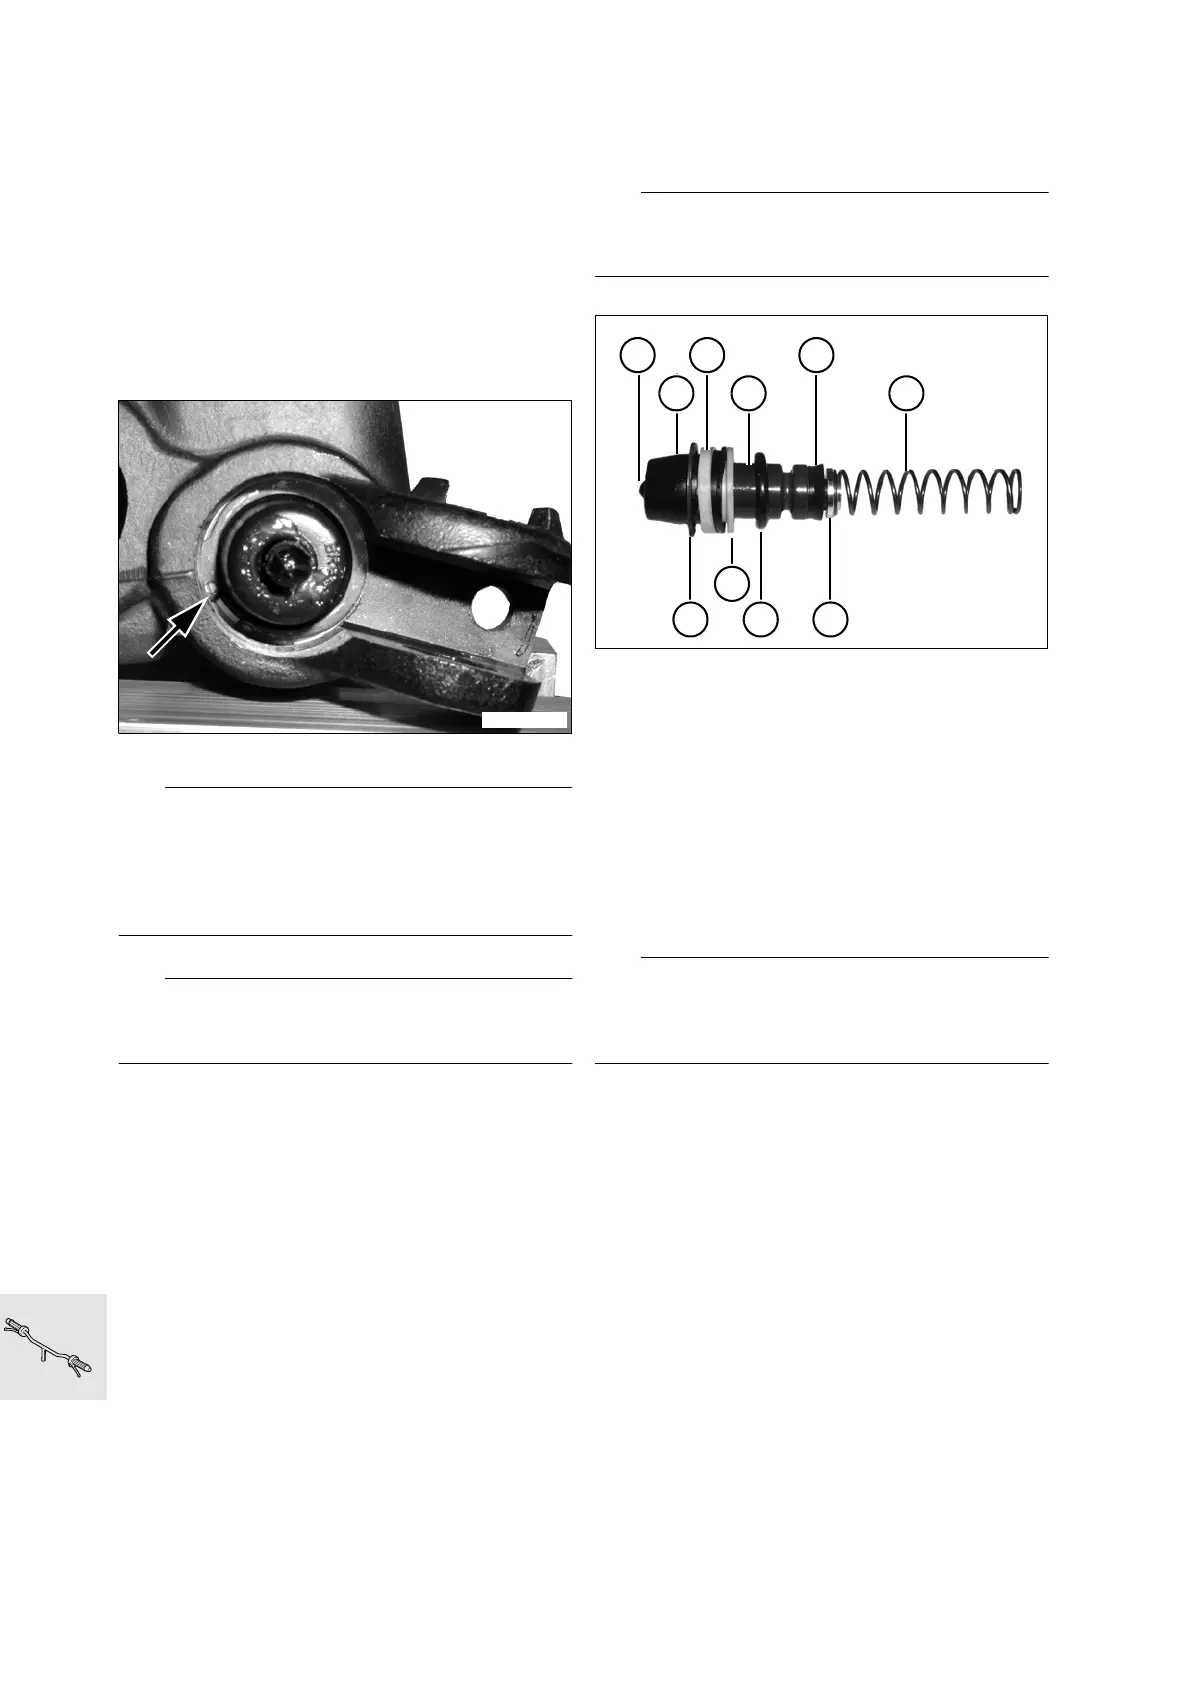
•
Remove circlip (arrow)
•
Remove piston
•
Remove seal
When installing:
•
While installation is basically a reversal of the re-
moval process, careful attention should be di-
rected toward the following:
e
Attention:
Take care to install the components in the right se-
quence!
1 Plunger
2 Rubber boot
3 Outer lockring
4Pistons
5Dust boot
6Spring
7Insert
8O-ring
9 Inner thrust washer
10 Lock ring
•
Install new repair kit
e
Attention:
When bleeding a previously drained brake system
always pull the handbrake lever repeatedly - danger
of residual air remaining in system!
– Filling/bleeding brake system
Front brake (
a
34.35)
Rear brake (
a
34.36)
C1320160
C1320170
1
2
3 5
4 6
10
9
8 7