46.44
L
Note:
The new version of the cable pulley is enclosed on
one side. The retaining clamp is not installed with
the disc enclosed on one side!
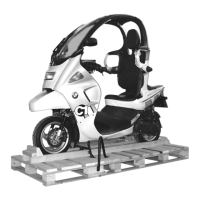
•
Remove retaining clamp (arrow)
•
Move lever (3) (easy-lift mechanism: extend/re-
tract stand) down and then raise it again
•
Release Bowden cable (arrow) from articulated
joint cable pulley
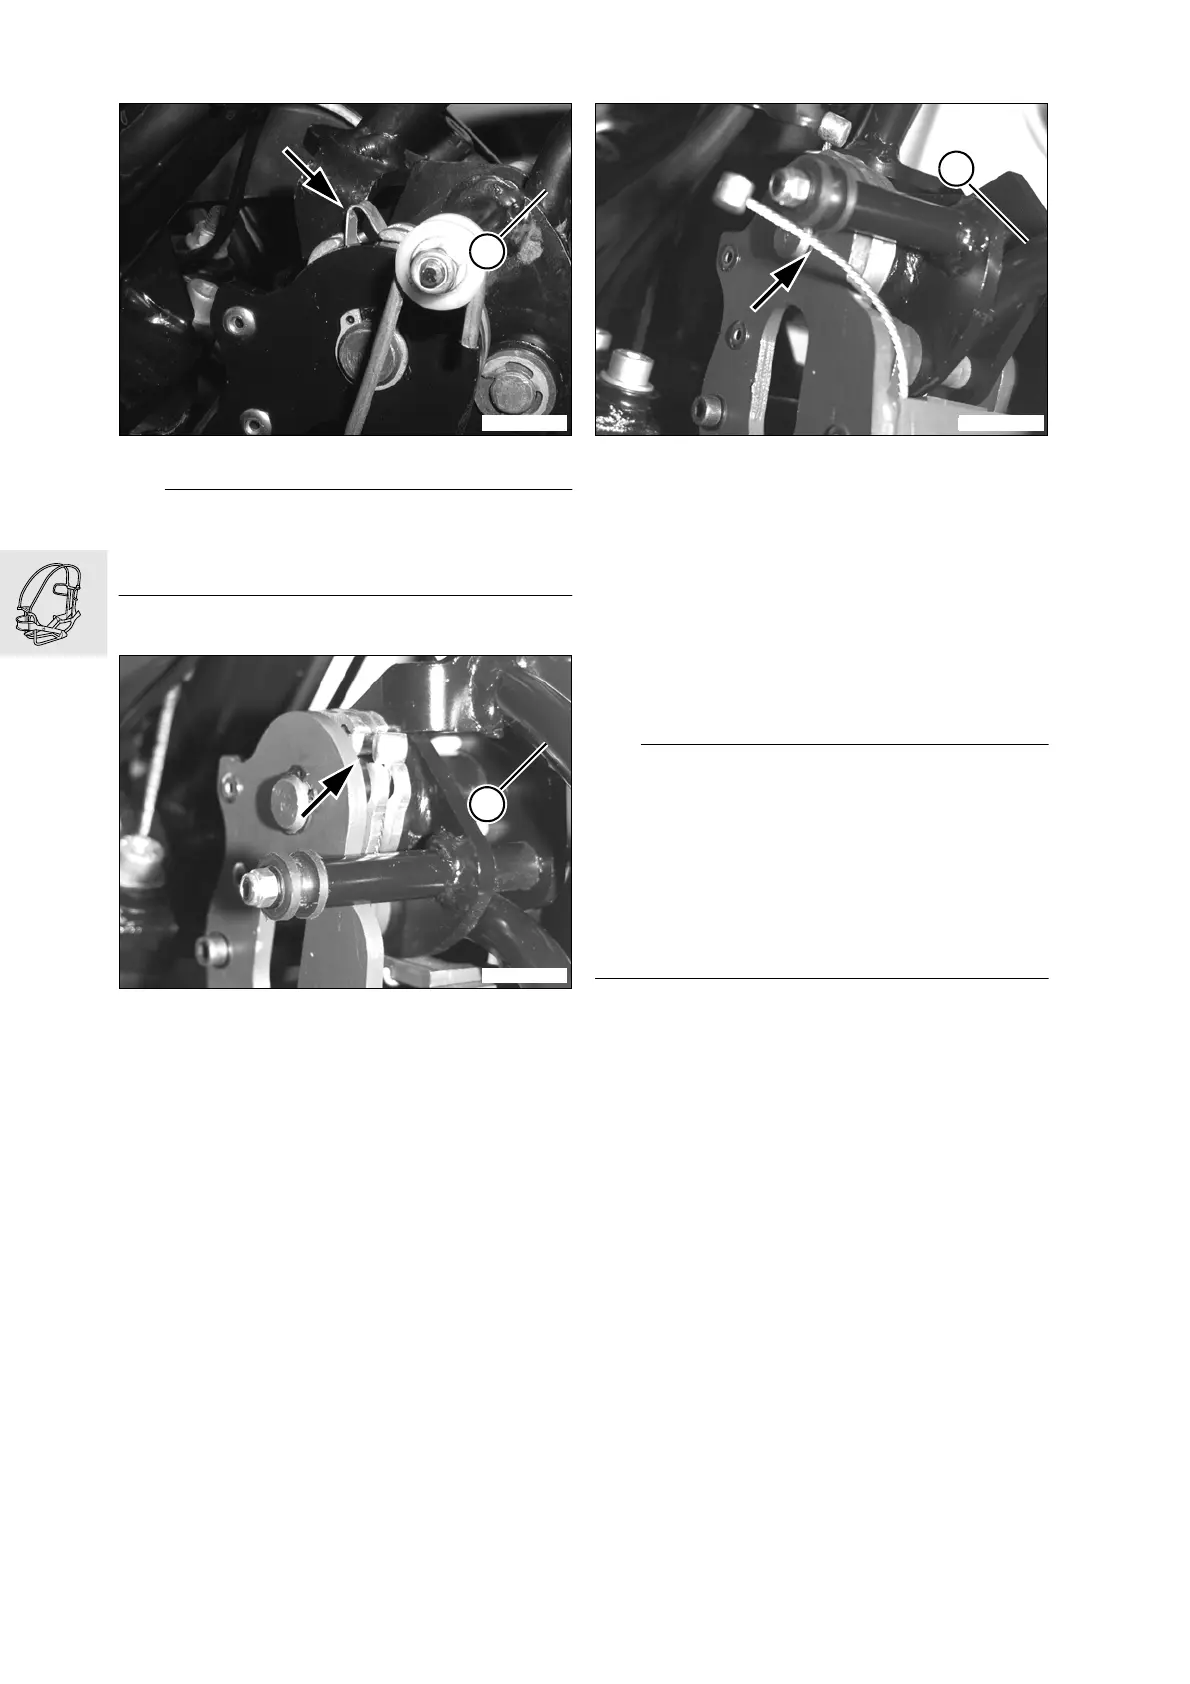
•
Extract Bowden cable (arrow) from articulated
joint mechanism, moving lever (5) gently upward
(raise/lower front wheel auxiliary support) as nec-
essary
•
Remove Bowden cable
Bowden cable installation/adjustment
•
While installation is basically a reversal of the re-
moval process, careful attention should be di-
rected toward the following:
e
Attention:
Install the eyebolts (bottom anchors for springs) with
the eyes parallel to the vehicle's front-to-rear axis.
Make sure that the Bowden cables for extending/re-
tracting stand and seat-belt central release are cor-
rectly routed.
Ensure that Bowden cables and stand cable pulley
are aligned correctly!
Make sure the hoses are routed well away from any
components that could cause rubbing and abrasion
•
Adjust Bowden cables
•
Extend and retract the stand several times
•
Check Bowden-cable settings; adjust if neces-
sary
Adjustment data:
Adjust Bowden cables without free travel, allowing
the stand springs to hold the stand in its end posi-
tion
X
Torque specification:
Articulated joint attachment.......................... 21 Nm
Eye bolt attachment ....................................... 8 Nm
Stand Bowden cable bracket ....................... 21 Nm
Bowden cable locknuts.................................. 8 Nm
C1460970
3
C1460490
3
C1460500
5
 Loading...