00.56
L
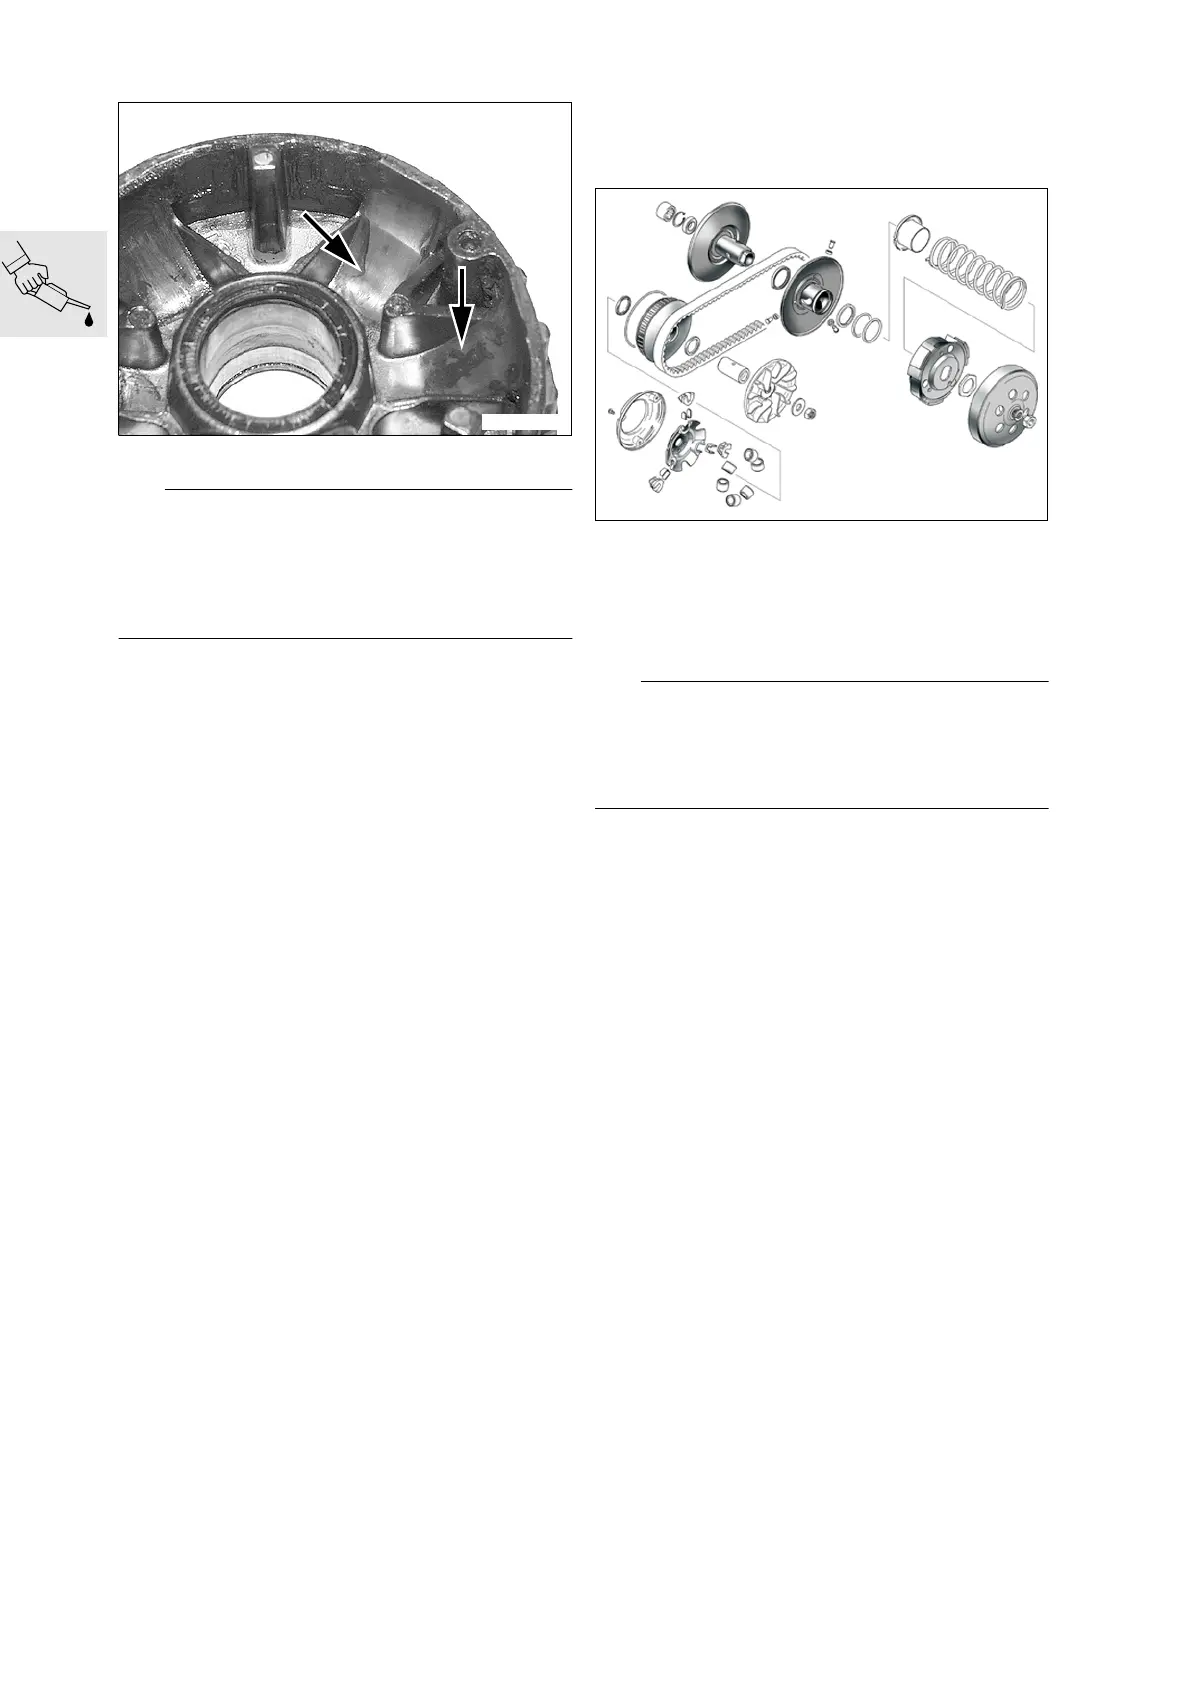
Note:
The rollers in the frame may display flat spots within
the wear limits!
Wear within the specified wear limits is acceptable!
Visible, palpable roller wear (arrows) on the drive
plate's tracking surfaces is acceptable!
•
Conduct visual inspection
•
Replace drive variator as required
When installing:
•
While installation is basically a reversal of the re-
moval process, careful attention should be di-
rected toward the following operations:
•
Evenly apply approximately 20 g (0.7 oz) of
grease to the contact path of the inner plate
•
Lightly grease O-ring and install
•
Place spring, sliders on transfer elementand
grease recesses in sliders
L
Note:
The bearing tube (spacer) is equipped with a contin-
uous lubrication passage! Install only bearing tube
with lubrication passage on lubricated version of
drive variator!
•
Apply even coat of grease to inside of bearing
tube (spacer)
•
Spray ground faces of crankshaft stub
•
Place transfer element in position
•
Check action of transfer element
•
Secure variator cover
Fluids and lubricants:
Shell Retinax HDX2 .......approximately 20 g (0.7 oz)
Spacer and contact
surface ..............................Klüber paste 46 MR 401
Crankshaft stub.................Klüber paste 46 MR 401
X
Torque specification:
Variator cover attachment .............................. 4 Nm
Drive variator attachment
(+ LOCTITE 243) .......................................... 60 Nm
Variator cover............................................... 10 Nm
Vent cover...................................................... 9 Nm
C1000480
C1111300
 Loading...