Print quality and color settings
Printing Photos and Images (W indows)
This topic describes how to print photos based on the following example.
• Document: Photo image from a digital camera
• Page size: 10×12 inches (254.0×304.8 mm)
• Paper: Roll
• Paper type: Glossy Photo Paper
• Roll paper width: 10 inches (254.0 mm)
1. Choose Print in the application menu.
2. Select the printer in the dialog box, and then display the printer driver dialog box. ( → P .473)
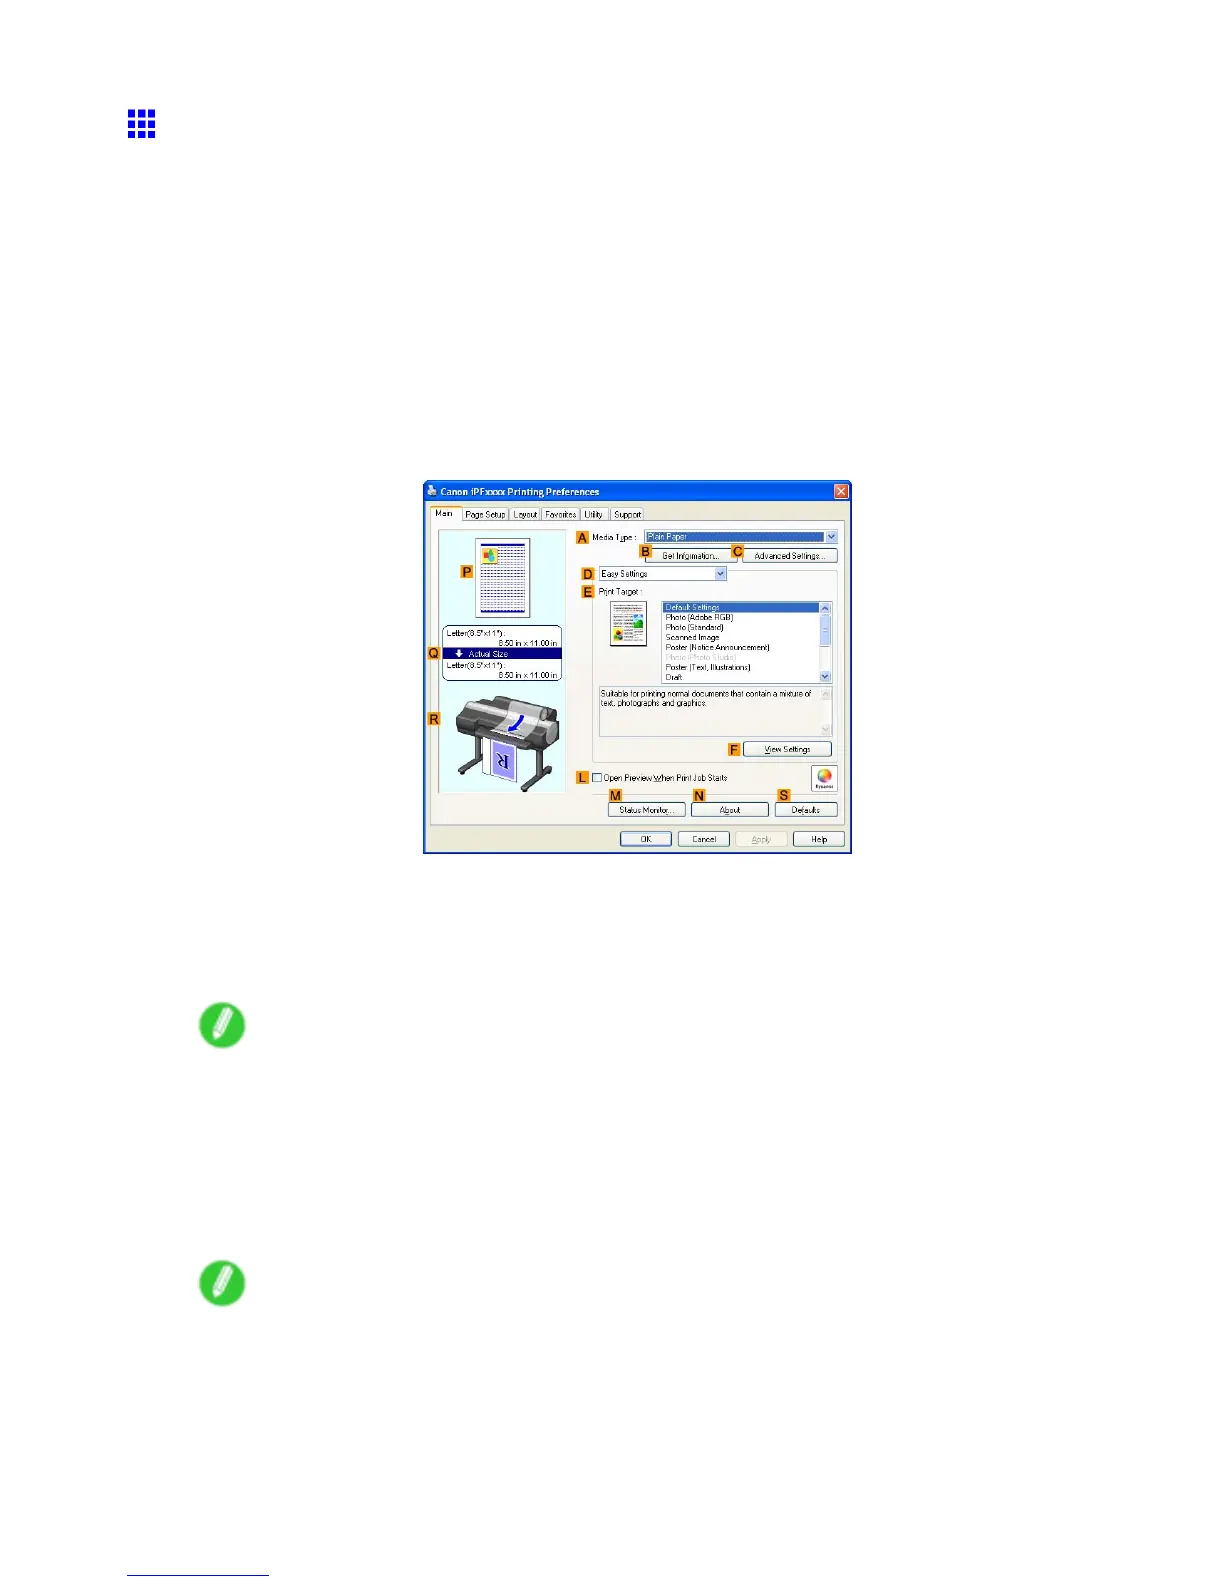
3. Make sure the Main sheet is displayed.
4. In the A Media T ype list, select the type of paper that is loaded. In this case, click Glossy
Photo Paper .
In the A Media T ype , choose the type of paper used for printing, such as Glossy Paper , Coated
Paper , and so on. Make sure the paper you select is loaded in the printer .
Note
• The paper type setting in the printer driver and related software (as well as on the Control Panel ) is
updated when you install the Media Conguration T ool from the User Software CD-ROM or if you
change paper information by using the Media Conguration T ool . (See the Media Conguration T ool
Guide (Windows) or Media Conguration T ool Guide (Macintosh).)
5. After conrming that D Easy Settings is selected, click Photo (Standard) or Photo (Photo
Studio) in the E Print T arget list.
Note
• For information on settings optimized for printing photos and images, see “Printing Photos and
Images (Windows, Mac OS X)”. (→P .177)
• Y ou can check the settings values selected in the E Print T arget list by clicking F V iew Settings .
228 Enhanced Printing Options
 Loading...