Network Setting
Conguring the IP Address Using the Printer Control
Panel
This topic describes how to congure the printer ’ s IP address on the Control Panel .
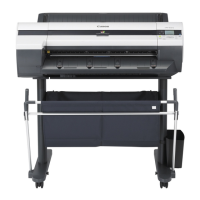
1. Press the Menu button to display MAIN MENU .
2. Press ▲ or ▼ to select Interface Setup , and then press the ► button.
3. Press ▲ or ▼ to select TCP/IP , and then press the ► button.
4. Press ▲ or ▼ to select IP Setting , and then press the ► button.
5. Press ▲ or ▼ to select IP Address , and then press the ► button.
6. After pressing ◄ or ► to select the input eld, press the OK button to enable numerical input.
7. Press ▲ or ▼ to select the number , and then press the OK button.
Note
• Pressing the ▲ button increases the number by 1. The maximum value is “255,” after which “0” is
displayed.
• Pressing the ▼ button decreases the number by 1. The minimum value is “0,” after which “255” is
displayed.
• Hold down ▲ or ▼ to increase or decrease the value continuously .
8. Repeat steps 3-4 to enter the IP address assigned to the printer .
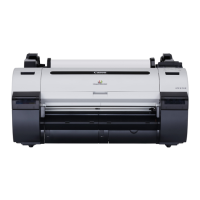
9. Press the Online button to bring the printer online.
If any of the settings are changed, a message for conrmation is displayed. In this case, press
the OK button.
Note
• If an error message is displayed, check the settings and correct any invalid values.
• T o cancel the setup process, hold down the Stop button for a second or more.
Important
• Be sure to complete step 6. This will activate the values you have entered.
• Y ou can also specify the subnet mask and default gateway on the Control Panel .
Network Setting 551
 Loading...