Replacing the Head Cleaning Set
Replace the head cleaning set when you see a message on the control panel.
Note: The printer warns you when the head cleaning set is running low. The printer warning system may
not function properly if you do not follow the correct procedure for replacing the head cleaning set.
1. Turn on the printer.
2. Press the maintenance button.
The Maintenance menu appears.
3. Press the up or down arrow button to select Head Cleaning Set, and press the right arrow button.
4. Press the right arrow button again.
5. Press the up or down arrow button to select Yes, and press the OK button.
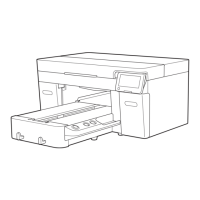
The platen and print head move to the maintenance position.
Note: Never move the print head or platen manually; otherwise a malfunction may occur.
6. Replace the parts of the head cleaning set in the following order:
• Wiper unit
• Anti-drying caps
• Flushing pad
Replacing the Wiper Unit and Anti-drying Caps
Replacing the Flushing Pad
Parent topic: Maintenance
Replacing the Wiper Unit and Anti-drying Caps
When you replace the head cleaning set, begin with replacing the wiper unit and the anti-drying caps.
86
 Loading...