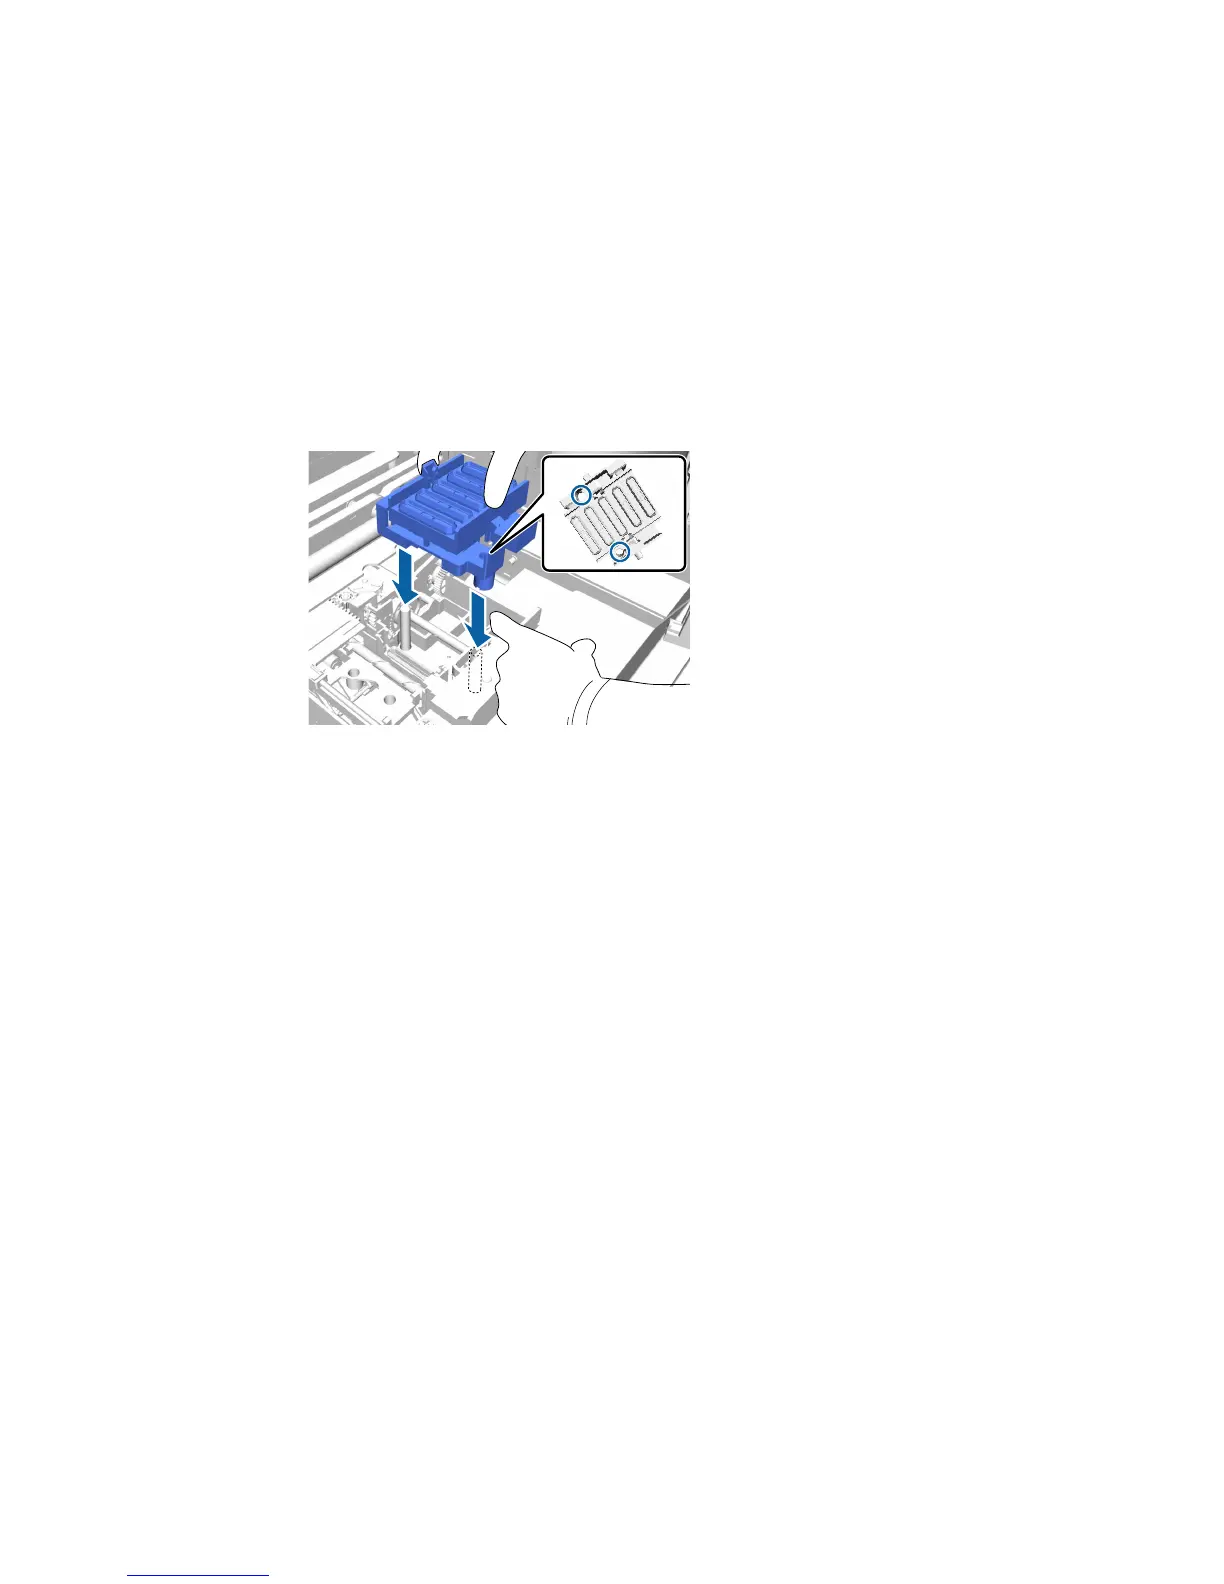
13. Press the lever forward as shown, and install the new anti-drying cap, placing the holes in the anti-
drying cap over the posts on the printer.
14. Close the printer cover.
15. Press the OK button.
16. Press the up or down arrow button to highlight Yes, and press the OK button.
17. Press the OK button again to move the print head to the flushing pad replacement position.
Parent topic: Replacing the Head Cleaning Set
Related tasks
Replacing the Flushing Pad
Replacing the Flushing Pad
Replace the flushing pad after replacing the wiper unit and anti-drying caps included in the head cleaning
set.
Note: The flushing pad, wiper unit, and anti-drying caps should all be replaced at the same time.
92
 Loading...