Press to replace the job displayed by the job called.
Press to cancel: the job is not sent to the tracer-centerer-blocker.
> The shape is displayed in the centering screen.
2. Centering a lens for a high-base frame
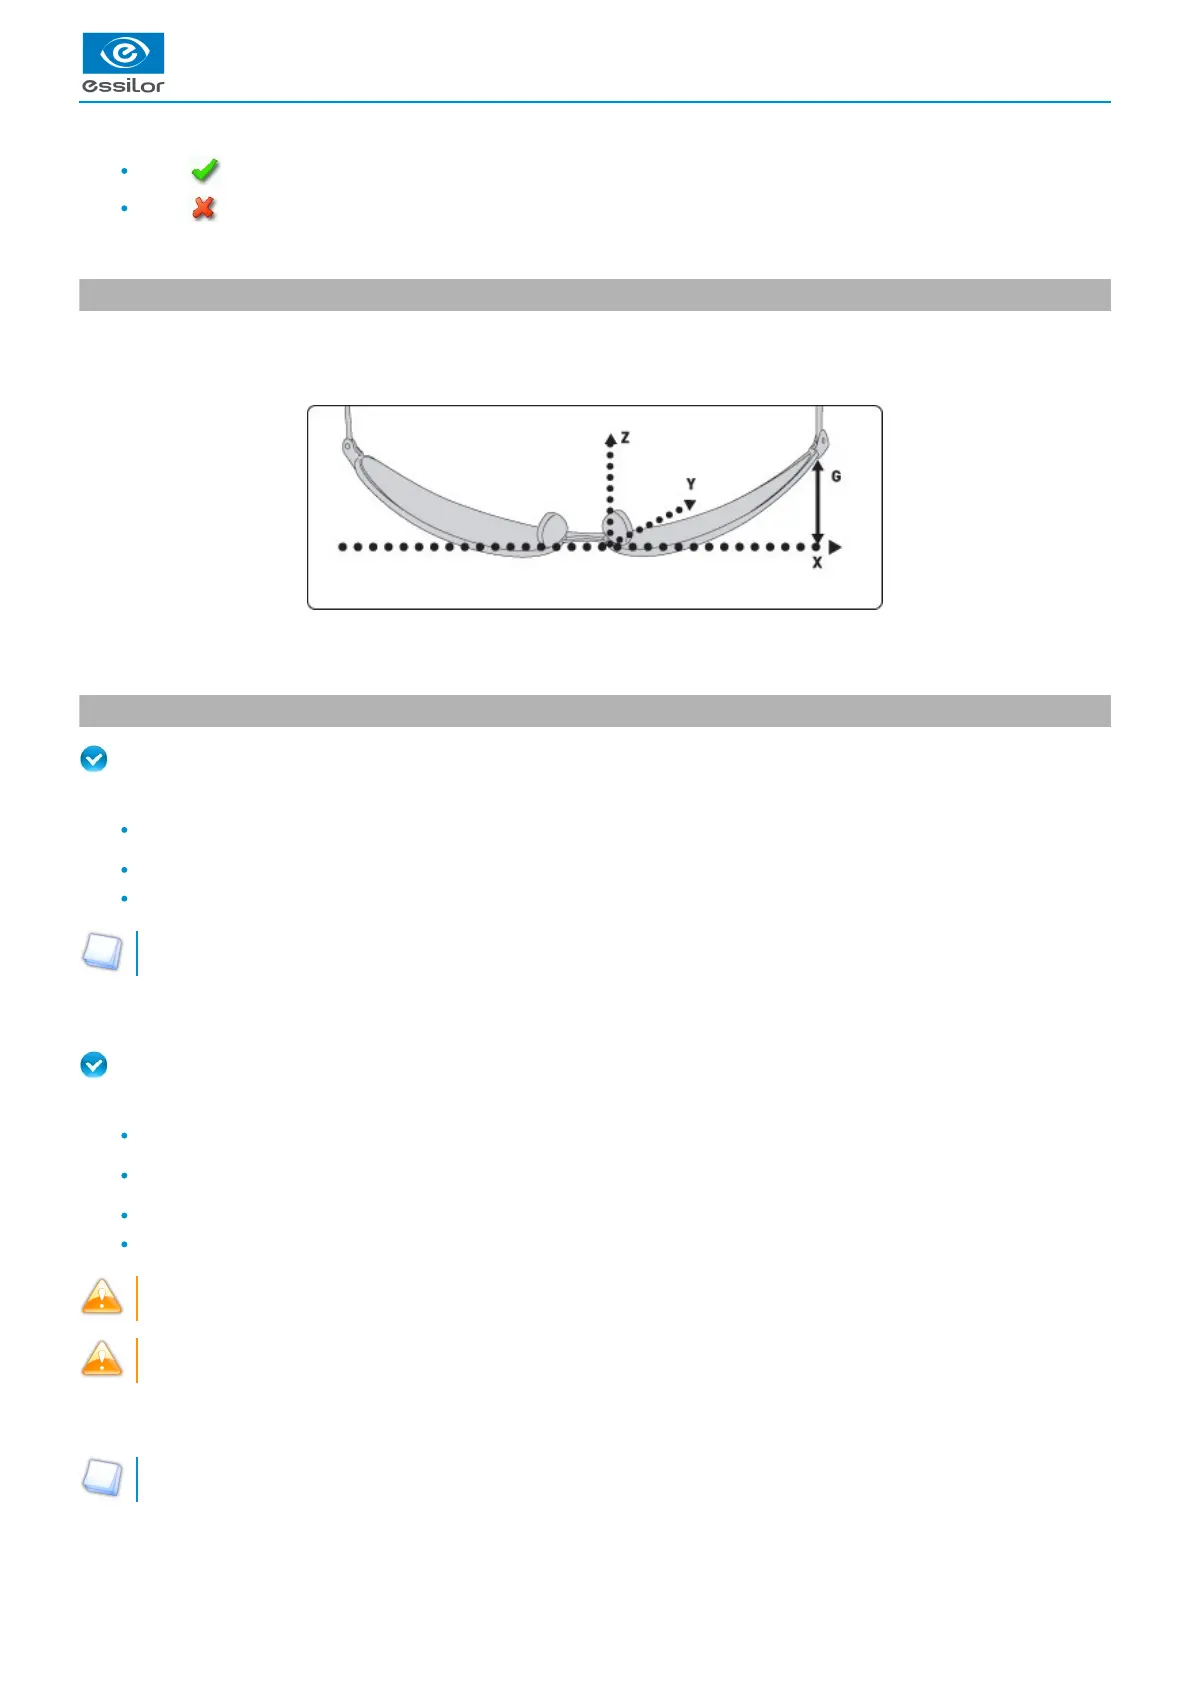
3D compensation
The PD and pupillary height measurements as well as the lens centering are done in two dimensions. But the frame is processed in
three dimensions:
3D compensation takes into account all frame characteristics (x, y, z, curve, pantoscopic tilt, etc.) to ensure that the center of the
wearer's pupil is at the optical center of the lens. For an optimal job, the on-screen positioning of the centering indicators always
takes account of 3D compensation.
3. Centering a single vision lens
Prerequisite: before carrying out lens centering, a shape must be displayed on the centering screen.
If necessary, we recommend that you first:
modify or retouch the traced shape (p.63)
prepare the drilling points (p.71) to be created (option)
place the stickers recommended by the manufacturer on hydrophobic lenses. (p.57)
Concerning the use of the stickers, be careful to change the centering tube with a larger diameter one to optimise the
effectiveness of the sticker.
This section describes the procedures for centering a single vision lens:
For centering using three focimeter dots
Prerequisite: the lens must be marked usinga focimeter.
The three focimeter dots must be:
aligned,
at the same distance from the central dot,
0.5 to 1.5 mm in diameter.
of white colour
At the time of the release of the lens on the centering tube, be sure to align the three focimeter dots with the notches
designed for this purpose in order not to alter the marking.
In the case of a demonstration lens or a recut lens, make sure that the marking feature is perfectly horizontal to avoid any
axis deviation during centering.
For more information, consult the section performing an optical tracing > Optical tracing > Prepare the optical tracing of a demo lens
or of recut lens. (p.27)
If need be, re-mark the points with a white colour gouache paint.
 Loading...

