EasyManua.ls Logo

Essilor Delta 2 Classic User Manual

Essilor Delta 2 Classic
158 pages
To Next Page IconTo Next Page
To Previous Page IconTo Previous Page
Page #73 background image
USER MANUAL > PREPARING A DRILLED JOB
Delta 2 - Edging system > v2 - 08.16 73
1.
This chapter describes the procedure for the positioning of drilling points (drill-holes, slots, notches) on a lens.
Description of the drilling screen (p.73)
Configuring drilling settings (p.75)
Drilling models (p.79)
Once the drilling parameters have been set, you can go on to the centering of the lens.
Prerequisite: you must already have carried out lens tracing.
Pre-existent drillings
If you trace a demo lens or a pattern and if drill-holes are detected, then the drilling screen is automatically displayed once
the tracing is carried out.
Glass lenses
The drilling function is not available for glass lenses.
1. Menu screen
The drilling screen is accessible:
from the centering screen,
from the edging preparation screen.
Press to prepare a drilled job.
The following screen is displayed:
Work area
Colours which may appear on screen:
(green) Current shape (from the shape traced) and associated drilling points
(cyan) Current shape (obtained by symmetry with the shape traced) and associated drilling points

Table of Contents

Question and Answer IconNeed help?

Do you have a question about the Essilor Delta 2 Classic and is the answer not in the manual?

Essilor Delta 2 Classic Specifications

General IconGeneral
GroovingYes
DrillingYes
PolishingYes
Maximum Lens Size80 mm
BevelingAutomatic
TypeAutomatic
Lens Material Compatibilitypolycarbonate and Trivex
Power Supply230V / 50-60Hz

Summary

Getting Started with Delta 2

Performing Optical Tracing

The Tracing Environment

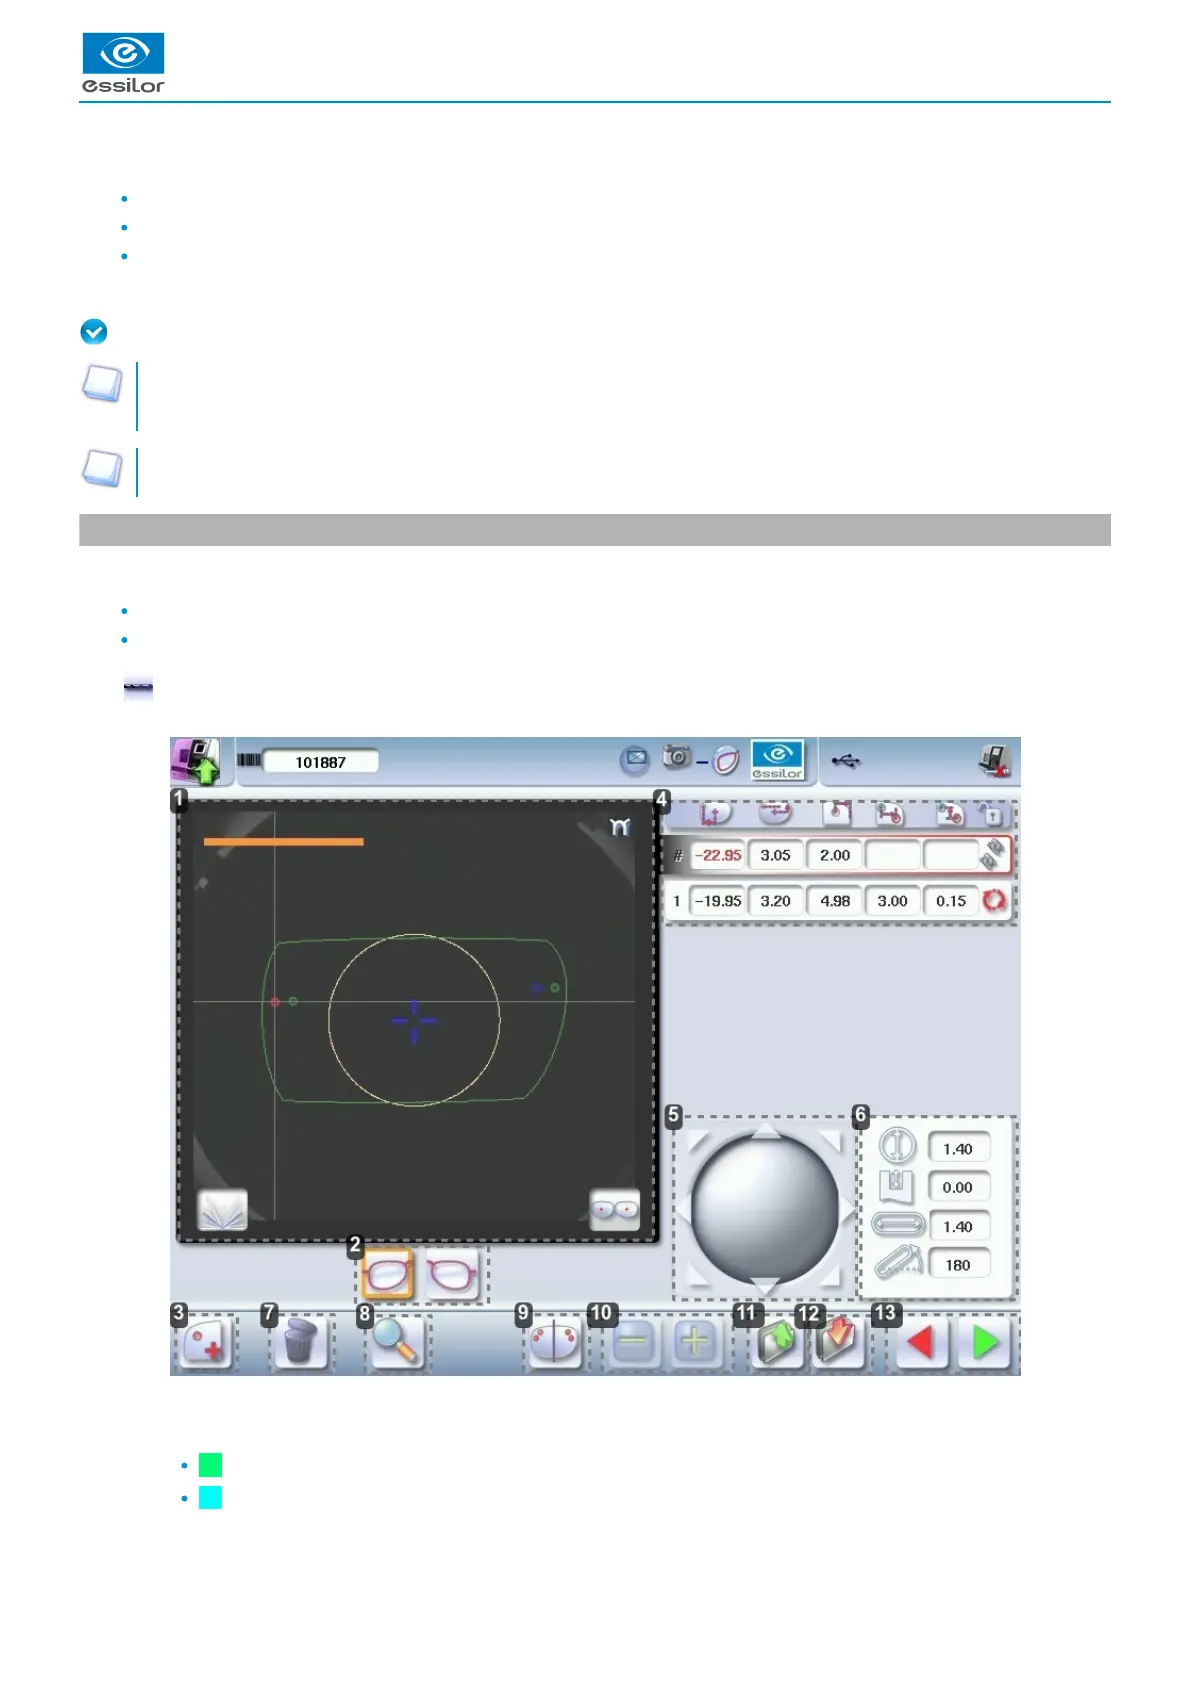
Description of the tracing screen and job management.

Optical Tracing

Preparing and performing optical tracing for demo or recut lenses.

Lens Centering and Blocking

Centering a Progressive Lens

Procedures for centering progressive lenses using various marking methods.

Blocking a Lens

Procedures for lens blocking, including preparation and the blocking process.

Modifying Lens Shape

Preparing Drilled Jobs

Configuring a Drilling Point

Procedures for creating, deleting, and setting drilling points.

Edging a Lens

Perform a Beveling

Procedures for creating different types of bevels on lenses.

Grooving

Procedures for creating grooves on lenses, including automatic and customized methods.

Perform a Drilling Job

Procedures for performing drilling operations, including automatic and customized modes.

Perform a Retouching

Steps for retouching lenses after edging to achieve optimal results.

Setting the Edging System

Adjusting the Precision of the Edger

Adjusting precision for finished lens diameter, bevel, groove, and drill holes.

Maintenance and Servicing

Perform the Autotest of the Tracer

Performing self-diagnosis tests on the tracer functions.

Performing the Edger Autotest

Carrying out self-diagnosis tests on the edger functions.

Checking and Calibrating the Tracer

Procedures for checking and calibrating the tracer for precision.

Testing and Calibrating the Edger

Testing and calibrating the edger, including monofeeler and touch screen.

Changing or Cleaning the Edger Tools

Procedures for changing or cleaning edger tools like drill bits and wheels.

Related product manuals