1
2
3
4
5
4
Translation of the original instructions
EN GL IS H
A DM board must be installed on automations fitted with a double
motor.
INSTALLING THE DM BOARD
!
Before proceeding, disconnect the mains power supply and disconnect
the emergency battery (if present).
1. Remove the E1SL board: remove all the connections, the screw (1)
and the screw with washer (2), then remove the board from the
support (3).
2. Unscrew the 2 screws (4) and remove the plastic cap, pulling out the
2 pins (5).
3. Install the DM board Refer to 6, install the 4 posts (6) on the E1SL
board and fasten them using the screws provided (7). Insert the
2 comb connectors into the connectors of the E1SL board as far as
the connector (8). Insert the DM board (9) on the side opposite
the comb connectors, as far as the connector (8). Fasten the DM
board onto the 4 posts using the screws provided (10).
4. Replace the plastic cap, inserting the 2 pins (5) into the board
E1SL. Fasten it using the 2 screws (4).
5. With reference to 5, Reinstall the E1SL board into the seats (3). Fix
in position with the screw (1) and the screw with washer (2). IM-
PORTANT: the washer provides the board's earth connection.
6. Restore all connections.
CONNECTING THE SECOND MOTOR
1. Extend the motor cable using the cable with connector and the ter-
minal connector provided.
2. With reference to 7, insert the connector (11) onto the board DM
(12). Follow the colour coding of the wires.
ENABLING THE DM KIT
During programming:
- from Board, advanced programming:
dM = Y
or
- from SDK EVO:
/PROGRAMMING/INSTALLATION/2ND ENGINE KIT = ENABLED
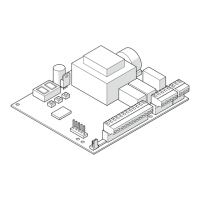
Removing/reinstalling the E1SL board
Removing/reinstalling the cap
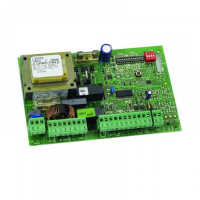
2. DM BOARD
 Loading...