EasyManuals Logo
Home>Fuji Xerox>Printer>DocuPrint M355df

Fuji Xerox DocuPrint M355df User Manual

Fuji Xerox DocuPrint M355df
554 pages
To Next Page IconTo Next Page
To Previous Page IconTo Previous Page
Page #235 background imageLoading...
Page #235 background image
Chapter 4 Disassembly / Assembly and Adjustment
4.2 Removal / Replacement
4-61
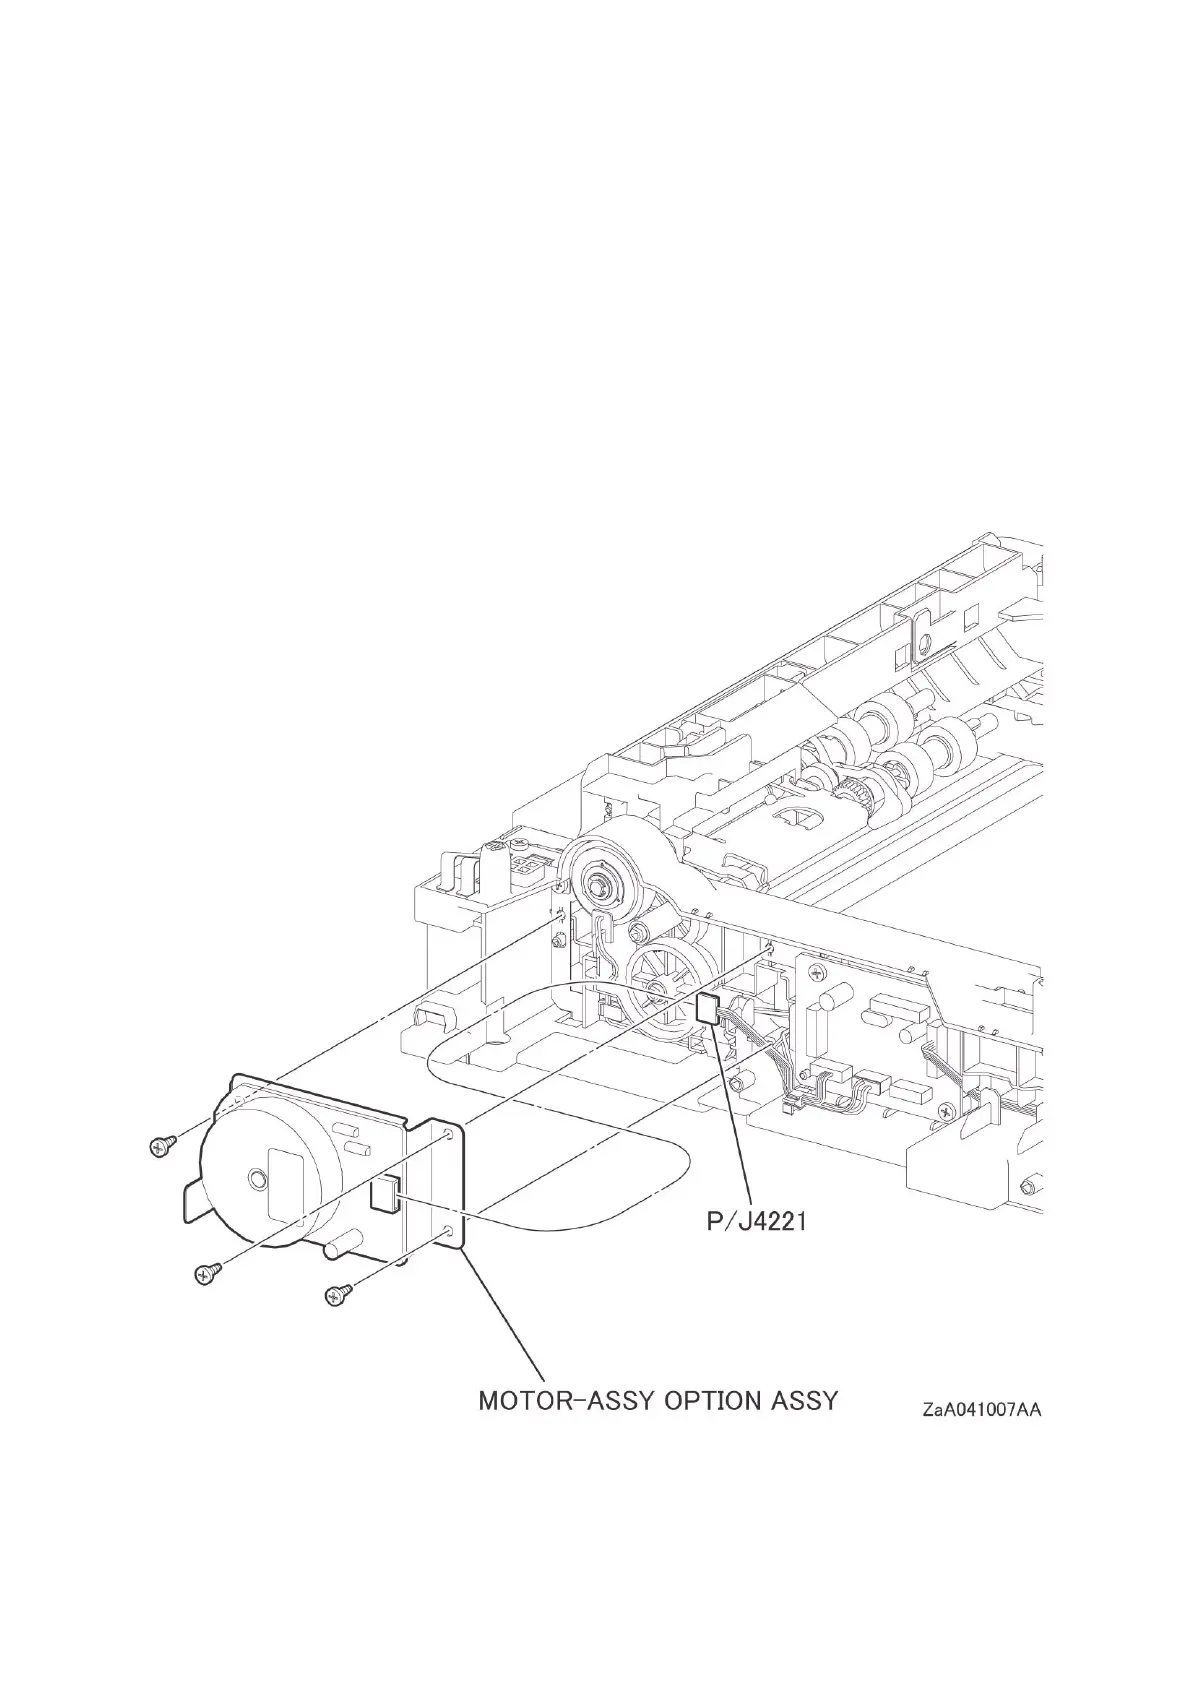
REP10.7 (SCC) MOTOR-ASSY OPTION (PL10.1.19)
[Removal]
1 Remove the TRAY ASSY 250 IOT. (REP10.5)
2 Remove the FEEDER ASSY OPT 250. (REP10.1)
3 Remove the COVER-SIDE L OPT 250 MAT. (REP10.2)
4 Disengage the connector (P/J4221) from the MOTOR-ASSY OPTION.
5 Remove the three screws (silver, tapping, 8mm) that fix the MOTOR-ASSY OPTION ASSY, and
then remove the MOTOR-ASSY OPTION ASSY.

Table of Contents

Questions and Answers:

Question and Answer IconNeed help?

Do you have a question about the Fuji Xerox DocuPrint M355df and is the answer not in the manual?

Fuji Xerox DocuPrint M355df Specifications

General IconGeneral
BrandFuji Xerox
ModelDocuPrint M355df
CategoryPrinter
LanguageEnglish

Related product manuals