EasyManuals Logo
Home>Fuji Xerox>Printer>DocuPrint P455 D

Fuji Xerox DocuPrint P455 D User Manual

Fuji Xerox DocuPrint P455 D
302 pages
To Next Page IconTo Next Page
To Previous Page IconTo Previous Page
Page #263 background imageLoading...
Page #263 background image
Maintenance 263
Installing a Fusing Unit
1 Unpack a new fusing unit.
2 Remove the packing material from the fusing unit.
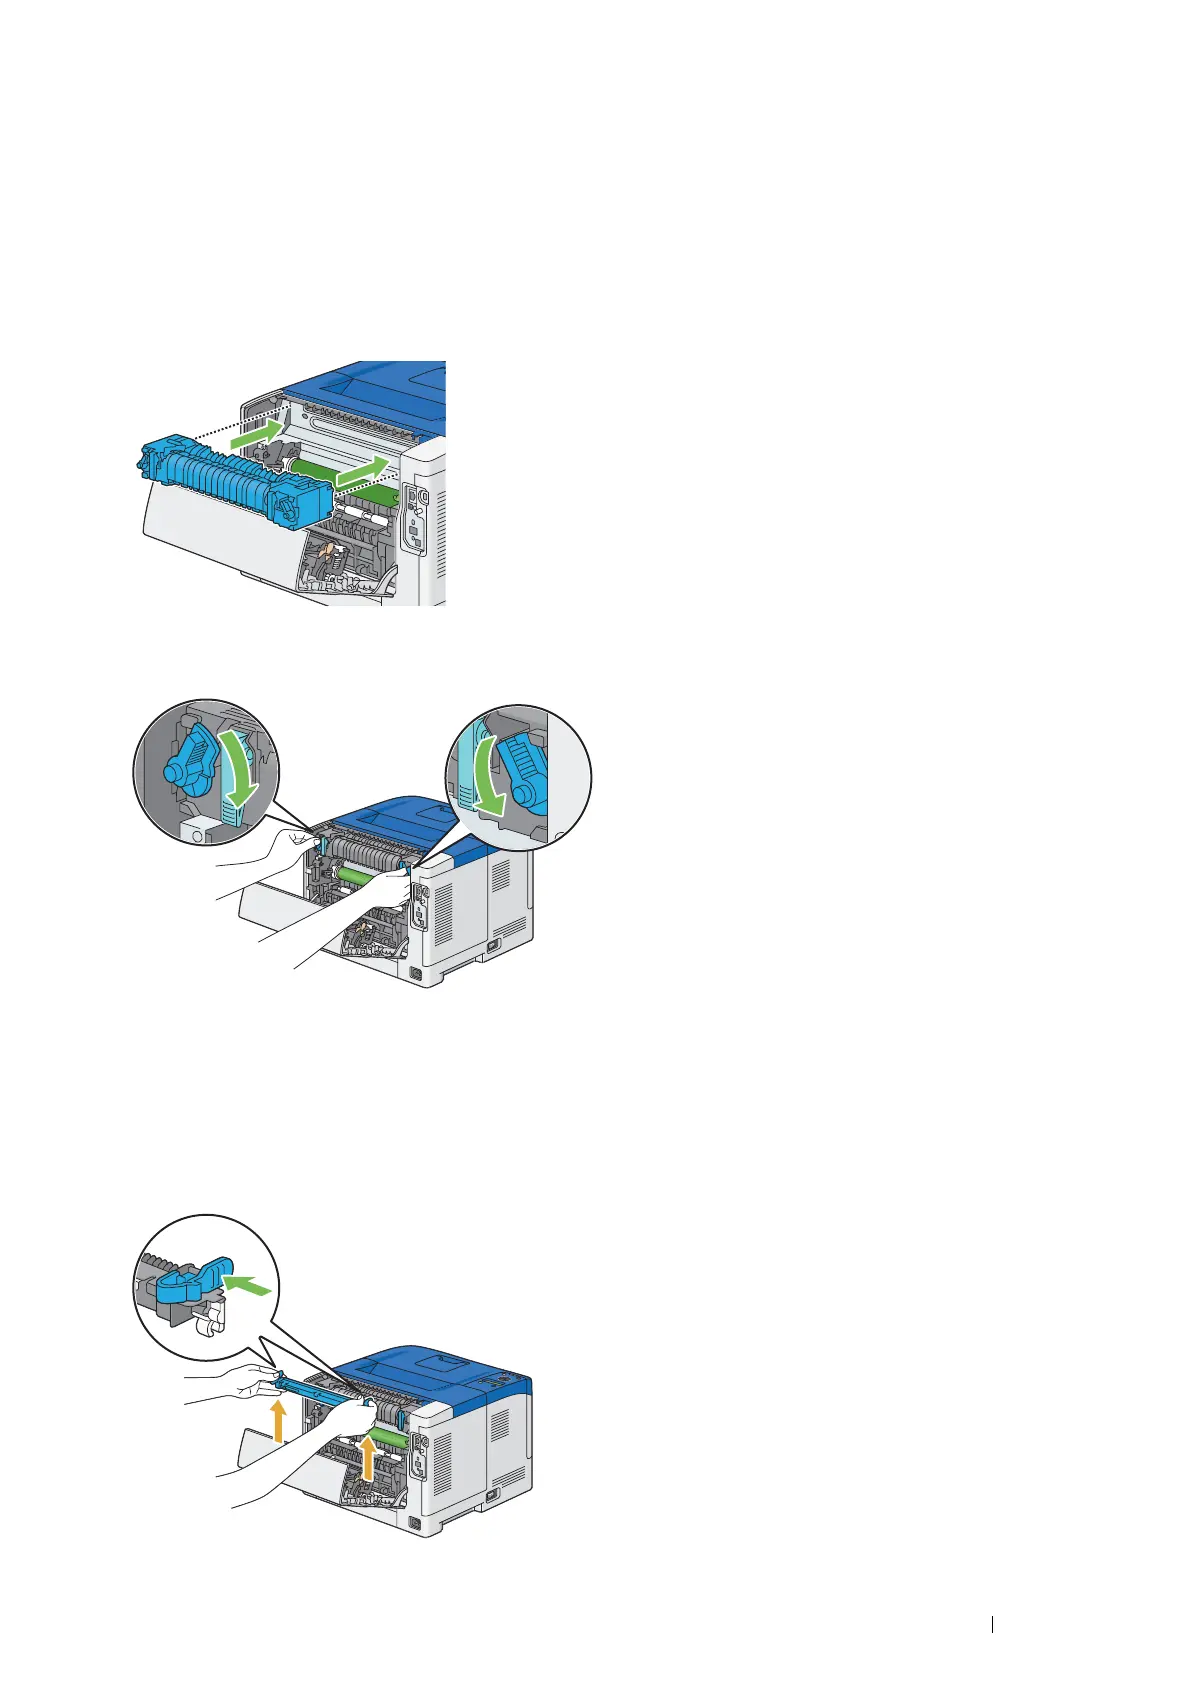
3 Insert the fusing unit into the printer until it clicks.
NOTE:
Hold both sides of the fusing unit with your hands.
Make sure that the fusing unit is firmly set in the slots and cannot be moved easily.
4 Lower the two gray levers to lock the fusing unit.
NOTE:
After replacing the fusing unit, initialize its life counter. For details, see "Resetting the Counter of the Fusing Unit" on
page 271.
Removing the Transfer Unit
1 Push the tabs on both sides of the transfer unit inward, and then lift it out of the printer.

Table of Contents

Other manuals for Fuji Xerox DocuPrint P455 D

Questions and Answers:

Question and Answer IconNeed help?

Do you have a question about the Fuji Xerox DocuPrint P455 D and is the answer not in the manual?

Fuji Xerox DocuPrint P455 D Specifications

General IconGeneral
BrandFuji Xerox
ModelDocuPrint P455 D
CategoryPrinter
LanguageEnglish

Related product manuals