HP
5384A and
HP
5385A
Operation
and Programming
most character
is
CHARACTER 1 and
the
rightmost
is
CHARACTER
12.
The scale
or
units designation
will
normally
be shown
in
character positions
10, 11,
and
12.
If
positions
10
and
11
are
required
to
display a high
resolution measurement,
only
character position
12
will
be used
to
designate
the
scale
or
units.
3-18.
Annunciation
for
all
operating
modes
is
also
indicated
by
the
display.
When
a
mode
is
selected,
an
arrow
appears at
the
bottom
of
the
display just above
the
name
of
the
mode
label
on
the
front
panel.
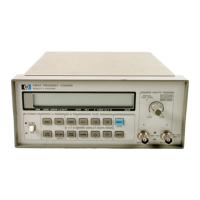
3-19. Keyboard
3-20. The keyboard, located on
the
front
panel,
is
a
14-position
pushbutton
assembly
which
is
connected
to
a
port
on
the
microcomputer.
The keyboard
is
divided
into
several groups, according
to
the
purpose
of
the
keys. From
the
left
after
the
power
switch,
we
have A,
B,
A&B, GATE, and DISPLAY DIGITS keys.
3-21. A
blue
RESET
/lOCAl
key and the CHECK key
complete
the
keyboard assembly
of
the
counter.
3-22.
INPUTS
3-23.
Immediately
to
the
right
of
the
keyboard
is
the
INPUTS section. There are
two
BNC inputs (Channels
A and
B)
and a
control
for
either
adjusting
the
trigger
level
of
Channel A
or
attenuating the
input
signal
to
Channel
B.
3-24. Power-Up/Self-Check
I
WARNING
I
BEFORE
USING
THE
INSTRUMENT,
ALL
PROTECTIVE
EARTH
TERMINALS,
EXTENTION
CORDS, AUTOTRANSFORMERS AND
DEVICES
CONNECTED TO
IT
SHOULD
BE
CONNECTED
TO A
PROTECTIVE
EARTH
GROUNDED
SOCKET.
ANY
INTERRUPTION OF
THE
PROTECTIVE
EARTH
GROUND
WILL
CAUSE
A
POTENTIAL
SHOCK HAZARD
THAT
COULD
RESULT
IN
PERSONAL
INJURY.
Before energizing
the
counter,
the
instrument
must
be
set
to
the
voltage of
the
power source
or
damage
to
the
instrument may result. See
Section
II.
3-25.
When
you
power-up
the
counter,
an
internal
check
is
automatically made
of
several major
com-
3-2
ponents in its circuitry.
During
this cycle,
all12liquid
Crystal Display (LCD) digits will be
momentarily
activated in a starburst pattern. Also activated are the
colons and annunciators. The address
of
the interface
will
briefly
be displayed.
3-26.
After
the
power-up
sequence,
the
counter
ini-
tializes itself. That
is,
Frequency A
mode
is
selected
for
display and the preset
trigger
level
mode
is
selected.
The
ATTN
and lPF modes are disabled, and
the
gate
time
is
set
to
0.1
s.
If
no
input
signal
is
present after
the
Power-Up
cycle,
00000000
will
appear
on
the display.
The
power-up
initialize state
is
listed
in
Table 3-1.
Table 3-1. Power-Up Initialize
States
FUNCTION
STATE
REMOTE/LOCAL
LOCAL
GATE TIME
0.1
s
MANUAL
LEVEL
OFF
WAIT-TO-SEND
OFF
DISPLAY DIGITS
NORMAL
FUNCTION
FREQ
A
X20
ATTN
X1
FILTER
OFF
REMOTE DISPLAY
OFF
3-27.
Any
failure
during
the
power-up
cycle will
cause
an
error
message
to
be displayed
momentarily.
After
the
error
is
displayed,
the
counter
will
attempt
to
operate normally.
3-28. Error Messages
3-29. The
counter
will display
error
messages
when-
ever
the
instrument
enters
an
error
state. Errors can
occur
either
during
self-test
or
after
an
improper
operation
has
been
attempted
through
the interface.
3-30.
If
an
error
occurs
during
power-up
self-test,
error
messages
will
appear
on
the
display. The mes-
sage
will
be displayed
for
approximately
one
second
to
give
the
operator
sufficient
time
to
read
the
message.
One
second after
the
error
is
displayed,
the
counter
will
attempt
to
operate normally.
3-31.
If
an
error
occurs
during
the
power-up
self-
test,
the
ERROR
annunciator
will
be
turned
on. This
annunciator
will
stay
on
as
long
as
the
instrument
does
not
enter
the diagnostic
mode
to
warn
the
operator
of
potentially
inaccurate results.
3-32. Several types
of
errors can
occur
when
an
improper
operation
is
attempted
through
the
inter-
face.
Whenever
an
error
message
is
generated be-
cause
of
an
illegal
operation,
the
error
message
will
•
•
•

 Loading...