38
Removing an interface card
CAUTION:
Do not touch the surface-mounted components directly with your hands.
1. Wear an ESD-preventive wrist strap and make sure it makes good skin contact and is well
grounded.
2. Use a Phillips screwdriver to completely loosen the captive screws at both sides of the interface
card.
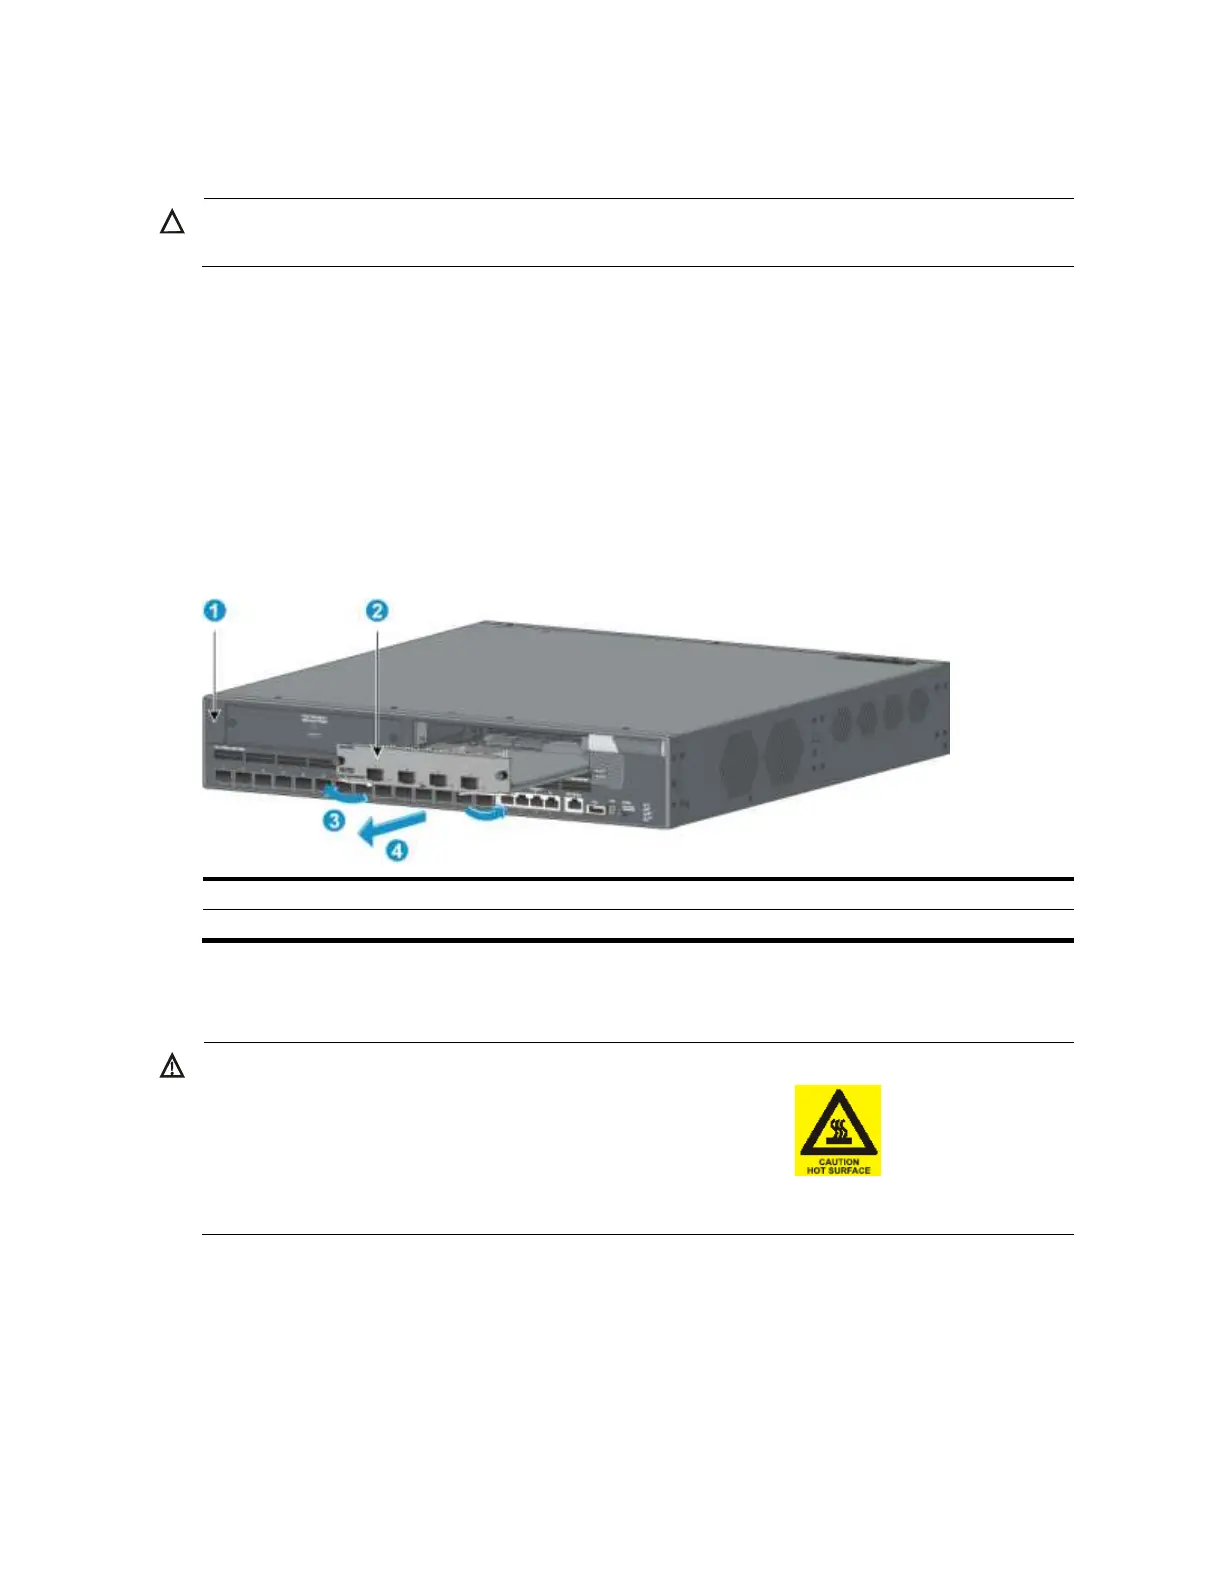
3. Pull the ejector levers at both sides of the interface card outward, and pull the interface card along
the guide rails until it completely comes out of the switch chassis. Do not use excessive force during
the operation.
4. If no new card is to be installed, install the filler panel to prevent dust and ensure good ventilation
in the switch.
Figure 50 Removing an interface card
(3) Pull the ejector levers outward
(4) Pull out the interface card
Installing/removing an OAP card
WARNING!
Do not touch the protection cover marked by the yellow warning label on the OAP card.
Underneath this protection cover is a heat radiator. After the OAP card runs for a period of time, this
area can get very hot.
Before you install an OAP card, check the compatibility of the OAP card with your switch and identify in
which slot you can install the OAP card (see ―OAP card compatibility matrix‖ and ―OAP cards‖).
 Loading...