13
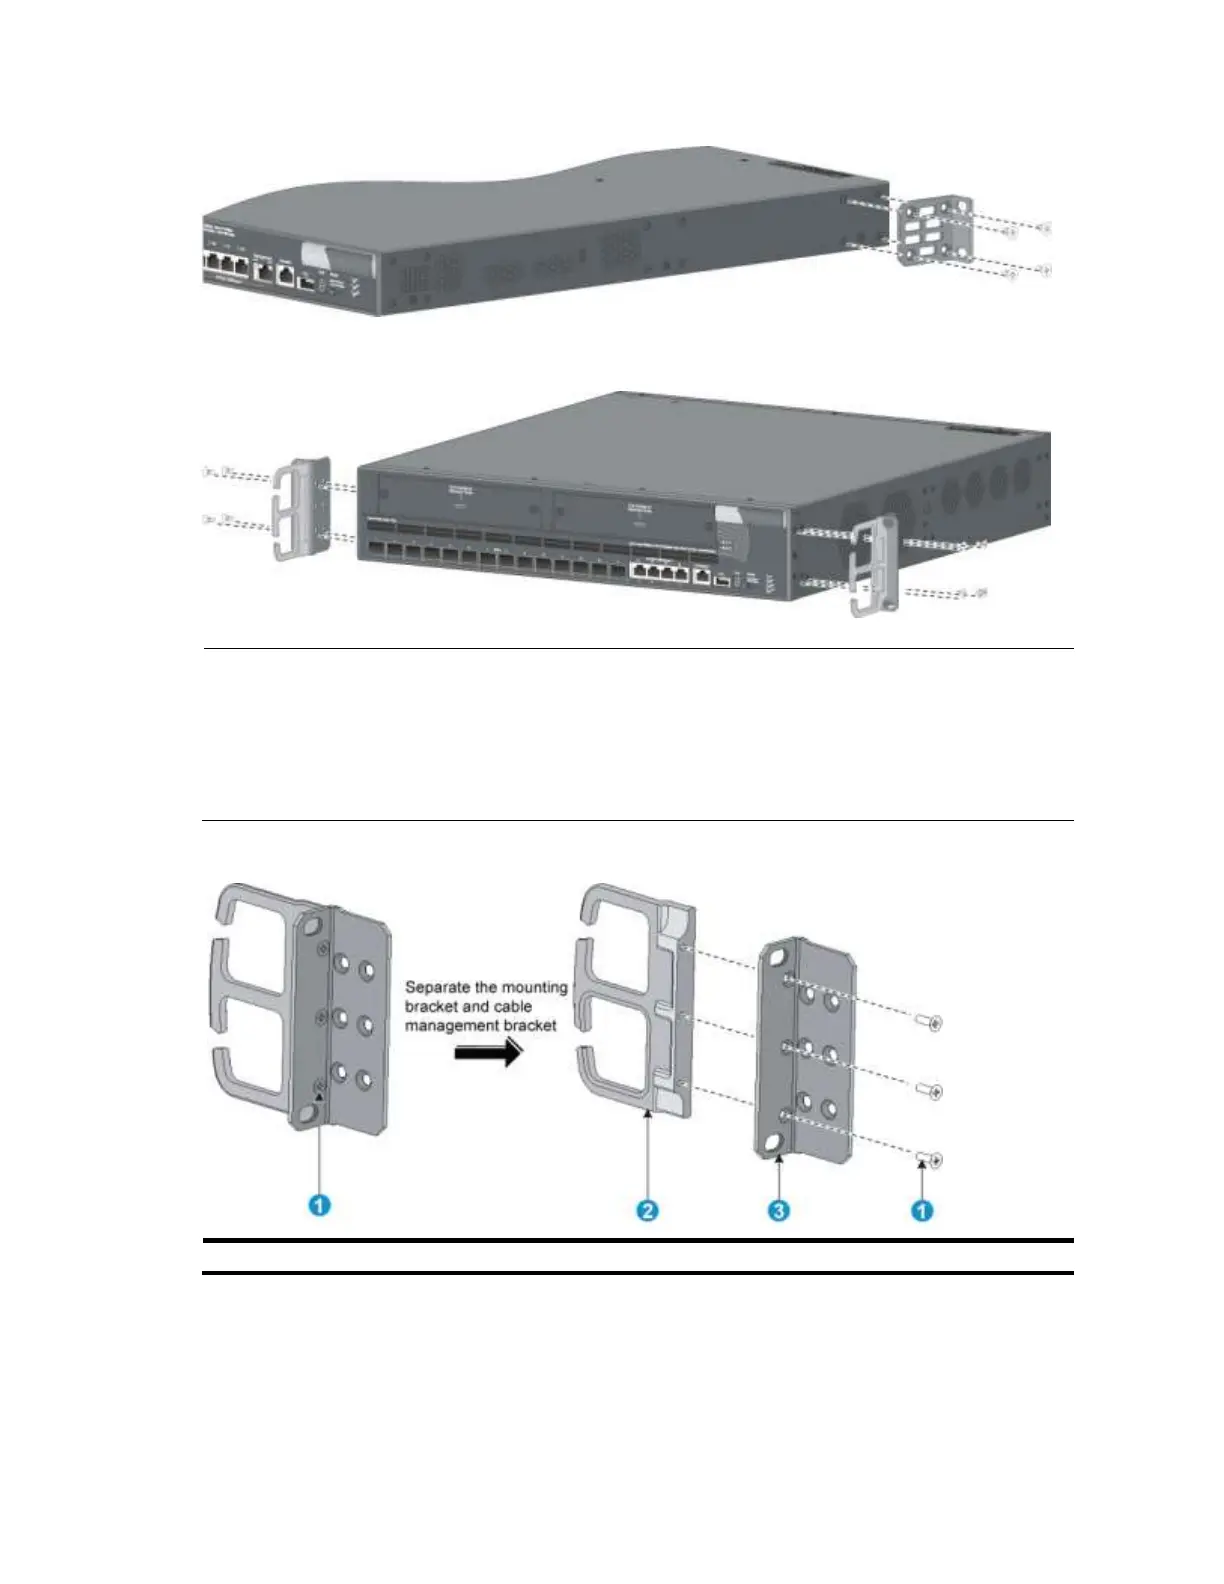
Figure 13 1U bracket rear mounting position
Figure 14 2U bracket front mounting position
NOTE:
Installing the 2U mounting brackets in the rear mounting position is similar to installing the brackets in the front
mounting position.
To install the 2U mounting brackets in the mid-mounting position of a 2U switch chassis, first use a screwdriver to
loosen the three captive screws and separate the mounting brackets from the cable management brackets (see
Figure 15).
Figure 15 Separating a cable management bracket from a mounting bracket
(2) Cable management bracket
Rack-mounting an A5800AF-48G/A5820AF-24XG switch
Attaching the slide rails to the rack
You must install slide rails for rack-mounting an A5800AF-48G or A5820AF-24XG switch.
 Loading...