39
Installing an OAP card in the OAP card slot
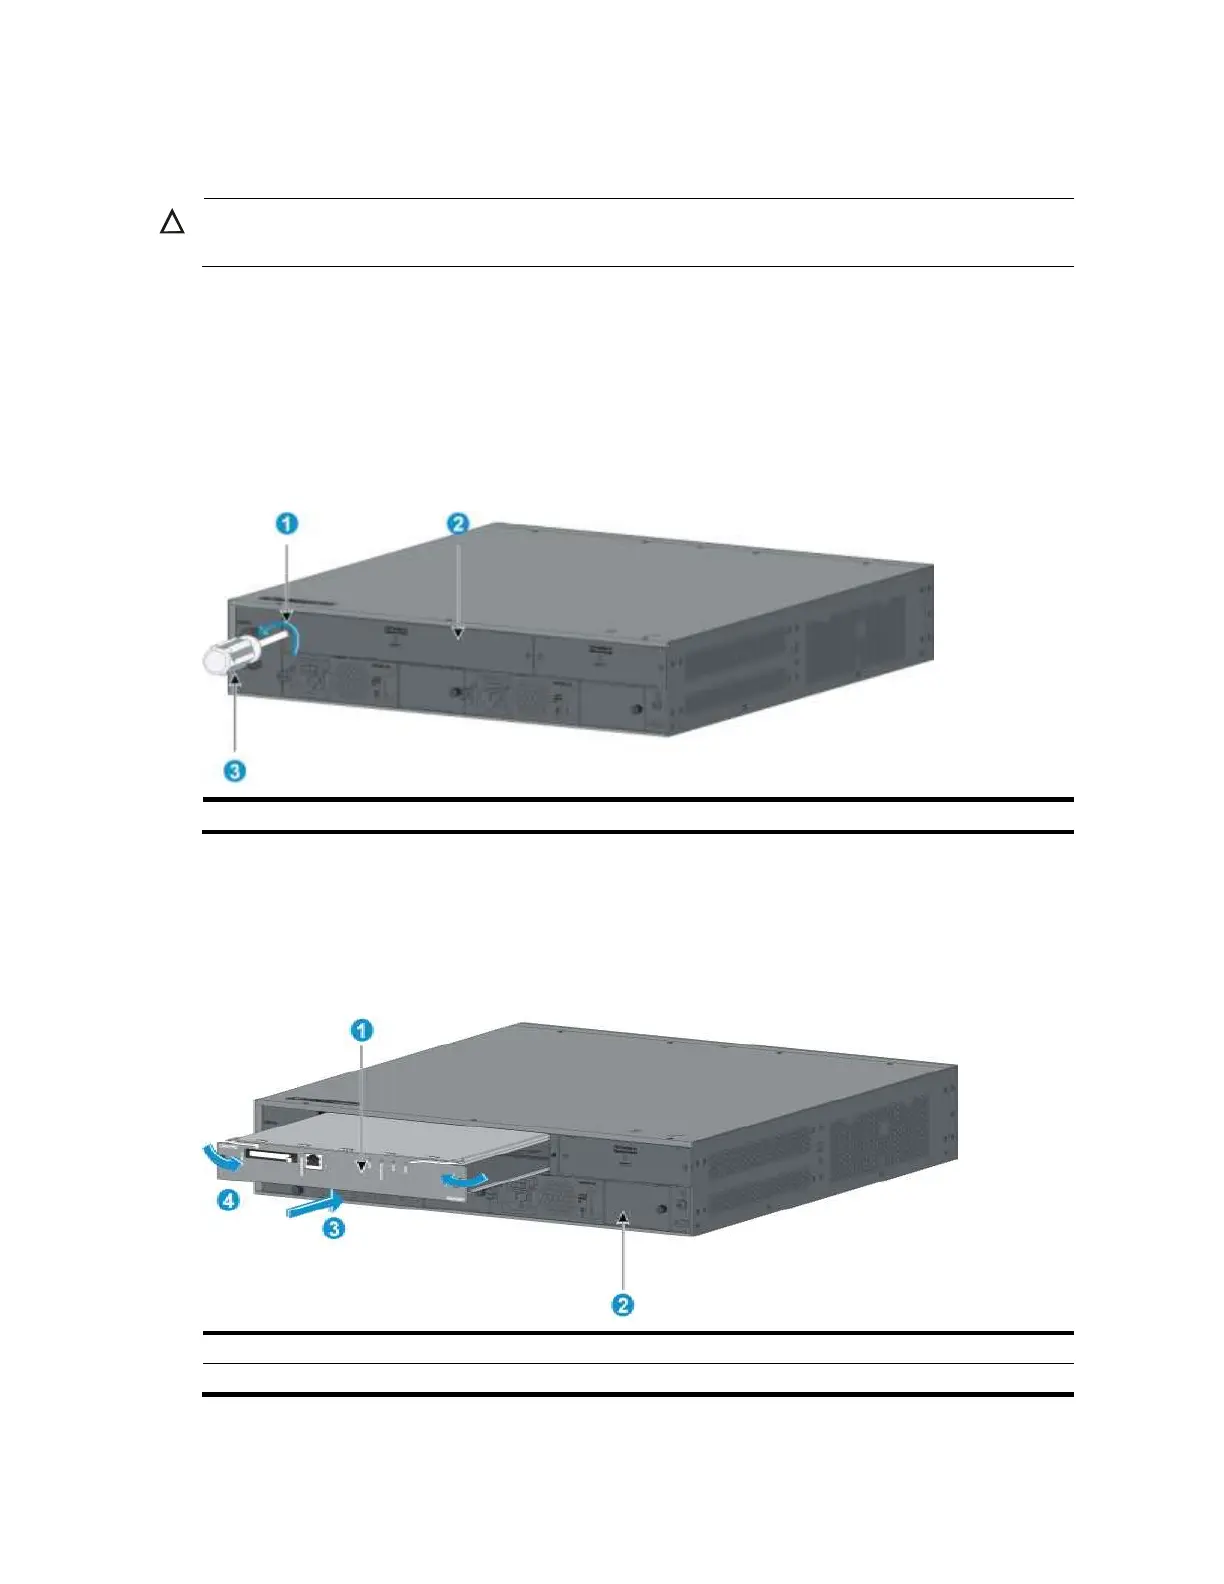
CAUTION:
Do not touch the surface-mounted components directly with your hands.
1. Wear an ESD-preventive wrist strap and make sure it makes good skin contact and is well
grounded.
2. Loosen the captive screws on the filler panel over the OAP card slot with a Phillips screwdriver (see
Figure 51), and remove the filler panel. Do not use excessive force when you install the OAP card.
If you cannot insert the OAP card smoothly, check the installation method for mistakes.
3. Put away the removed filler panel for future use.
Figure 51 Removing the filler panel over the OAP card slot
(1) Rotate counterclockwise
(2) Filler panel over the OAP card slot
4. Unpack the OAP card and check that this OAP card can be installed in the OAP card slot.
5. Hold the OAP card with the ejector levers on top, push the OAP card slowly along the guide rails
into the slot (see callout 3 in Figure 52), and push the ejector levers inward to lock the OAP card in
position (see callout 4 in Figure 52).
Figure 52 Installing an OAP card
(4) Push the ejector levers inward
6. Fasten the captive screws on the OAP card with the Philips screwdriver to secure the OAP card in
the slot.
 Loading...