Step 5 Check the indicator status of the M.2 FRU.
For details, see M.2 FRU Indicators.
----End
5.2.2 Installing the Screw-in RAID Controller Card
Step 1 Power off the compute node.
For details, see 3.1 Power-Off Procedure.
Step 2 Remove the compute node.
For details, see 3.3 Removing a CH121 V5.
Step 3 Place the compute node on the ESD workstation.
Step 4 Remove the cover.
For details, see 3.5 Removing the Cover.
Step 5 Check whether a PCIe card is installed.
l If yes, go to Step 6.
l If no, go to Step 7.
Step 6 Remove the PCIe card.
For details, see 3.11 Removing a PCIe Card.
Step 7 Take the spare part out of its ESD bag.
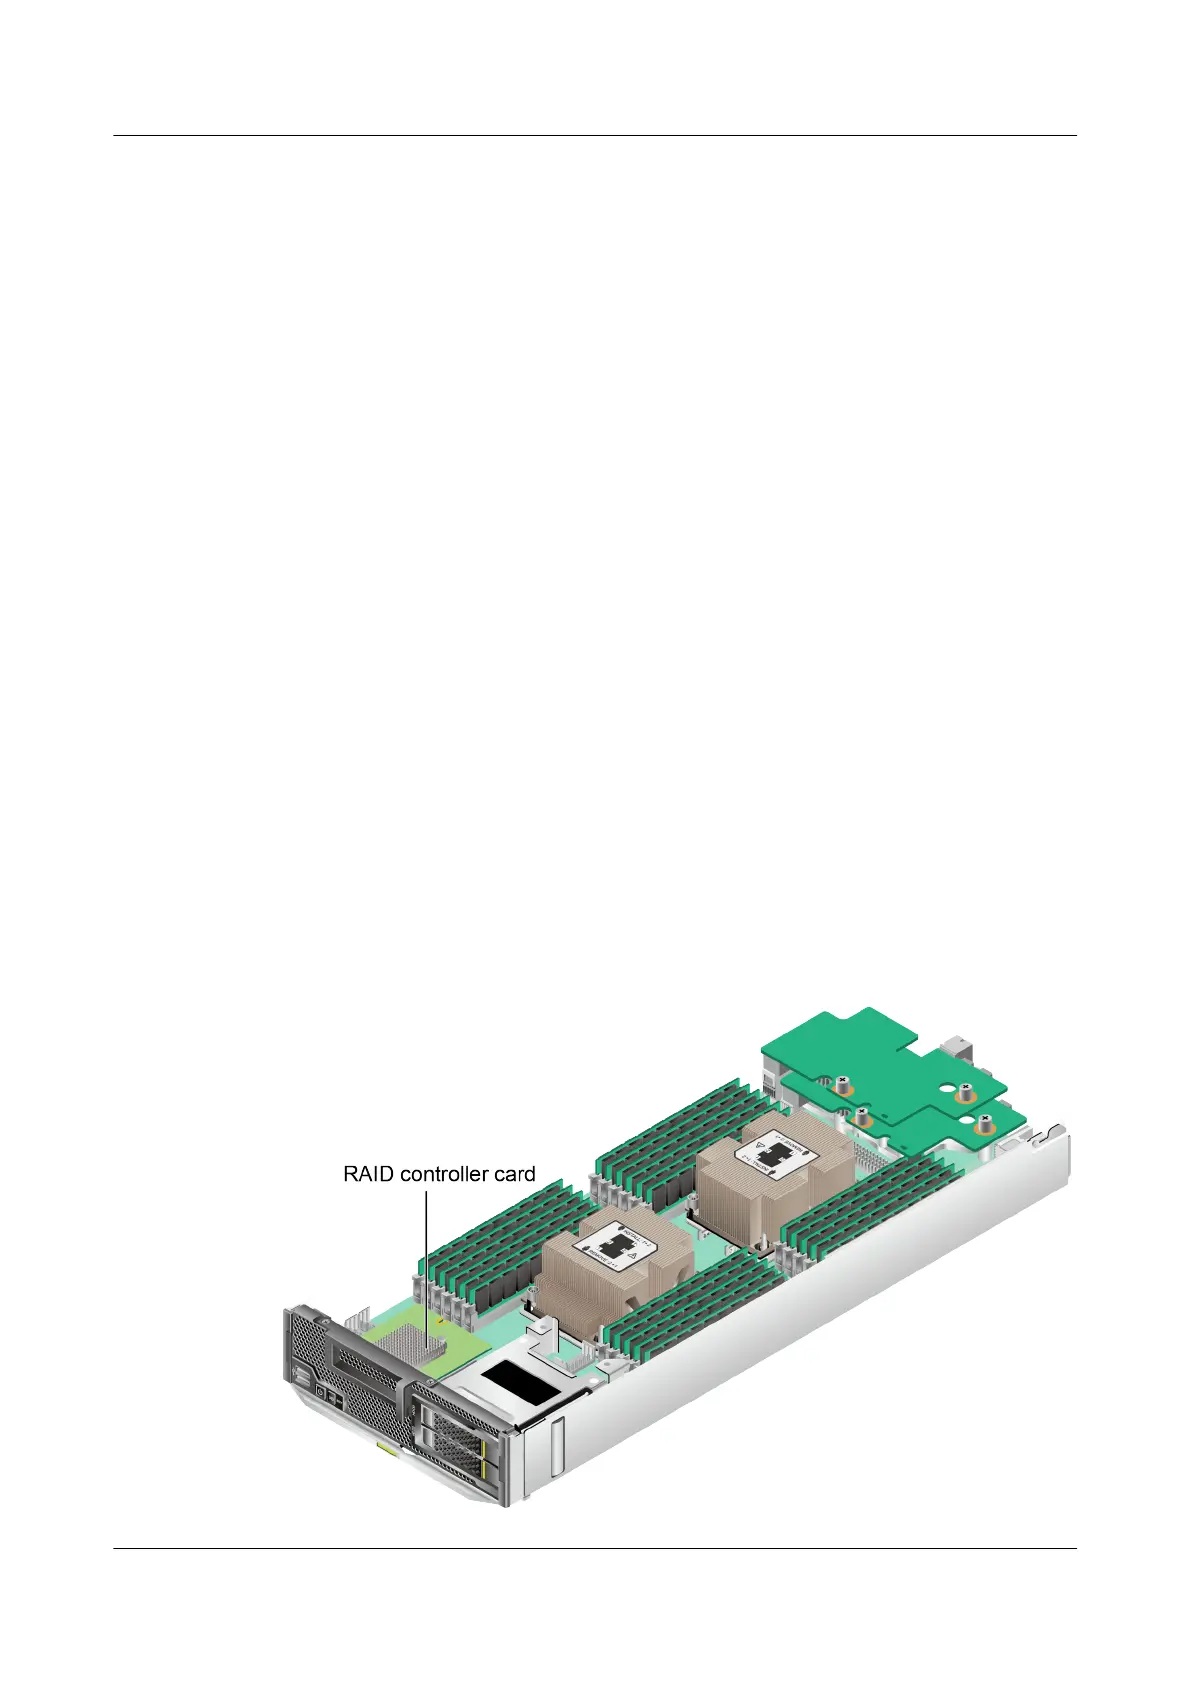
Step 8 Determine the position of the screw-in RAID controller card.
Figure 5-3 Position of the screw-in RAID controller card
FusionServer Pro CH121 V5 Compute Node
User Guide
5 Optional Part Installation
Issue 06 (2019-08-10) Copyright © Huawei Technologies Co., Ltd. 95
 Loading...