EasyManua.ls Logo

IBM SAN64B-6 User Manual

IBM SAN64B-6
122 pages
To Next Page IconTo Next Page
To Previous Page IconTo Previous Page
Page #76 background image
Note: QSFP transceivers have pull tabs rather than bails. Always use the pull tab to insert or remove the
QSFP transceivers, as the QSFP might be hot.
Procedure
1. Remove any cables that are inserted into the transceiver.
2. Grasp the QSFP transceiver pull tab and gently pull the tab straight out.
Note: Grasp the pull tab near the body of the transceiver to reduce the chances of bending the pull
tab. As the QSFP may be hot, avoid touching it.
3. To insert the replacement transceiver, use the pull tab to carefully push the transceiver into the port.
Transceivers are keyed so that they can only be inserted with the correct orientation. If a transceiver
does not slide in easily, ensure that it is correctly oriented. Gently push the correctly oriented QSFP
transceiver until the latching mechanism clicks.
Figure 29. Replacing a QSFP optical transceiver
1 - Pull tab
2 - QSFP cable
3 - QSFP transceiver
4. Position a cable so that the key (the ridge on one side of the cable connector) is aligned with the slot in
the transceiver. Insert the cable into the transceiver until the latching mechanism clicks.
Cables are keyed so that they can be inserted in only one way. If a cable does not slide in easily,
ensure that it is correctly oriented.
Verifying the operation of new transceivers
About this task
You can use the following commands to verify if the transceivers are working correctly:
sfpShow
switchShow
errDump
fabricShow
Example
Refer to the Fabric OS Command Reference for output examples and descriptions.
52
IBM Storage Networking SAN64B-6: SAN64B-6 Installation, Service, and User Guide

Table of Contents

Other manuals for IBM SAN64B-6

Question and Answer IconNeed help?

Do you have a question about the IBM SAN64B-6 and is the answer not in the manual?
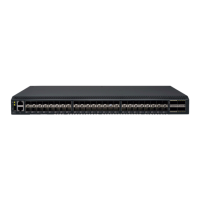
IBM SAN64B-6 Specifications

General IconGeneral
ModelSAN64B-6
Product TypeFibre Channel Switch
Ports64
Hot-swappableYes
RedundancyYes
Power SupplyDual, hot-swappable
ManagementCLI
Fabric OSFabric OS
Port Speed16 Gbps, 32 Gbps
Data Transfer Rate16 Gbps, 32 Gbps
Form Factor1U

Summary

Chapter 1. Introducing the SAN64B-6

Hardware features

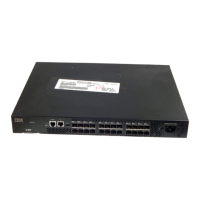
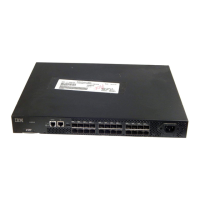
Details the features and capabilities of the SAN64B-6 switch, including port types, speeds, and scaling.

Chapter 2. Preparing for the installation

Safety precautions

Highlights safety warnings and precautions to be observed before and during installation.

Facility requirements

Details the necessary electrical, thermal, and rack requirements for installing the switch.

Chapter 3. Mounting the switch

Precautions specific to mounting

Outlines specific safety warnings and cautions related to mounting the device.

Chapter 4. Initial setup and verification

Providing power to the switch

Details the procedure for connecting and powering on the SAN64B-6 switch.

Establishing a first-time serial connection

Guides users on establishing a serial connection for initial device configuration.

Configuring the IP address

Explains how to set up IP addresses, either statically or via DHCP, for device management.

Verifying correct operation

Provides methods and commands to verify the correct operation of the switch after setup.

Backing up the configuration

Details the procedure for backing up the switch configuration to an FTP server or USB device.

Chapter 5. Installing transceivers and cables

Precautions specific to transceivers and cables

Highlights important safety precautions related to handling transceivers and fiber-optic cables.

Installing an SFP+ transceiver

Guides on how to install SFP+ optical transceivers into the switch ports.

Replacing an SFP+ transceiver

Details the procedure for removing and installing a new SFP+ optical transceiver.

Installing a QSFP transceiver

Guides on how to install QSFP optical transceivers into the switch ports.

Replacing a QSFP transceiver

Details the procedure for removing and installing a new QSFP optical transceiver.

Chapter 6. Monitoring the device

Running diagnostic tests

Details how to run diagnostic tests to troubleshoot hardware and firmware issues on the switch.

Chapter 7. Power supply and fan assembly

Precautions specific to the power supply and fan assemblies

Critical safety precautions for handling and working with power supply and fan assemblies.

Removing a power supply and fan assembly

Step-by-step instructions for removing a faulty power supply and fan assembly from the chassis.

Chapter 8. Chassis replacement

Remove the old switch chassis and install the new switch chassis

Provides instructions for removing the old chassis and installing the new one.

Chapter 9. Power supply and fan assembly

Related product manuals