Operating CW
Before transmitting, monitor your selected operating
frequency to make sure you don’t cause interference
to other stations on the same frequency.
Push a band key to select the desired band. q
Push the Mode key [CW] to select the CW mode. w
• “CW” or “CW-R” is displayed.
• Push [CW] again to select the CW or CW-R mode.
• The carrier point of the CW mode is the LSB side by
default. You can change it to the USB side in the “CW
Normal Side” item of the Others set screen.
(SET [F-7] > OTHERS [F-5] > CW Normal Side)
Rotate [MAIN DIAL] to tune a desired signal. e
• Try to match the specied signal’s tone to the side tone
frequency.
• The S-meter indicates the received signal strength when
signal is received.
Rotate [AF] to set the audio to a comfortable listen- r
ing level.
Rotate [RF PWR] to adjust the output power. t
• The TX power readout displays the setting level.
Transmit. y
• Push [TRANSMIT].
• The [TX] indicator lights red.
Use the electric keyer or a paddle to key your CW u
signals.
• The power meter indicates transmitted CW output pow-
er.
Push the Multi-function [METER]( i ) key to select
the ALC meter.
Rotate [DRIVE] to adjust the Drive gain. o
• While keying, adjust the Drive gain so that the ALC me-
ter reading swings within 30 to 50% of the ALC scale.
• If the ALC meter reading goes outside the ALC zone,
the rise time becomes faster than the setting time in the
Keyer set screen (p. 5-13).
!0 After your transmission is finished, returns to re-
ceive.
• Push [TRANSMIT].
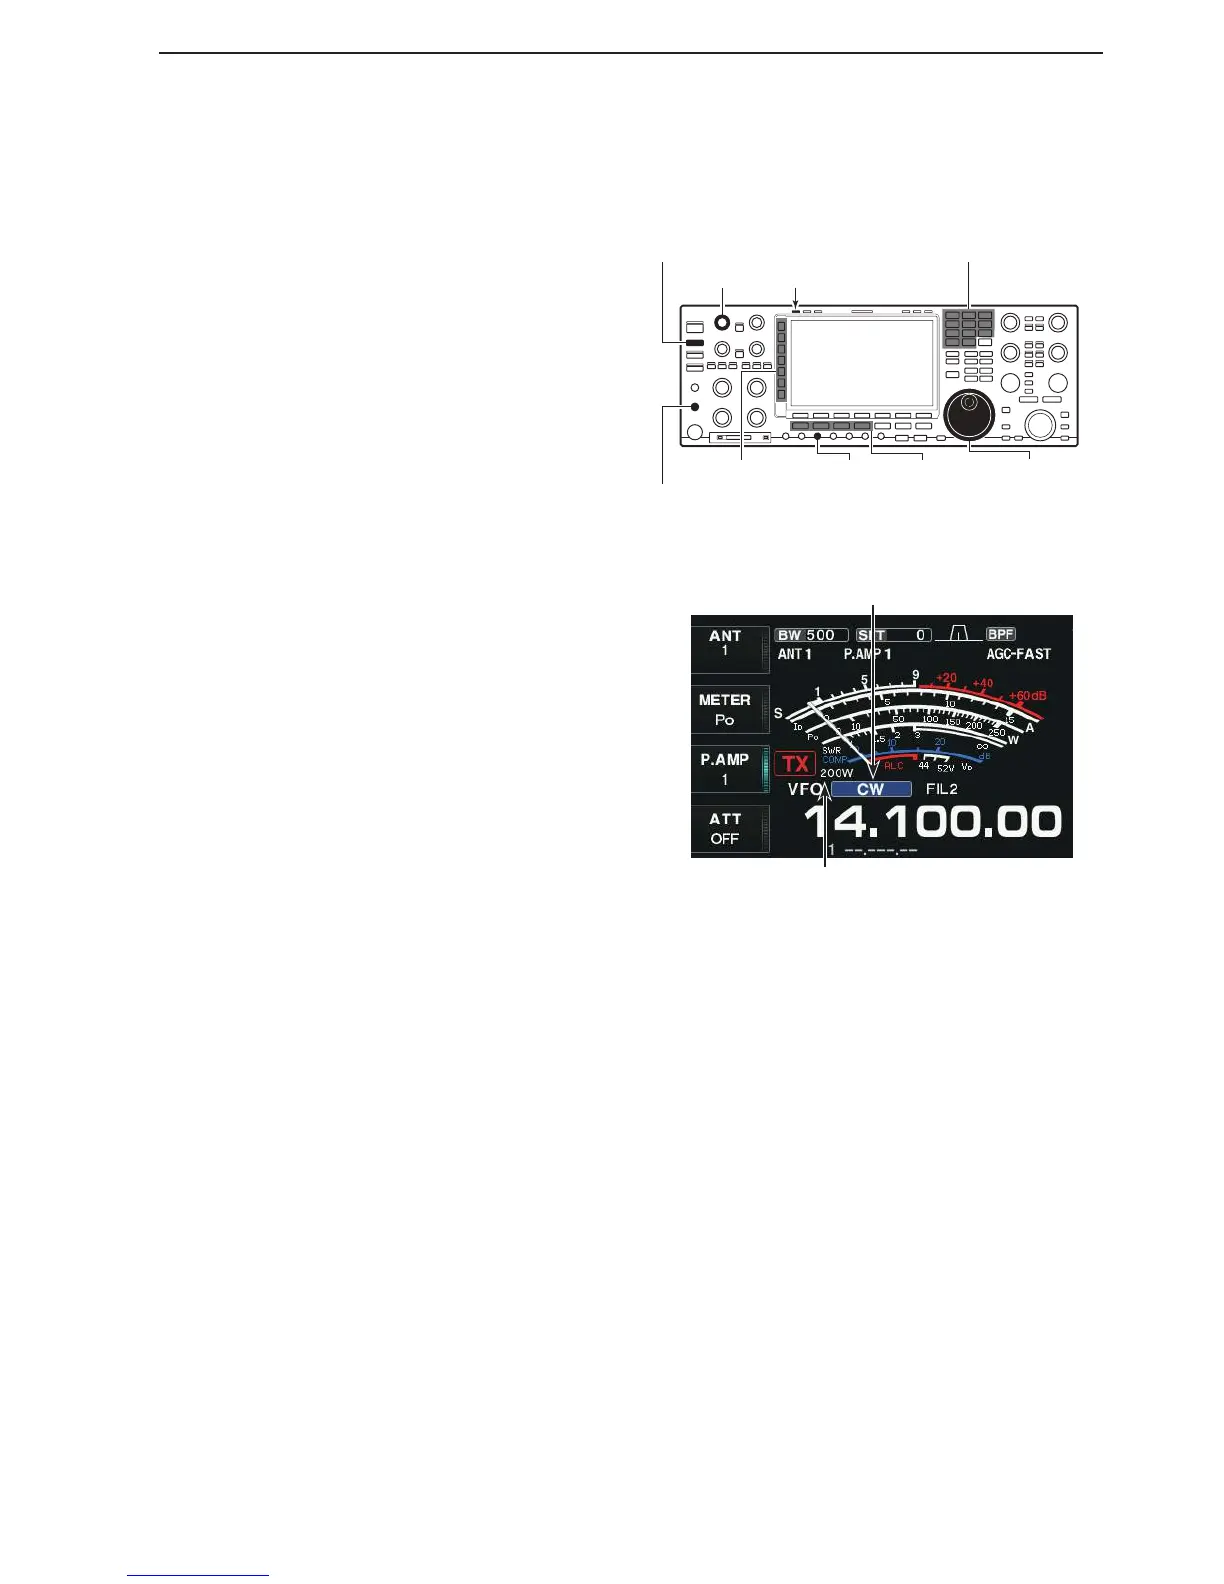
Mode keys [MAIN DIAL]
() Multi-function keys
Connect a paddle (or connect an Electric key or external electric keyer
to the [KEY] jack on the Rear panel).
[DRIVE]
[RF PWR]
[TRANSMIT]
TX indicator MAIN
Band keys
Mode icon
TX power readout
 Loading...