Console Port Setup ! 79
Chapter 8: Accessing E-series Routers
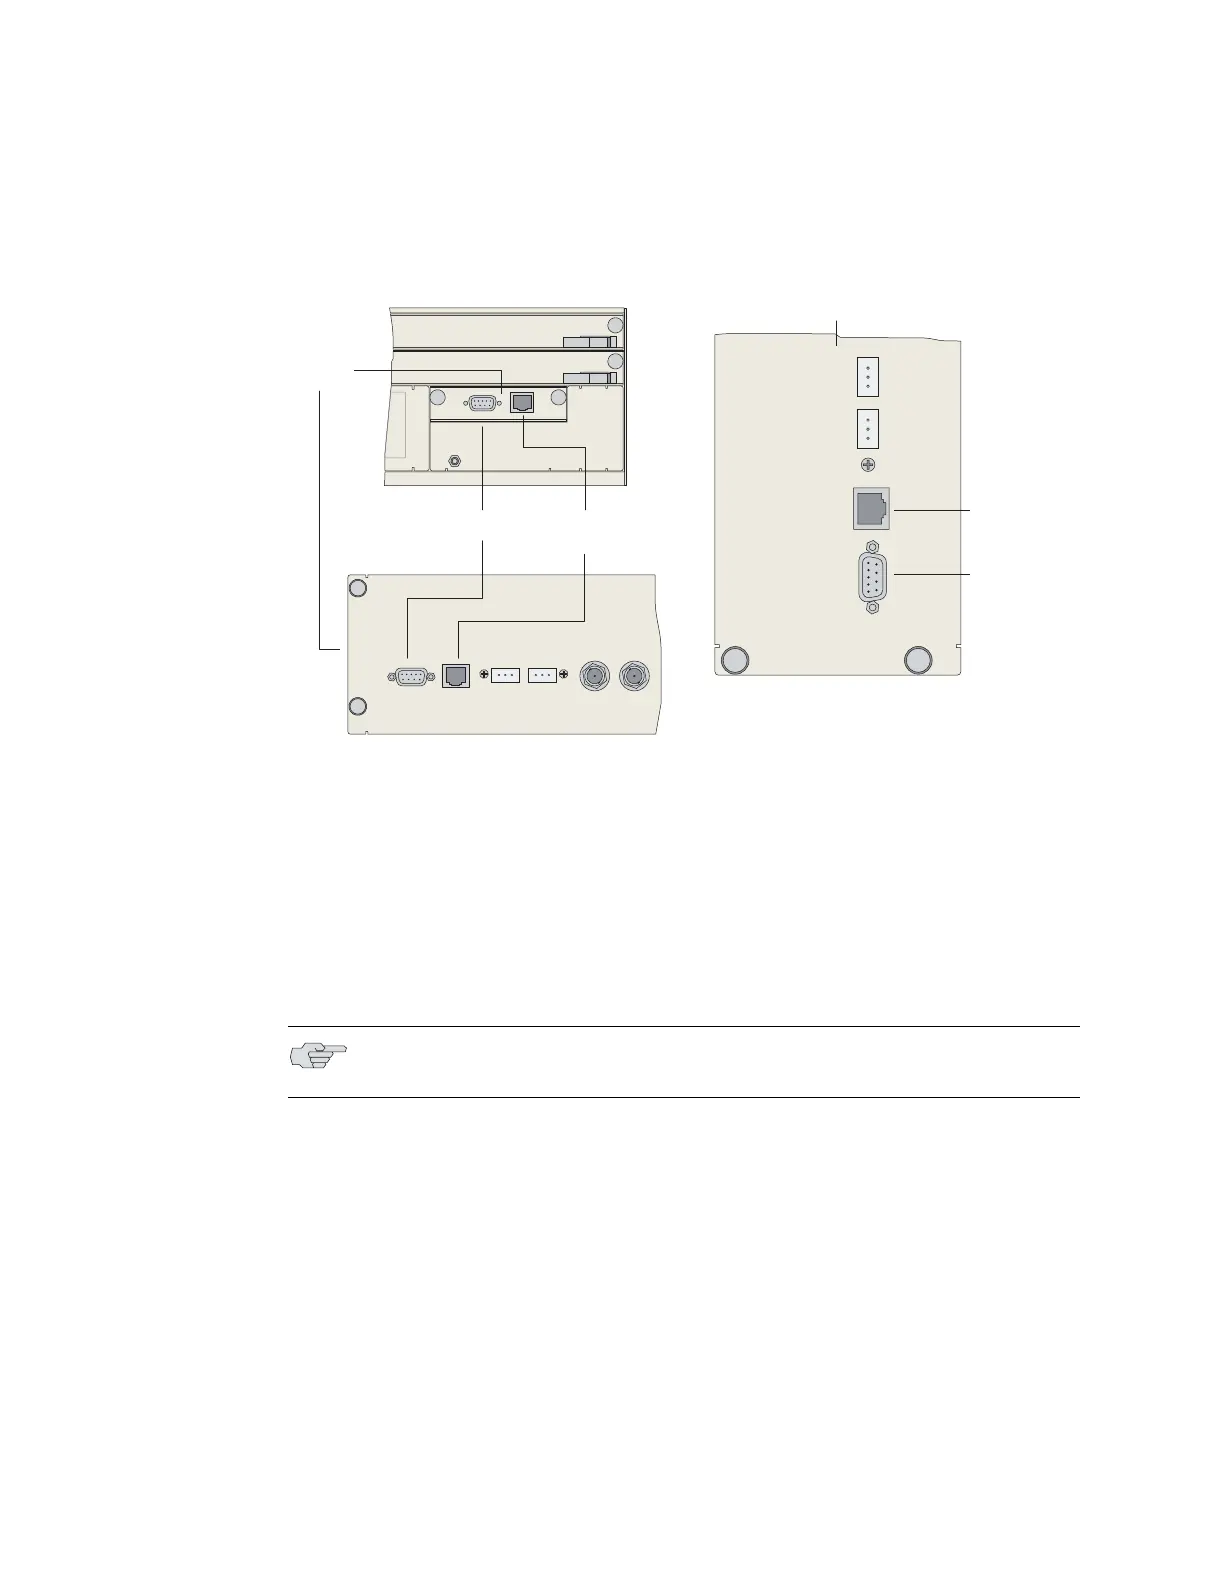
Figure 41: E-series routers management ports
2. Connect the crossover adapter connector to your PC’s serial port.
3. Power up the system.
When you power up the system, the CLI appears on your console’s screen. The
system is now in User Exec mode, and you can begin configuration. For more
information on using the CLI and configuring the system, see the JUNOSe
System Basics Configuration Guide.
Assigning an IP Address
When your console is ready to communicate with the system, power up the system
(see Chapter 7, Powering Up E-series Routers), and set an IP address for the system.
The system powers up in User Exec mode. To assign an IP address:
1. Enter the enable command at the User Exec prompt.
host1>enable
host1#
The system is now in Privileged Exec mode.
A
T
G
R
T1 100 OHM
CLOCK IN
B
T
G
R
CONSOLE
10/100
BASE T
RS-232
RS-232 port 10/100
BASE T port
SRP I/O
module
ERX-310 Router
ERX-14xx Model
SRP I/O module
ERX-7xx Model
RS-232
10/100
BASE T
T1 100 OHM
CLOCK IN
E1 75 OHM
CLOCK IN
A
B
A
B
CONSOLE
EXTERNAL TIMING
T
G
R
T
G
R
g013762
10/100
BASE T port
RS-232 port
NOTE: Direct access through the RS-232 serial port allows you to monitor the
system as it boots.
 Loading...