C03027 Cooling System C3-3
c. Disconnect headlight wire harness at each
light. Remove cable clamps and remove har-
ness to allow radiator removal.
d. Remove hardware attaching grille structure
to radiator assembly, attach overhead crane,
and lift slightly. Move grille structure forward
to clear radiator assembly.
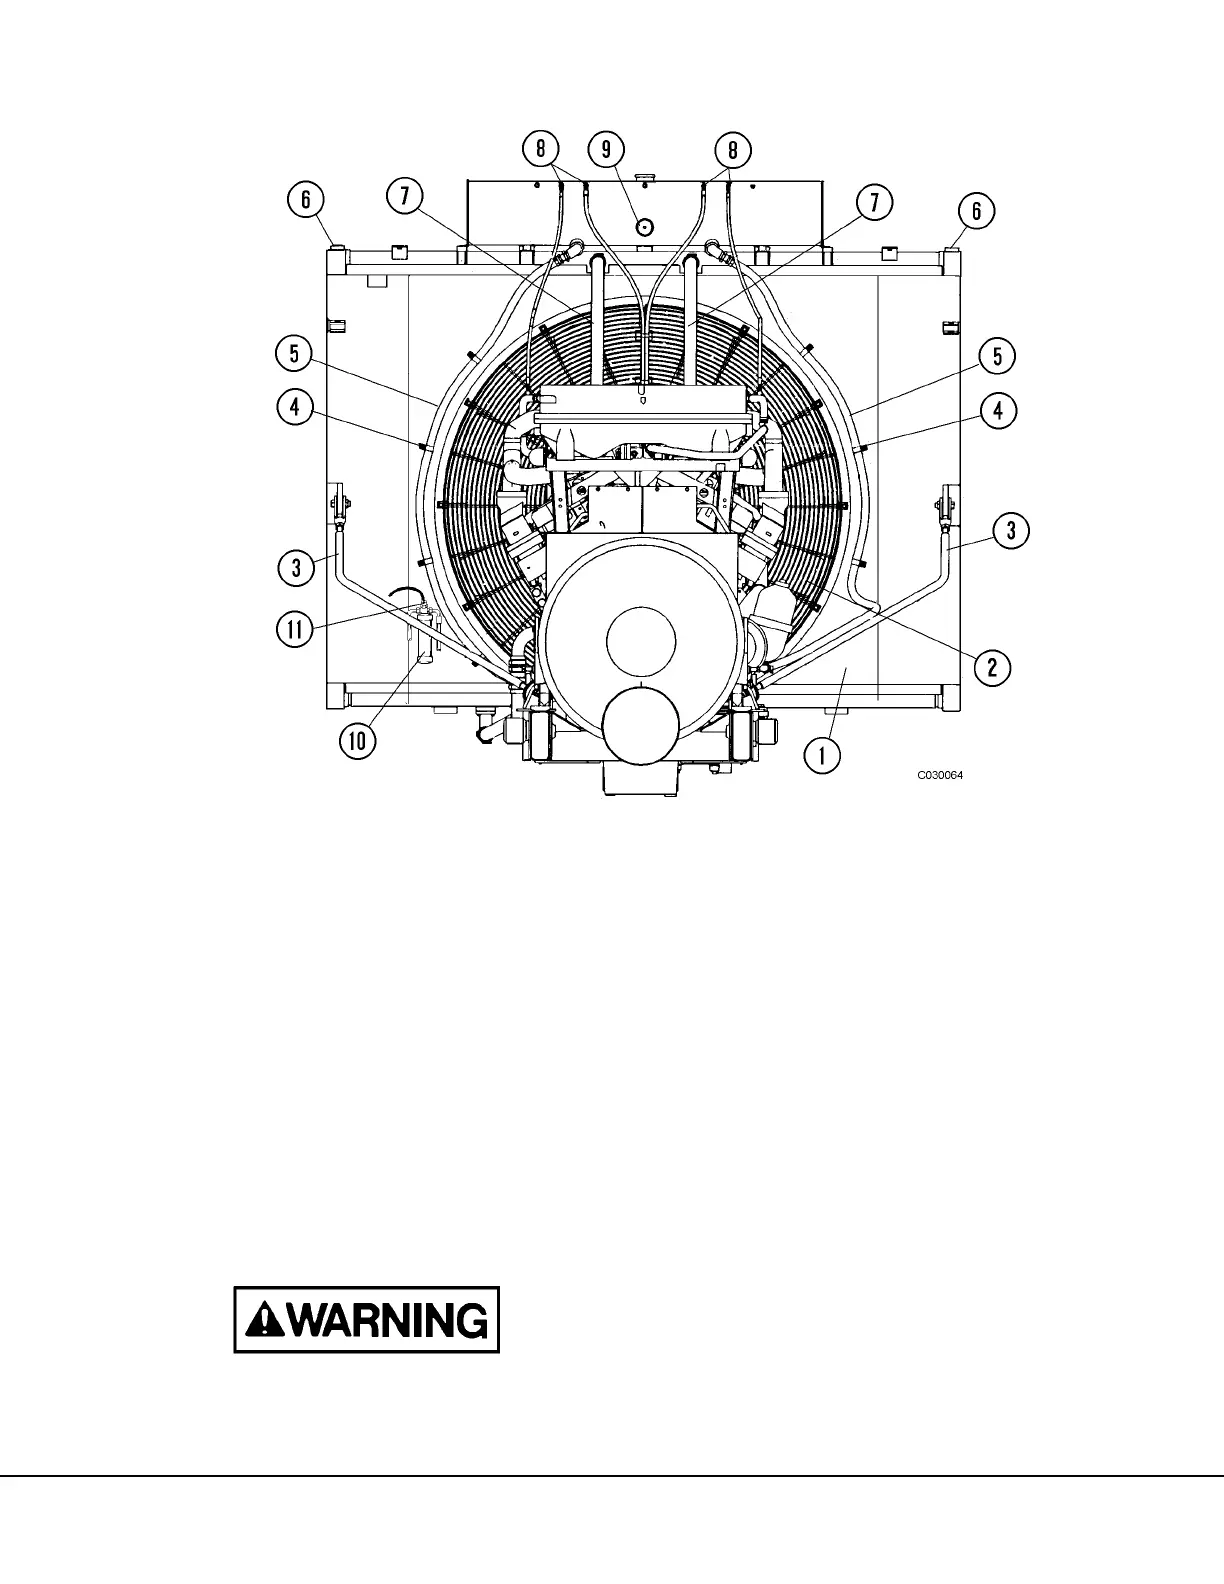
8. Install lift eyes (included in truck tool group) in
tapped blocks (6, Figure 3-4) at upper corners
of radiator assembly and attach overhead
crane.
The radiator assembly weighs approximately
4,200 lbs. (1907 kg.) Be sure lifting device is
capable of lifting the load.
9. Remove radiator support struts (3), upper sup-
port rods, and hardware (2, Figure 3-3) attach-
ing radiator assembly to power module
subframe.
10. Lift radiator enough to separate from mounts on
subframe and move forward until shroud clears
the engine fan.
Do not allow shroud to contact fan blades.
11. Move assembly to a work area and remove hard-
ware attaching shroud to radiator assembly.
Remove air conditioner condenser and fuel
cooler.
FIGURE 3-4. RADIATOR AND SHROUD (Rear View)
1. Shroud
2. Fan Guard Str.
3. Support Rod
4. Clamp
5. Hose
6. Lift Points
7. Upper Tubes
8. Vent Hoses
9. Level Sensor
10. Receiver/Drier
11. Pressure Switch

 Loading...


