HDMI-3D-OPT series – User's Manual 38
Create or Modify an Event
Wizard Mode
The wizard mode lists the most common conditions and actions, so the
Step 1. Click on the Edit button of the desired Event; the Event editor is
displayed.
Step 2. The wizard mode is displayed as default. Select the desired
Category
Step 3. Select the desired Expression from the drop-down menu. If any
other parameter is necessary to set, it is going to be displayed.
Step 4. Press the Apply button to store the settings of the Condition.
Advanced Mode
The goal of this mode is the same as of the wizard: set the properties and methods for conditions and
protocol. Advanced mode allows almost all of it.
Step 1. Click on the Edit button of the desired Event; the
Event editor is displayed.
Step 2. The wizard mode is the default, press the
Advanced
displayed showing the list of the properties in the
drop-down menu. Navigate to the desired node.
Step 3. Select the desired Property from the menu. The
manual of the property is displayed below to help
to select the necessary property and to set the
value.
Step 4. Set the desired value and operator, then press the
Apply button to store settings.
The Link Tool
The new interface allows creating more actions to the same condition. In that case, a condition can trigger
more actions. To set such an Event, the Link tool has been introduced.
Step 1. Click on the Edit button of the desired Event; the
Event editor is displayed.
Step 2. The wizard mode is displayed as default, press the
Link button.
Step 3. All the saved Events are analyzed and the conditions
Show advanced expressions option allows showing
the exact path and set the value of the given property.
Step 4. Select the desired Condition and press the Apply button to store the settings.
Special Tools and Accessories
The Name of the Event
The name of a port can be changed by typing the new name and clicking the Set button. The following
characters are allowed when naming:
Letters (A-Z) and (a-z), numbers (0-9), special characters: hyphen ( - ), underscore ( _ ), and space ( ).
Enable or Disable an Event
The set Event can be enabled or disabled in the Event list, or directly in the Event editor window by setting
the tick mark beside the name.
Testing the Condition
a small panel that shows if the set condition is detected and how many times. The Counter can be reset by
the button in Event editor. If the Condition is true, the detected mark turns green for two seconds and the
Counter is increased.
Testing the Action
The method is the same as testing the Condition, but in this case, the Action can be triggered manually by
pressing the Test button.
TIPS AND TRICKS: The Test button is also placed on the Action panel in the Event list. Thus, you can check
the Actions without opening the Event editor.
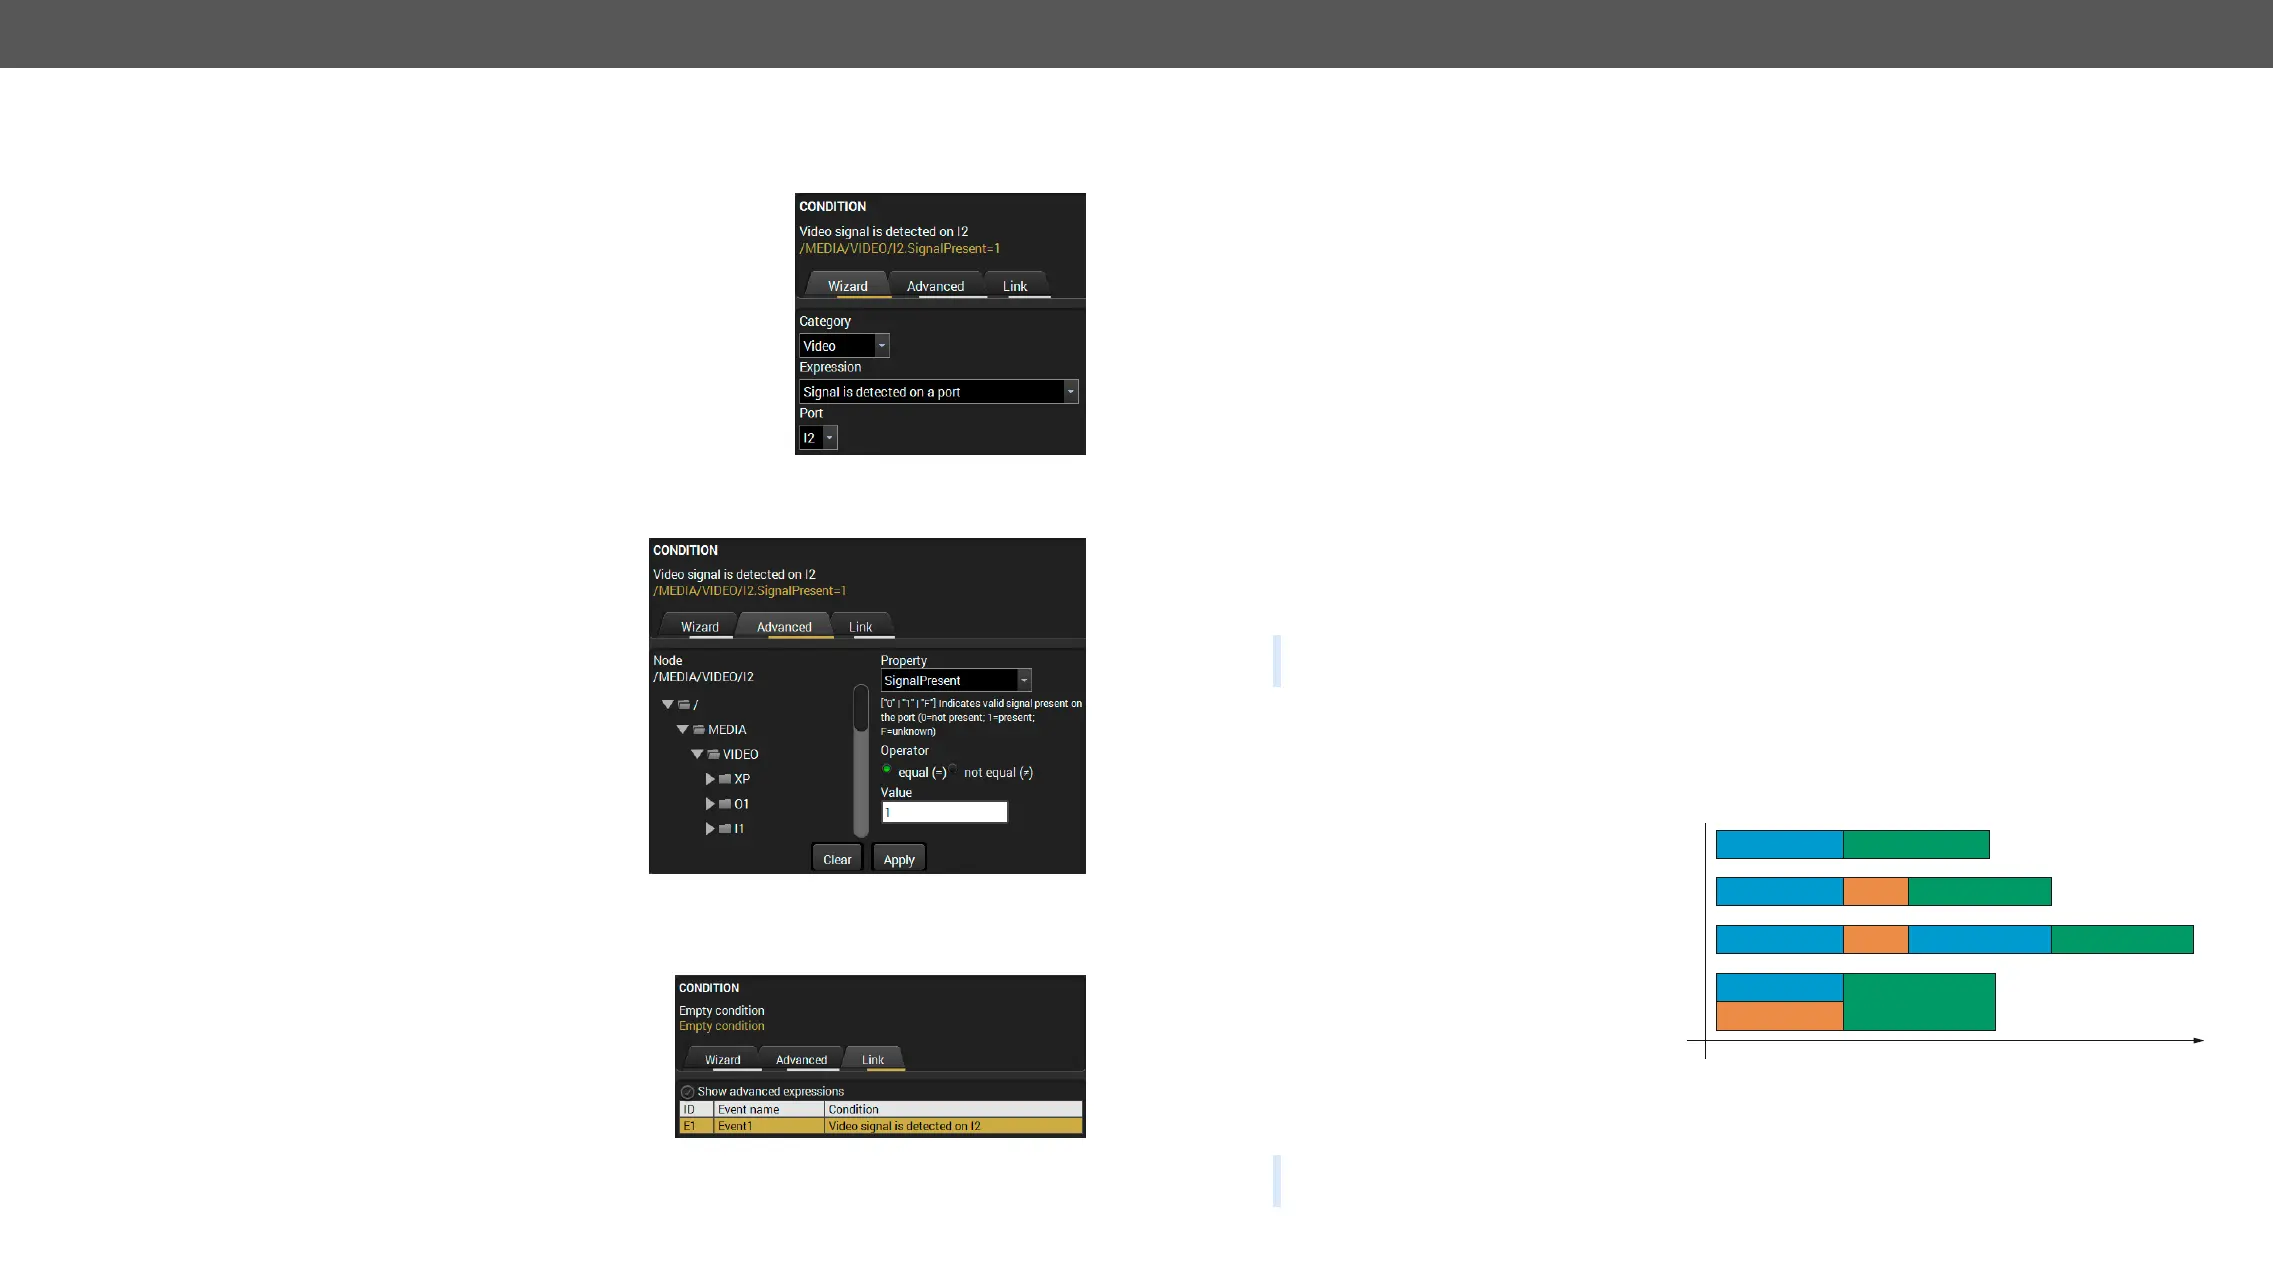
Delay the Action
In most cases the Action is performed immediately after the Condition is detected. But sometimes a delay
is necessary between the Condition and the Action. Therefore, the new Event manager contains the Delay
panel which allows that feature with below settings:
▪ No delay: when the Condition
is detected, the Action is
launched.
▪ Simple delay: when the
Condition is detected, the
Action is launched after the
set time interval.
▪ Still exists: when the Condition
is detected, the Action is
launched after the set time interval only if the Condition still exists.
▪ Continuously exists: when the Condition is detected, the Action is launched after the set time interval
only if the Condition has been existing continuously.
TIPS AND TRICKS: Show advanced expressions option is a useful tool when you look for the path or value of
a property. The option is available in the Event list window or when Link tool is used.
Delay
Condition = true
Condition = true
Condition = true
Condition = true
continously
exist
still exist
simple delay
no delay
Perform the action
Perform the action
Delay
Delay
Perform the action
Condition = true
Perform the action
Time
 Loading...