- 239 -
5
1
2
4
3
Convenient print
functions
Appendix Index
Checking and
Changing Printer
Settings Using
the Control Panel
Network
Setup
Matching
Colors
Using Utility
Software
Setting the network from the web browser
8
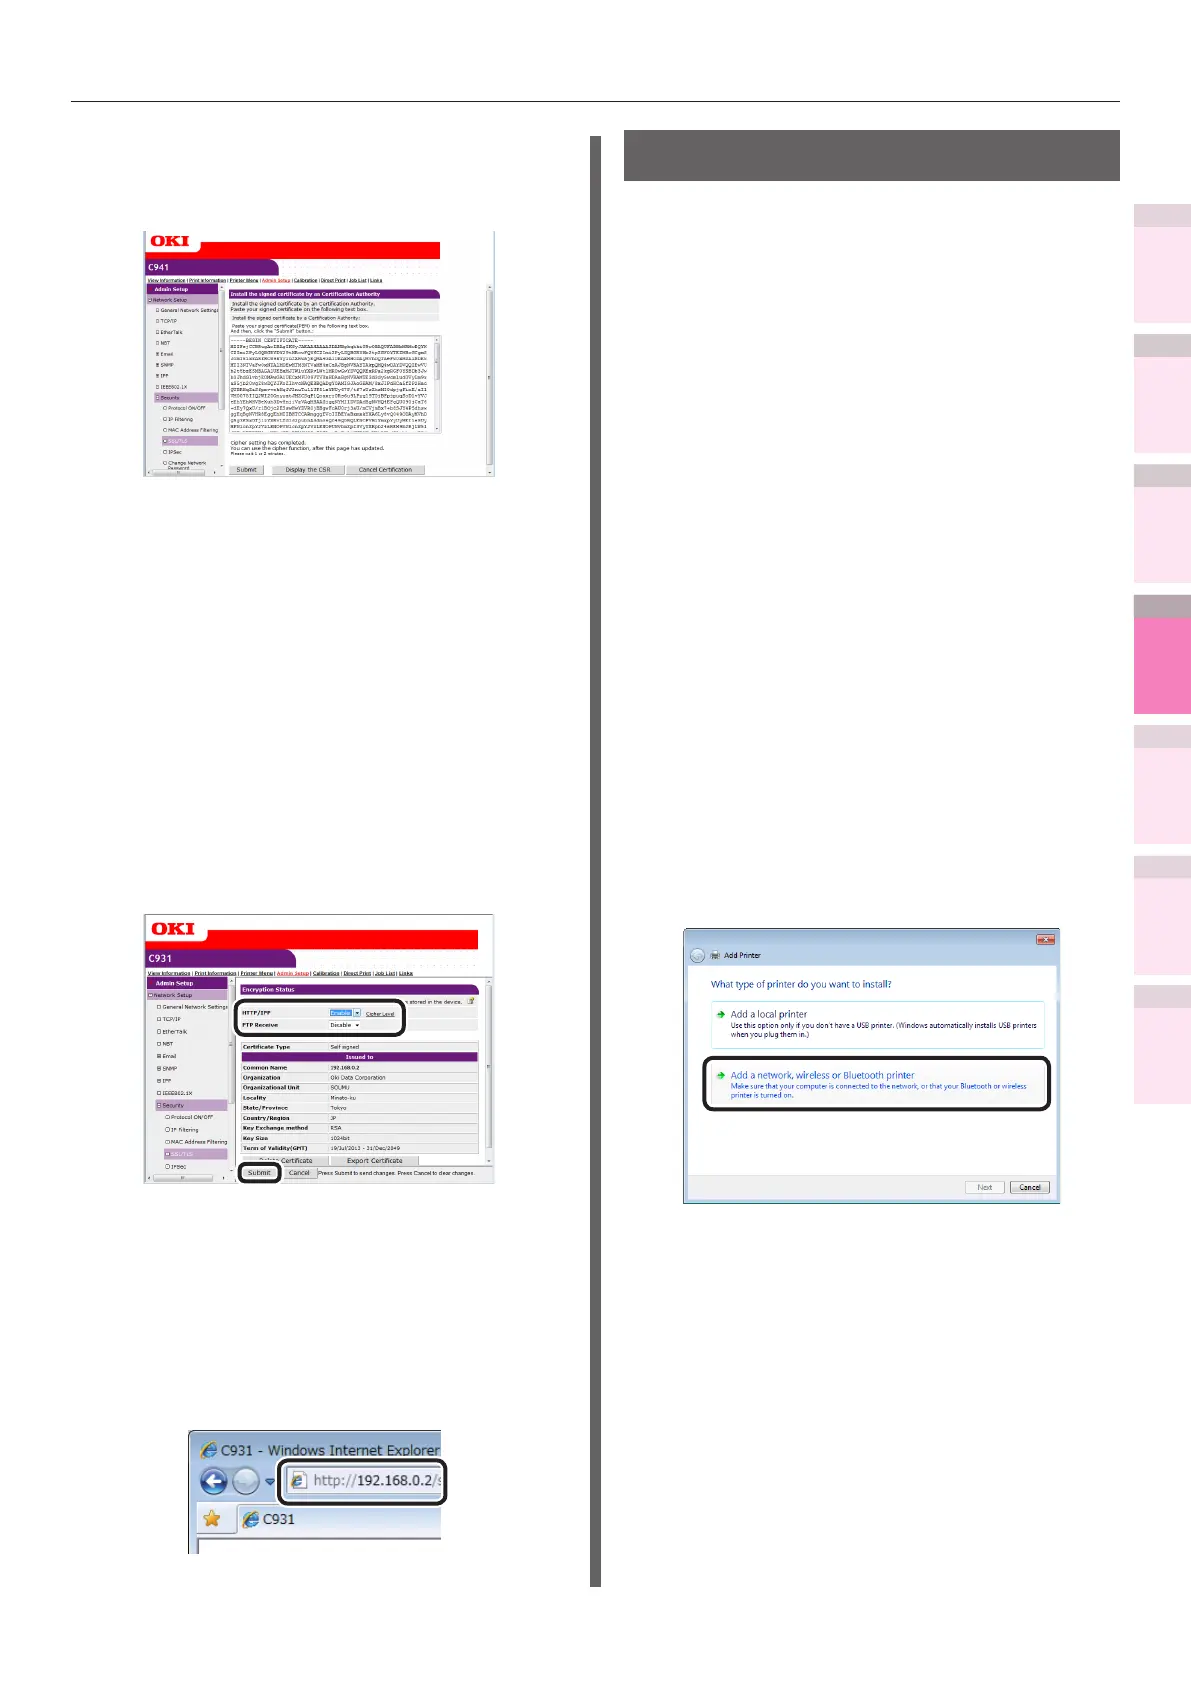
Install the certicate issued by the
authenticator (using the web). (For
authenticator certicates.)
Follow steps 1 to 3 to display the encryption
(SSL/TLS) setup screen.
Paste the issued certicate from "-----
BEGIN CERTIFICATE -----" to "----- END
CERTIFICATE -----" to the text box, and
click [Submit].
This completes the authenticator signed
certicate creation.
The settings will be save in the printer, and
the network functions will restart.
9
Follow Steps 1 to 3 to display the
encrypted (SSL/TLS) setup screen,
and set the protocols to enable the
encryption.
10
Click [Submit].
Usage methods
1
Start the web browser, and enter
"https://printer IP address" in the
adress eld to connect.
Printing using IPP
You can print using IPP.
Enabling IPP Communications
1
Access the device web page, and log in
as an administrator.
2
Select [Admin Setup].
3
Select [Network Setup]>[IPP]>[Setup].
4
Implement advanced setup by following
the on-screen instructions.
5
Click [Submit].
Setting up the device as an IPP
printer (Windows)
1
Click [Start], and then select [Devices
and Printers]>[Add printer].
2
Use the [Add printer] wizard to select
[Add a network, wireless or Bluetooth
printer].
3
Select [The printer that I want isn’t
listed] from the table of usable printers.
 Loading...