44952001TH Rev.2
5-19
Oki Data CONFIDENTIAL
5. MAINTENANCE MENUS
5.4.4 Motor and clutch test
The motor and clutch test is used for motor and clutch testing.
1. Enter the self-diagnostic mode (level 1) and, until MOTOR & CLUTCH TEST
appears on the upper display, press [2] or [8] ([2] displays the next test option
and [8]
displays the preceding test option). Then press the [6] button.
2. Press [2] or [8] until the option for a unit to test, which is shown in table 5-4,
appears on the lower display ([2] displays the next option and [8] displays the
preceding option).
MOTOR & CLUTCH TEST
ID MOTOR
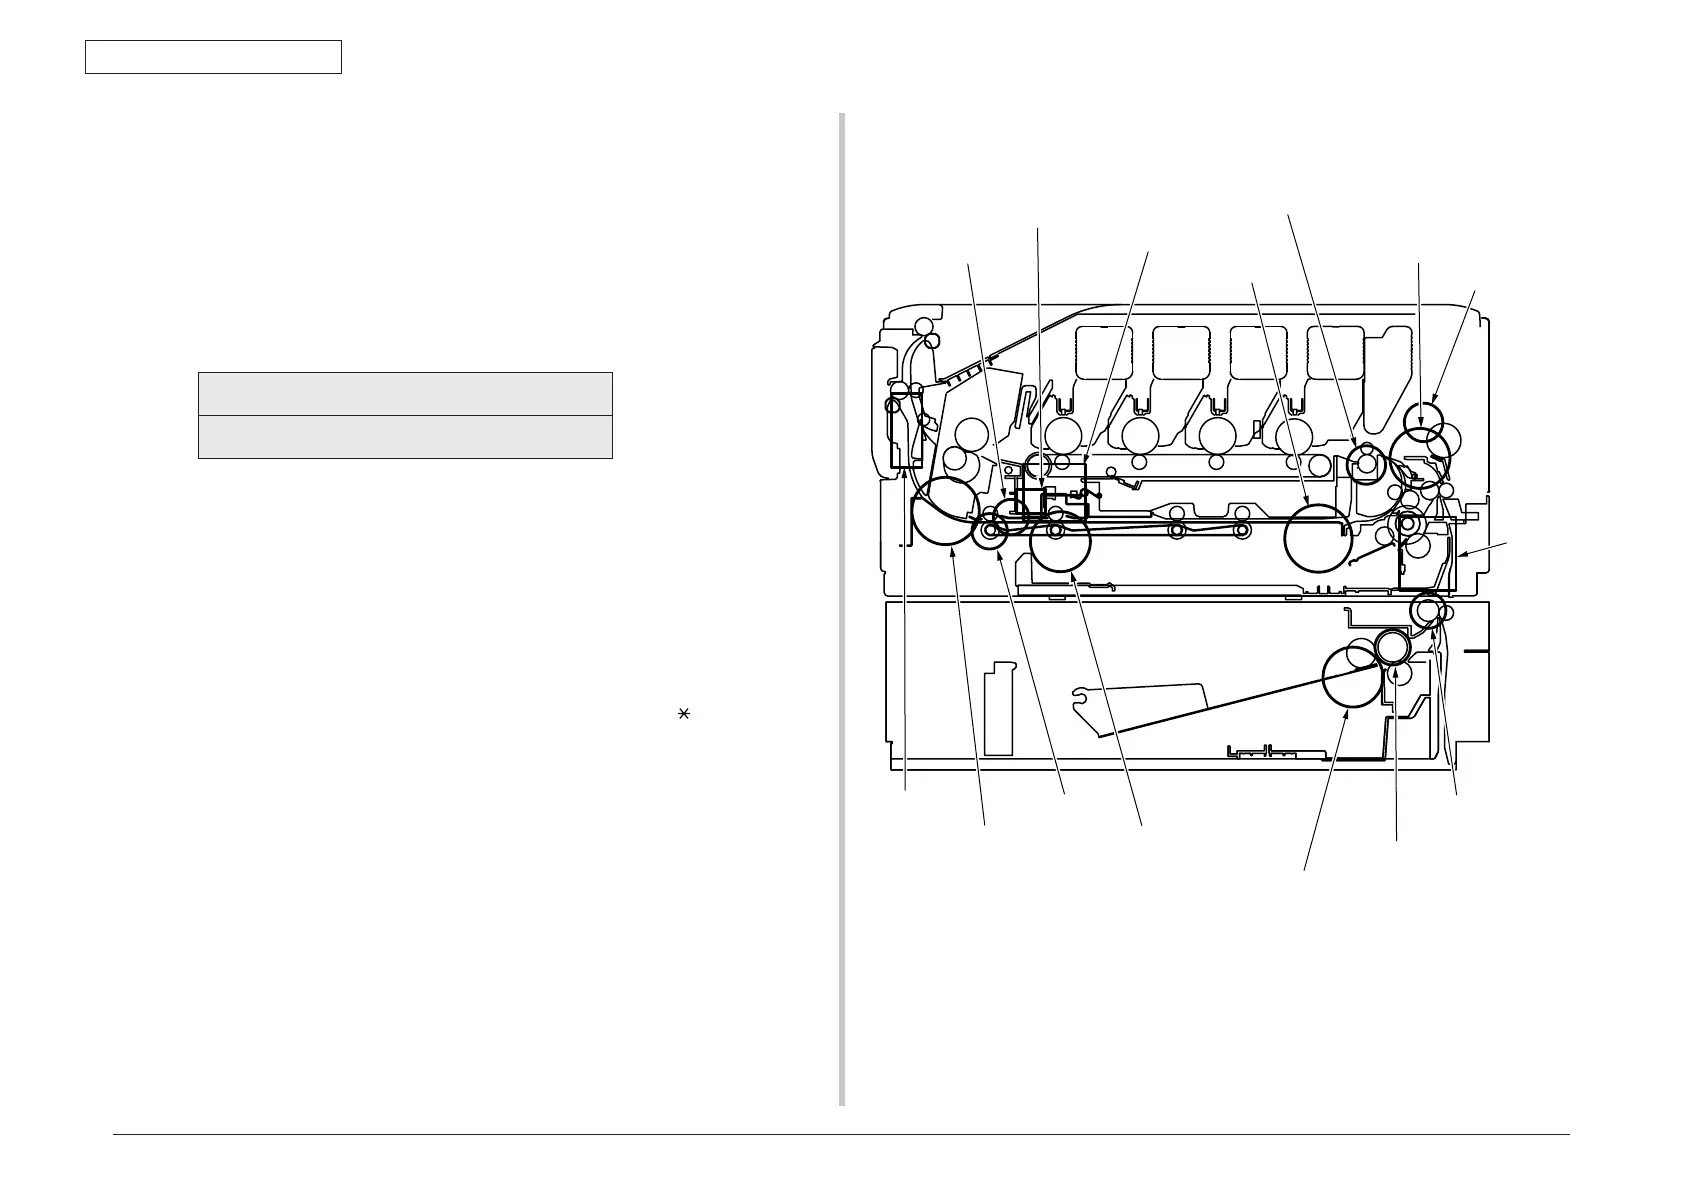
3. Press the [6] button. The motor and clutch test starts, the unit’s the name
starting to blink, and the unit being driven for10 seconds (refer to Figure 5-2).
Note: The state for step 2 is restored after the 10-second driving of the unit. The unit
is driven again by pressing an appropriate button.
• Theclutchsolenoidrepeatedlyturnsonandoffinnormalprintingdriving(a
motor is driven together with the solenoid when it cannot be driven solely
because of its mechanical structure). * ID UP/DOWN continues driving until
the [#] button is pressed.
• Theclutchsolenoidiskeptdrivenbypressingthe[
] button (for two
seconds) to determine a motor.
4. Press the [#] button to stop driving the unit (the display continues indicating the
unit).
5. Repeat steps 2 through 4 when necessary.
6. Press [4] to end the test (the state for step 1 is restored).
Y
M
C
K
Tray-2 hopping motor
Tray-2 hopping clutch
Tray-2 registration
clutch
Front
cooling
fan
Tray-1 hopping motor
(registration motor, front motor)
MPT clutch
Tray-1 registration clutch
Image drum motor
Color (registration) shutter
Image drum cooling fan
Image drum up-down
clutch
Rear cooling fan
Fuser motor
Duplex clutch
Belt motor
Figure 5-2
 Loading...