Section 3 HOW TO USE THE BASIC FUNCTIONS
3-10
HOW TO USE THE
BASIC FUNCTIONS
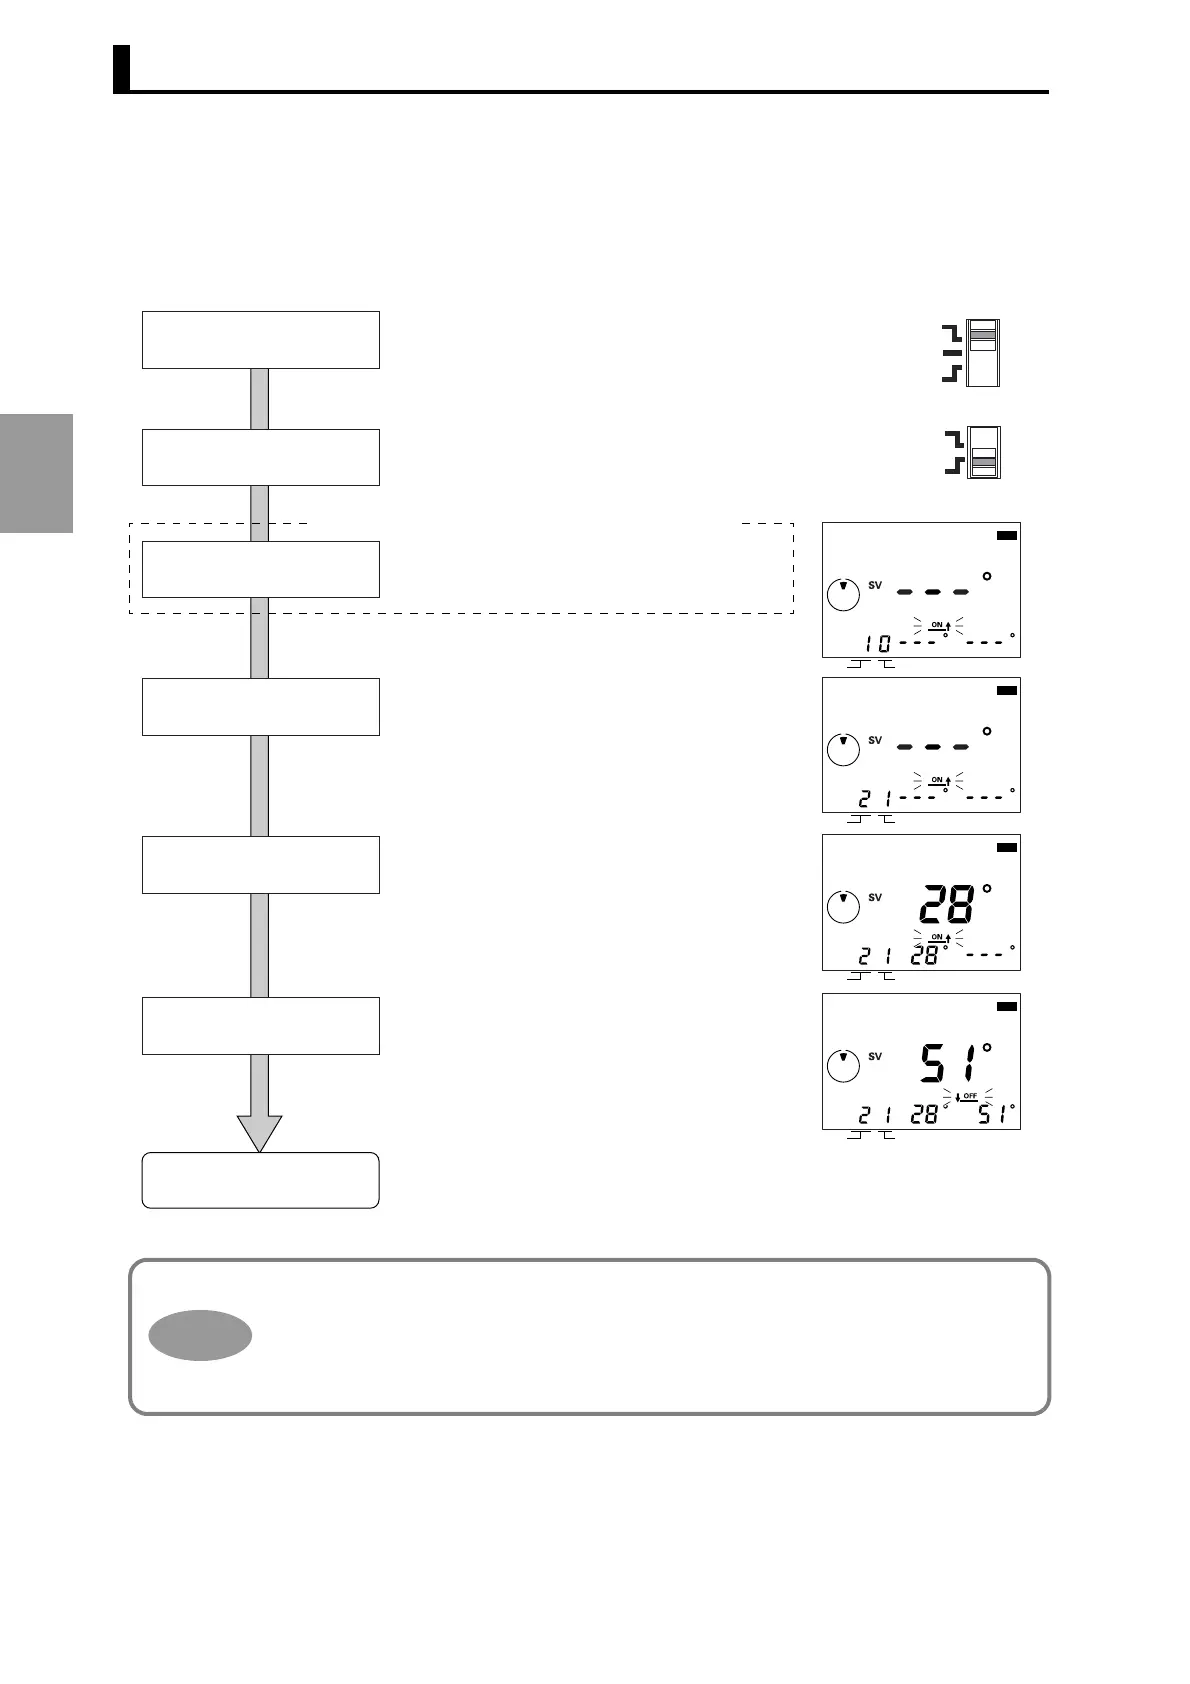
3.5.1 Setting the ON/OFF Angles in the Manual Mode (Key Input)
<Example>
To set "ON at 25° and OFF at 51°" for Cam 2, Step No. 1
• The value being set using the CAM keys ([+] and [− ]), STEP keys ([+]. [− ]) or ANGLE keys
([+], [− ]) changes rapidly if the key is held down. In the case of the ANGLE keys, the value
being set changes more rapidly when the other key is pressed.
• The setting procedure explained above may not be possible if the step-number limit function
(Refer to "4.6 Step Number Limit (F5)"), the cam protection function (Refer to "4.7 Cam Pro-
tection (F6)") or the all protection function (Refer to "3.11 All Protection Function") is used.
Selecting the mode
Selecting the
programming mode
Setting a bank number
Designating the cam No./step No.
Set the mode switch to PRGM or TEST.
(The explanation below assumes that the switch
is set to PRGM.)
Set the programming mode switch to MAN.
Press the [+] or [−] key of the CAM keys to
change the cam number to "2".
Similarly, press the [+] or [−] key of the STEP
keys to change the step number to "1."
Setting the ON angle
Press the [ON↑ ↓OFF] key to select the ON
angle setting state (ON↑ flashing).
Pressing the [+] or [−] key of the ANGLE keys to
set the desired ON angle (28° in this example)
and then press the [WRITE] key. (Make sure
28° appears in Sub-display.)
Setting the OFF angle
Press the [ON↑ ↓OFF] key to select the OFF
angle setting state (↓OFF flashing).
Pressing the [+] or [−] key of the ANGLE keys to
set the desired OFF angle (51° in this example)
and then press the [WRITE] key. (Make sure
51° appears in Sub-display.)
PRGM
TEST
RUN
TCH
MAN
End
CAM
STEP
PRG
CAM
STEP
PRG
CAM
STEP
PRG
CAM
STEP
PRG
When banks are used with 16-/32-output models
Set the bank number of the bank to be used.
For details on setting a bank function, refer to
"4.8 Bank Function (F7/F8/F9)".
Hint
 Loading...