8
If it is to be used as an exposed model:
(1) When wiring remote controls, be sure to double-check the terminal numbers of the indoor unit connecting them so there
are no mistakes in the wiring. (Damage will occur if high voltage [e.g. supply voltage] is applied.)
(2) If the wiring to the operation panel is bundled together with other wiring, such as the incoming line from the power source,
it can cause a malfunction, so avoid doing so.
(3) If something causes the unit’s power source to make noise it will be necessary to resolve the problem,
such as by installing a noise filter.
NOTE
Implementing a Test Run
Up) and operate the
Down) and make sure
Address Display
on the Remote
Control
Position of the
Receiver’s
Address Switch
It doesn’t matter
where the receiver’s
address switch is.
Use remote control cord (sold separately) for wiring a separately installed receiver.
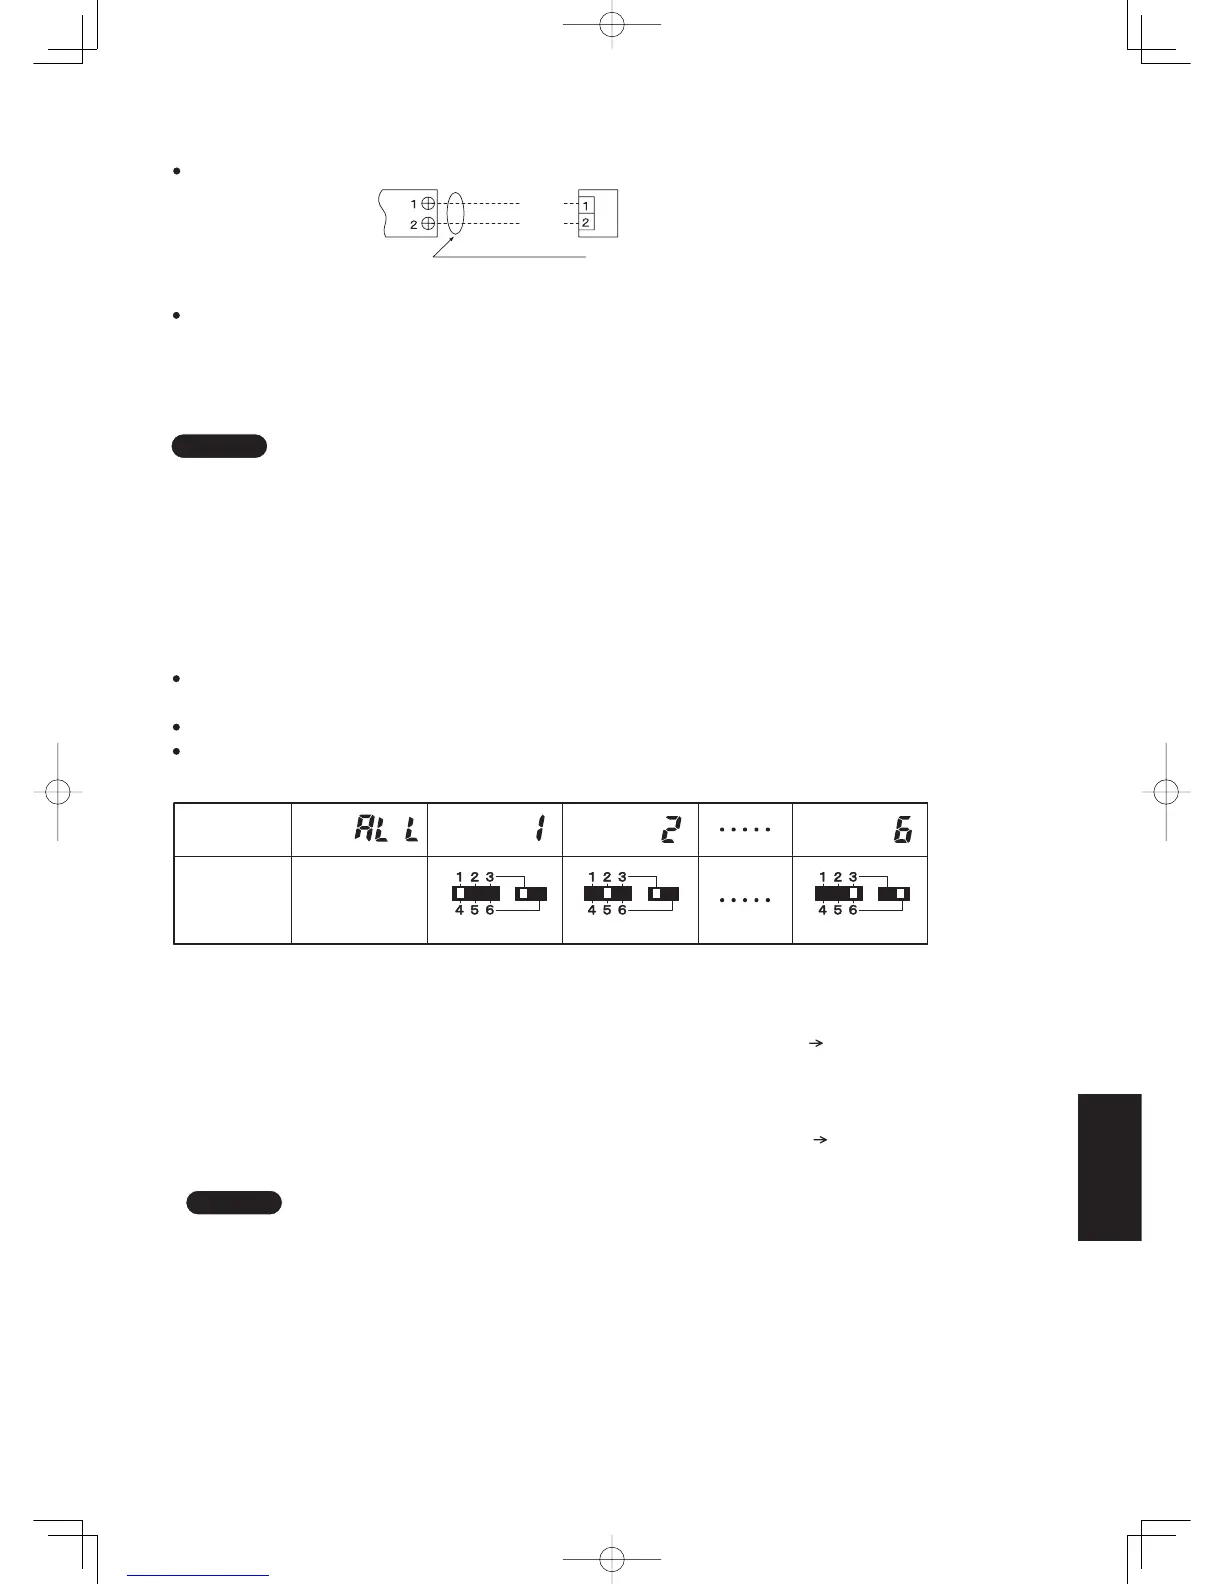
When more than one receiver and remote control are installed in the same room, setting up addresses allows them to avoid
interfering with each other.
Refer to the Users Manual for information on how to change the addresses of the remote controls.
Changing the address of a receiver can be done after removing the screw to the receiver’s PCB cover.
Once the change is complete, put the cover back in place; while holding the wiring with the cable clamp, tighten its screw.
(1) For instructions on how to install a remote control cord (sold separately), refer to the chapter on Using as an Embedded
Model in Installing Separate Receivers.
(2) If a remote control cord (sold separately) is to be used, refer to the Mounting Instructions attached to the remote control
cord.
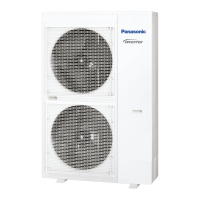
Receiver
Terminal strip for wiring
the remote control of the
indoor unit
Remote Control Cord
(Sold Separately)
White
Black
Wiring Diagram
4. Setting Address Switches
(1) Remove the face plate of the receiver’s PCB and turn the DIP switch to RUN/On (Down
wireless remote control with its Start/Stop button.
(2) During a test run, all display lamps on the display will light up.
(3) During a test run, it is not possible to adjust the temperature.
(4) After completing a test run, be absolutely sure to return the Test Run switch to OFF (Up
none of the display lamps are blinking. Also, put the face plate back in place.
5. Test Operation
(1)
This is hard on the device, so only use this for the test run.
(2)
After turning on the power, the unit will not receive any commands from the remote control for about 1 minute.
This is not an error. (In fact it does receive signals, but they are cancelled.)
(3)
Make sure to operate while the indoor unit is stopped.
(4)
The address of indoor unit is set to "ALL" at the time of the shipment.
NOTE
8-27
Sec8.indd27Sec8.indd27 2012/02/2816:14:022012/02/2816:14:02
 Loading...