1
1-44
Pattern 2
If there is an obstacle that is higher than the unit on the discharge side. (There is no limit to the height of the obstacle
above the discharge.)
• If the upper part is open
①
For separate installation location
More
than 100
More
than 300
• If there are obstacles above the unit
①
For separate installation location
• The dimensions for H, A and L are shown in the following
table.
A
L
H 100
H < L Install a pedestal or mount so that L H
• Cover the bottom part of the pedestal or mount so that air
does not go through it.
Less than 500
More than
1000
More than
300
Less than 500
■
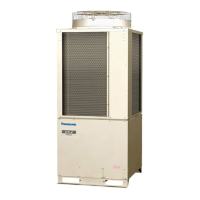
HOW TO INSTALL THE OUTDOOR UNIT
● Transporting
1. Transport the outdoor unit in its original packaging as close as possible to the installation location.
2. In the event that the unit needs to be lifted or suspended, use a rope or belt and use cloth or wood as padding to avoid damaging
the unit.
3. Use the side handles to carry the unit and be careful not to touch the fan with your hand or any objects.
● Installation
1. Read the “SELECTING THE INSTALLATION SITE” thoroughly before installing the outdoor unit.
2. When installing to a concrete or solid surface, use M10 or a W 3/8 bolts and nuts to secure the unit.
Ensure that it installed upright on a horizontal plane. (Use an anchor bolt for the installation as shown
in the diagram below.)
3. Avoid installing on the slanted roof.
4. In the even where the roof is at risk of receiving oscillations or vibrations, secure the
unit with a seismic isolating mount or vibration absorbing rubber.
5. The drain water will be discharged from the unit during heating or defrosting operation
mode.
Select an appropriate location with good drainage system. (In the winter, there is risk of
slipping due to freezing, and depending on the installation set up there is risk of drain
water running overhead.)
Please consult us if installing drain elbows.
In cold regions (where the outdoor temperature can drop to below 0° for 2 to 3
consecutive days), the drain water may freeze and may prevent the fan from
operating. For this case, do not use the drain elbow.
Less than 25
Anchor bolt length
(Unit: mm)
Less than 25
Anchor bolt length
(Unit: mm)
(Unit: mm)
(Anchor pitch)
19.5 380.5
130 39
170
220 200 160 321
620 150
(Anchor pitch)
Anchor bolt position
(Unit: mm)
(Anchor pitch)
19.5 380.5
130 39
170
220 200 160 321
620 150
(Anchor pitch)
Anchor bolt position
Sec1.indb44Sec1.indb44 2012/03/0717:30:022012/03/0717:30:02

 Loading...