Installation
28 Rev. G Nov/2015 MI3
The total sensing head cable length for all networked sensing heads must not exceed
30 m (98 ft) for MI3 and 2x30 m (2x98 ft) for MI3M!
Do not add a third party cable to extend the length of the sensing head cable!
5.3.1 Comm Box (metal)
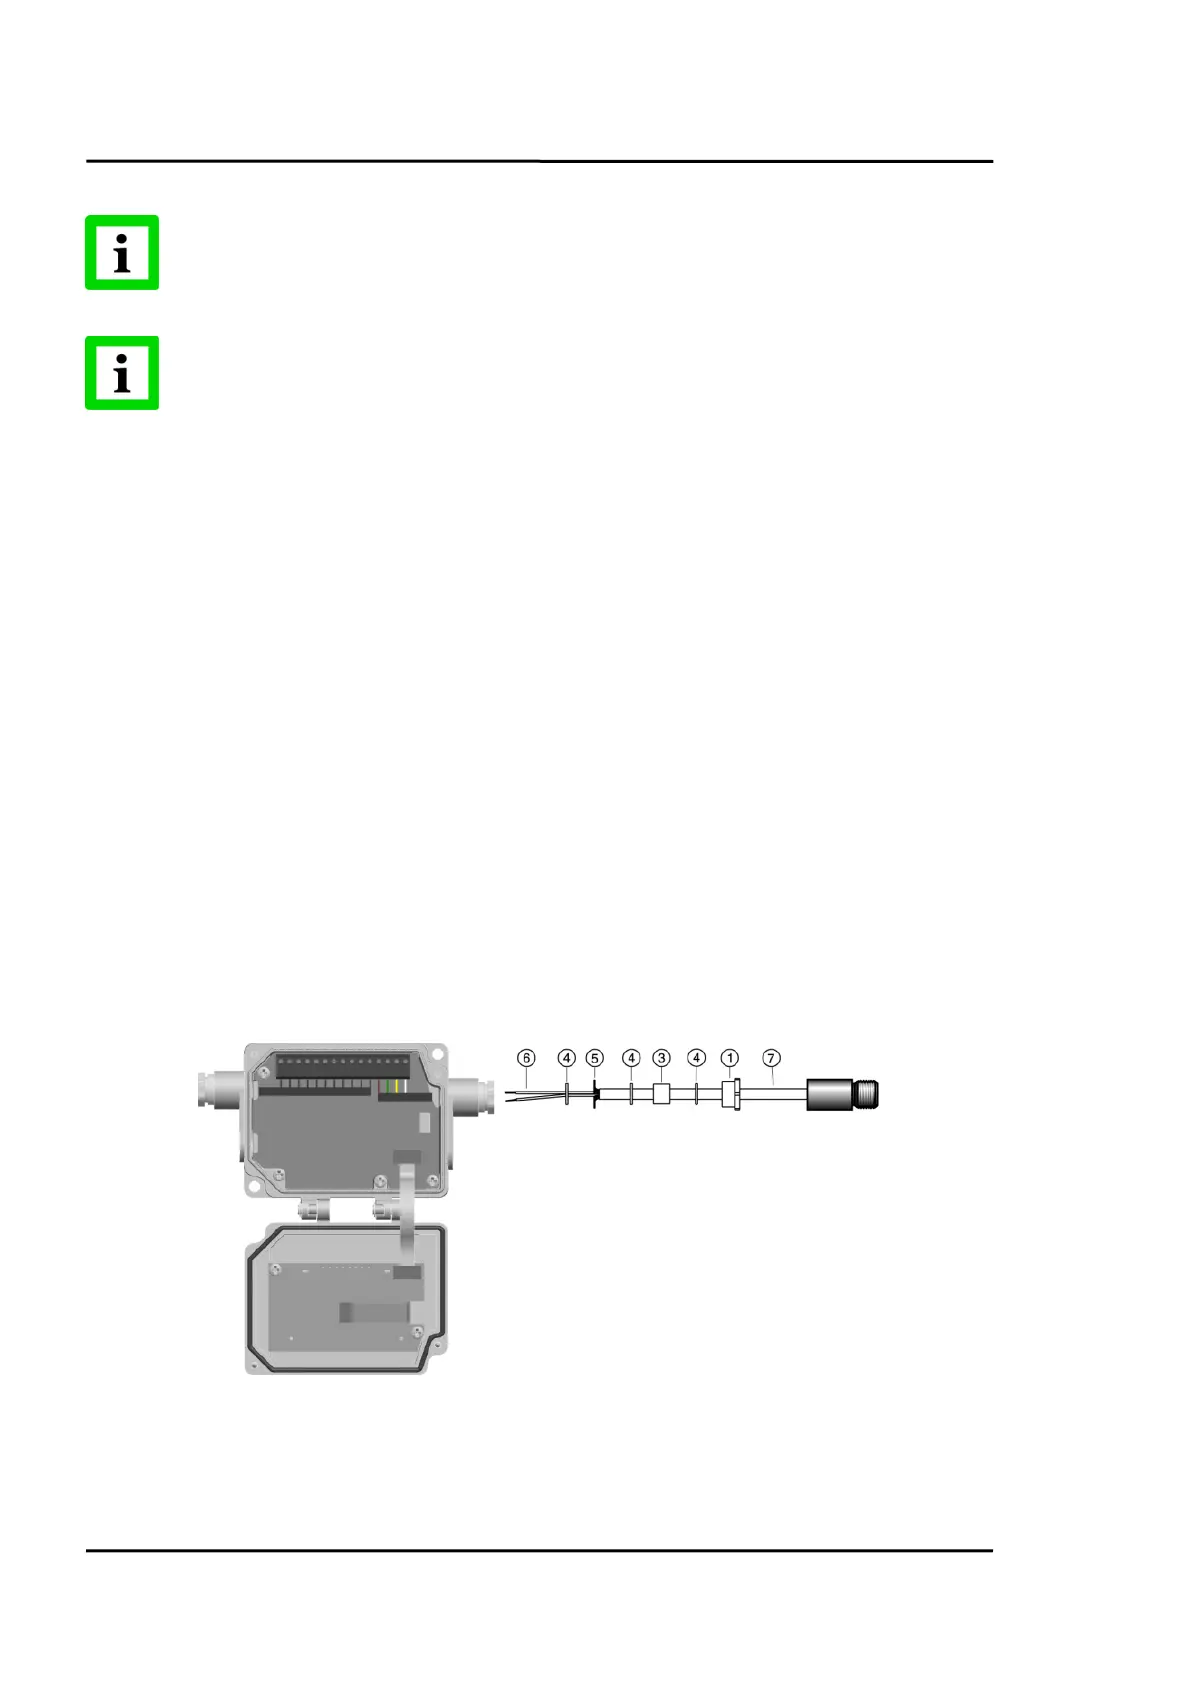
1. Cut about 40 mm (1.5 in) of the cable sheath from the end of the sensing head cable ⑦.
Caution: Do not cut into the shield!
2. Cut the shield ⑤ so about 5 mm (0.2 in) remains exposed from under the cable sheath.
Separate the shield and spread the strands out.
3. Strip 3 mm (0.12 in) of insulation from the wires ⑥!
4. Open the communication box by removing the four Phillips head screws and pulling off the
lid. Unscrew the pressure screw ①, and remove the first metal washer ④, the rubber
washer ③, and the second and the third metal washers ④.
5. Put the following on the cable: the pressure screw ①, the first metal washer ④, the rubber
washer ③ and the second metal washers ④, see the following figure.
6. Spread the cable shield ⑤ and then slip the third metal washer ④ onto the cable. Note that the
shield must make good contact to both metal washers.
7. Slip the wires ⑥ into the communication box far enough to connect to the terminal.
8. Screw the pressure screw ① into the communication box. Tighten snuggly. Do not over
tighten.
9. Connect the wires ⑥ to the terminal on the printed circuit board.
Figure 13: Sensing Head Cable to the Comm Box
 Loading...