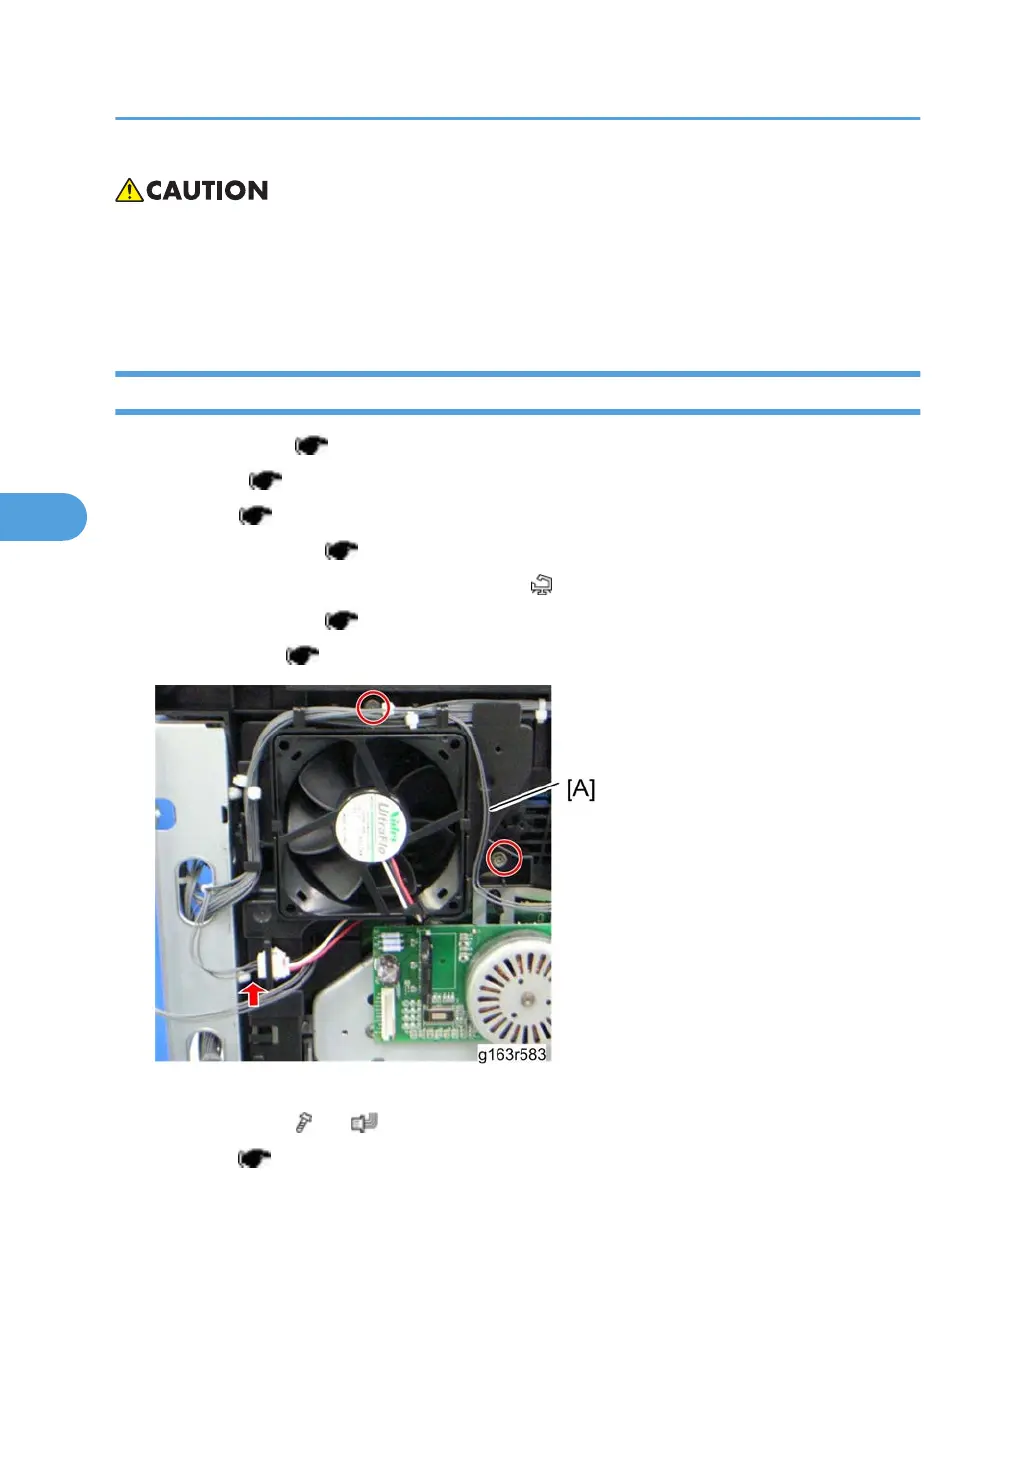
• Install the LSU fan motor, orienting it as shown in above photo, with its decal facing the outside of
the machine.
•
When reinstalling the LSU fan motor, make sure that its cable is oriented as shown above and that
the decal is visible. (If the decal is not visible, the motor is installed backwards.)
ID Chip Board
1. Operation panel ( p.26)
2.
Rear cover (
p.25)
3.
Left cover (
p.27)
4.
Controller box cover (
p.76 "Controller Board")
5.
Disconnect the connector (CN308) on the EGB (
x 1).
6.
Interlock switch base (
p.81 "Interlock Switches")
7.
Fusing fan base (
p.82 "Fusing Fan Motor")
8. Take the harnesses aside around the LSU fan base [A].
9.
LSU fan base [A] (
x 2, x 1)
10.
Drive unit (
p.36)
4. Replacement and Adjustment
84
 Loading...