Procedure
1. Undo the six screws ③ and open the door of the wall-mounted device.
2. Remove the shield plate ④ on the right side panel. To do this, loosen the screws.
3. Unscrew the union nut of the cable gland ⑤.
4. Insert the connecting cable through the cable gland ⑤.
5. Press the wire end ferrules onto the ends of the wires. Then connect the wires of the
connecting cable to the IEC connector ② at the marked position. Make sure that the power
supply and PE conductor connections are correct!
Tighten the screws to the appliance plug with a torque of
– 0.5Nm at the terminals
– 0.3Nm at the strain relief and the connector housing.
6. Connect the appliance plug ② to the power supply unit ①.
7. In case of operation with type of explosion protection Ex py or Ex ec: Place the supplied
guard bracket ⑦ over the IEC connector ② and screw it to the enclosure. The torque is
2.5Nm.
8. Fasten the connecting cable in the cable gland ⑤. To do this, tighten the union nut with a
torque of 4,5 Nm for plastic glands and 9 Nm for metal glands (see Cable glands (Page91)).
9. Place the shield plate ④ back into the wall-mounted device and fasten it with screws. The
torque is 2.0Nm.
10.Close the door of the wall-mounted device and tighten the six screws ③ again with a torque
of 2.0Nm.
11.Connect the device to the equipotential bonding ⑥. To do this, connect the ring cable lug
with spring washer to the threaded bolt M5 with a torque of 5.0Nm.
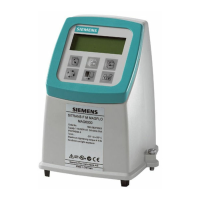
4.7.4 Connecting the signal cables
4.7.4.1 Permitted signal cables
The following cable cross-sections for use as signal cables must be met for the terminals:
• Solid conductor 0.08 … 2.5mm² (28 … 12AWG)
• Finely-stranded conductor 0.08 … 2.5mm² (28 … 12AWG)
• Finely-stranded conductor; with end sleeve with plastic collar 0.25 … 1.5mm² (23 … 16
AWG)
• Finely-stranded conductor; with end sleeve without plastic collar 0.25 … 2.5 mm² (23 … 12
AWG)
Note
The stripped length should be 5 … 6mm (0.2 … 0.24").
Connecting
4.7Connecting the wall-mounted device
SIPROCESS GA700 rack and wall mounted devices
Compact Operating Instructions, 06/2023, A5E35134047-AB 61
 Loading...