2-13. AC Inlet
Preparation
1. Remove the top cover. (Refer to “2-2. Top Cover”.)
2. Remove the optical multi fiber cable. (Refer to “2-4. Optical Multi Fiber Cable”.)
3. Remove the DC fan (60 square). (Refer to “2-10. DC Fan (60 Square)”.)
4. Remove the duct top and duct rear. (Refer to steps 1 and 2 in “2-12-1. Power Assembly”.)
Procedure
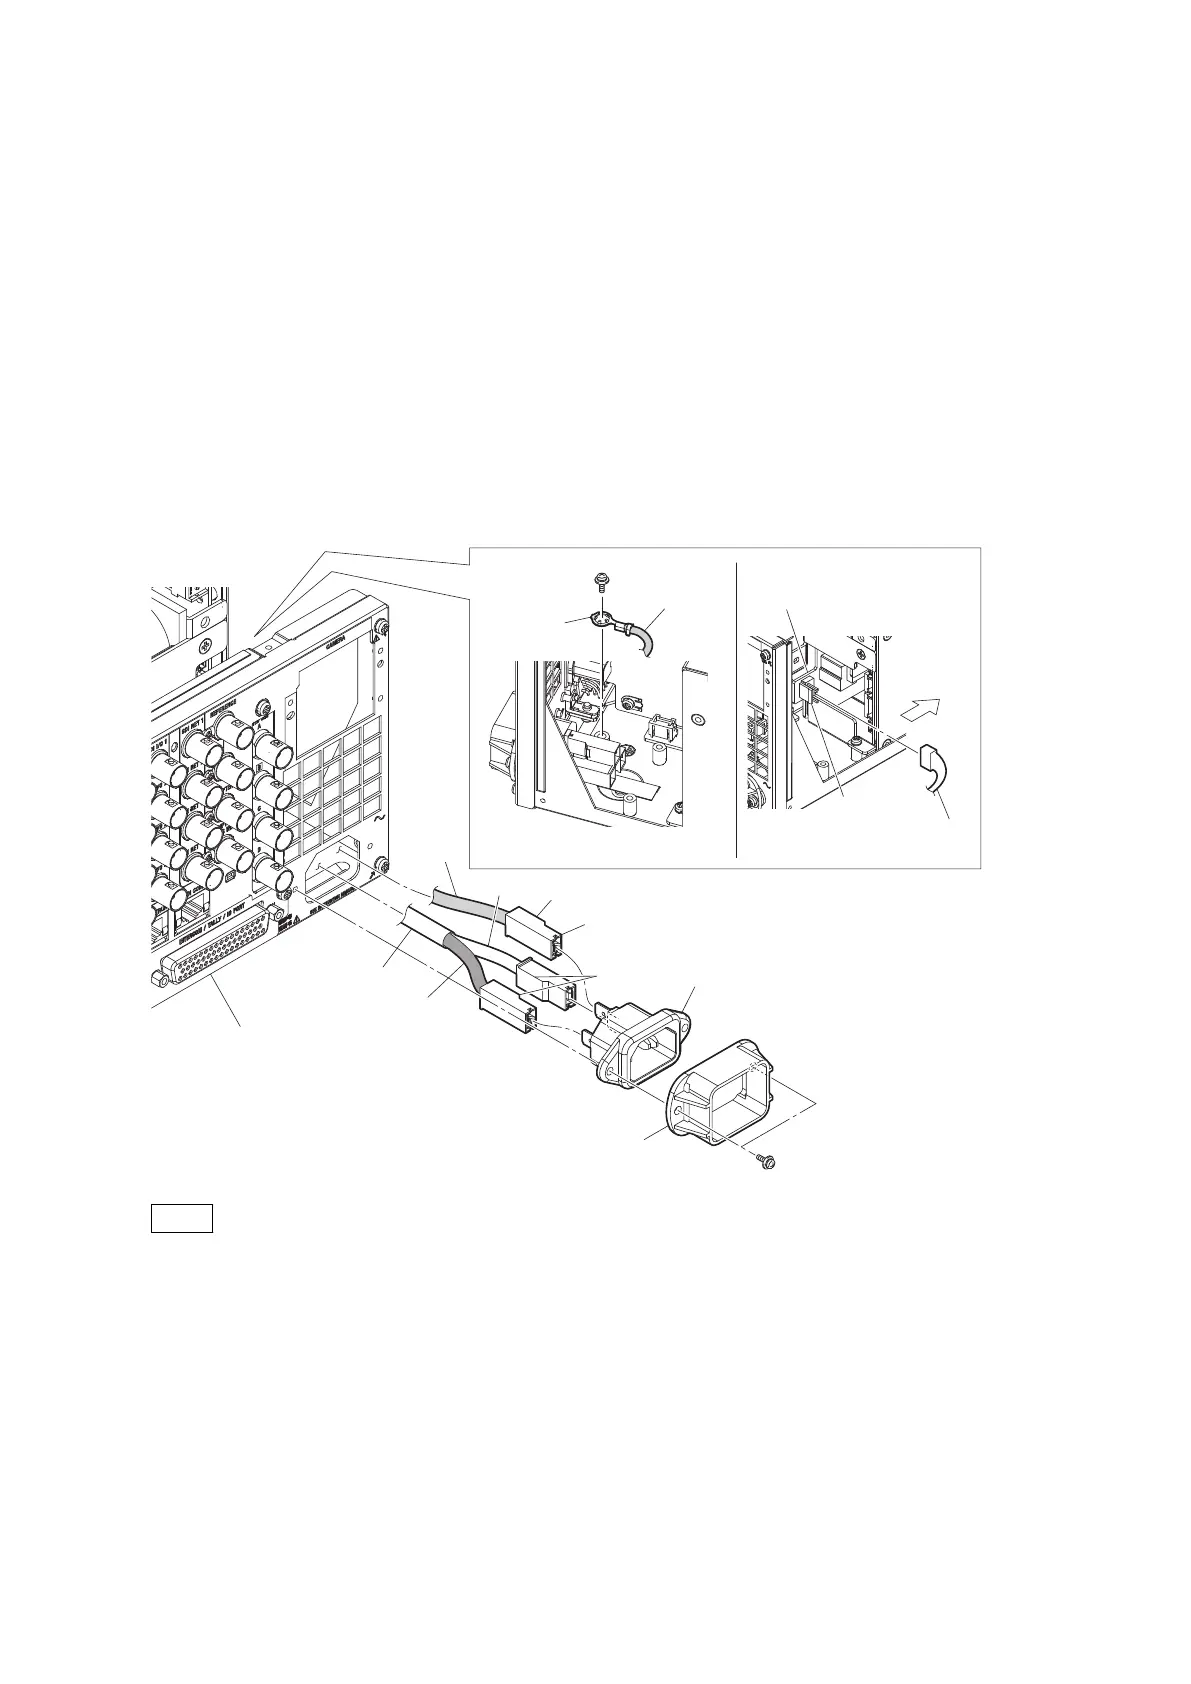
1. Disconnect the AC-IN harness from the connector (CN102) on the PS-939 board.
2. Remove the screw (PSW4 x 8), and then remove the earth lug terminal.
3. Remove the two screws (PSW3 x 10), and then remove the plug holder (A).
4. Pull out the AC inlet from the hole of the rear panel.
5. Disconnect the AC harness and earth harness from the AC inlet.
PSW
3 x 10
PSW
4 x 8
Front side
AC-IN harness
Earth
harness
Rear panel
AC-IN harness
Brown
White
Green
Earth harness
Convex
portions
Convex portion
AC inlet
Plug holder (A)
Earth lug
terminal
PS-939 board
CN102
Note
When installing harnesses in the AC inlet, pay attention to the following.
• Insert the three harness terminals into the AC inlet terminal with the wire color and convex part's direction
shown in the figure.
• Insert until the harness terminals are locked.
6. Install the removed parts by reversing the steps of removal.
HDCU3500/HDCU5500
2-33
 Loading...