Trigger setups
Set up trigger controls (A event tab)
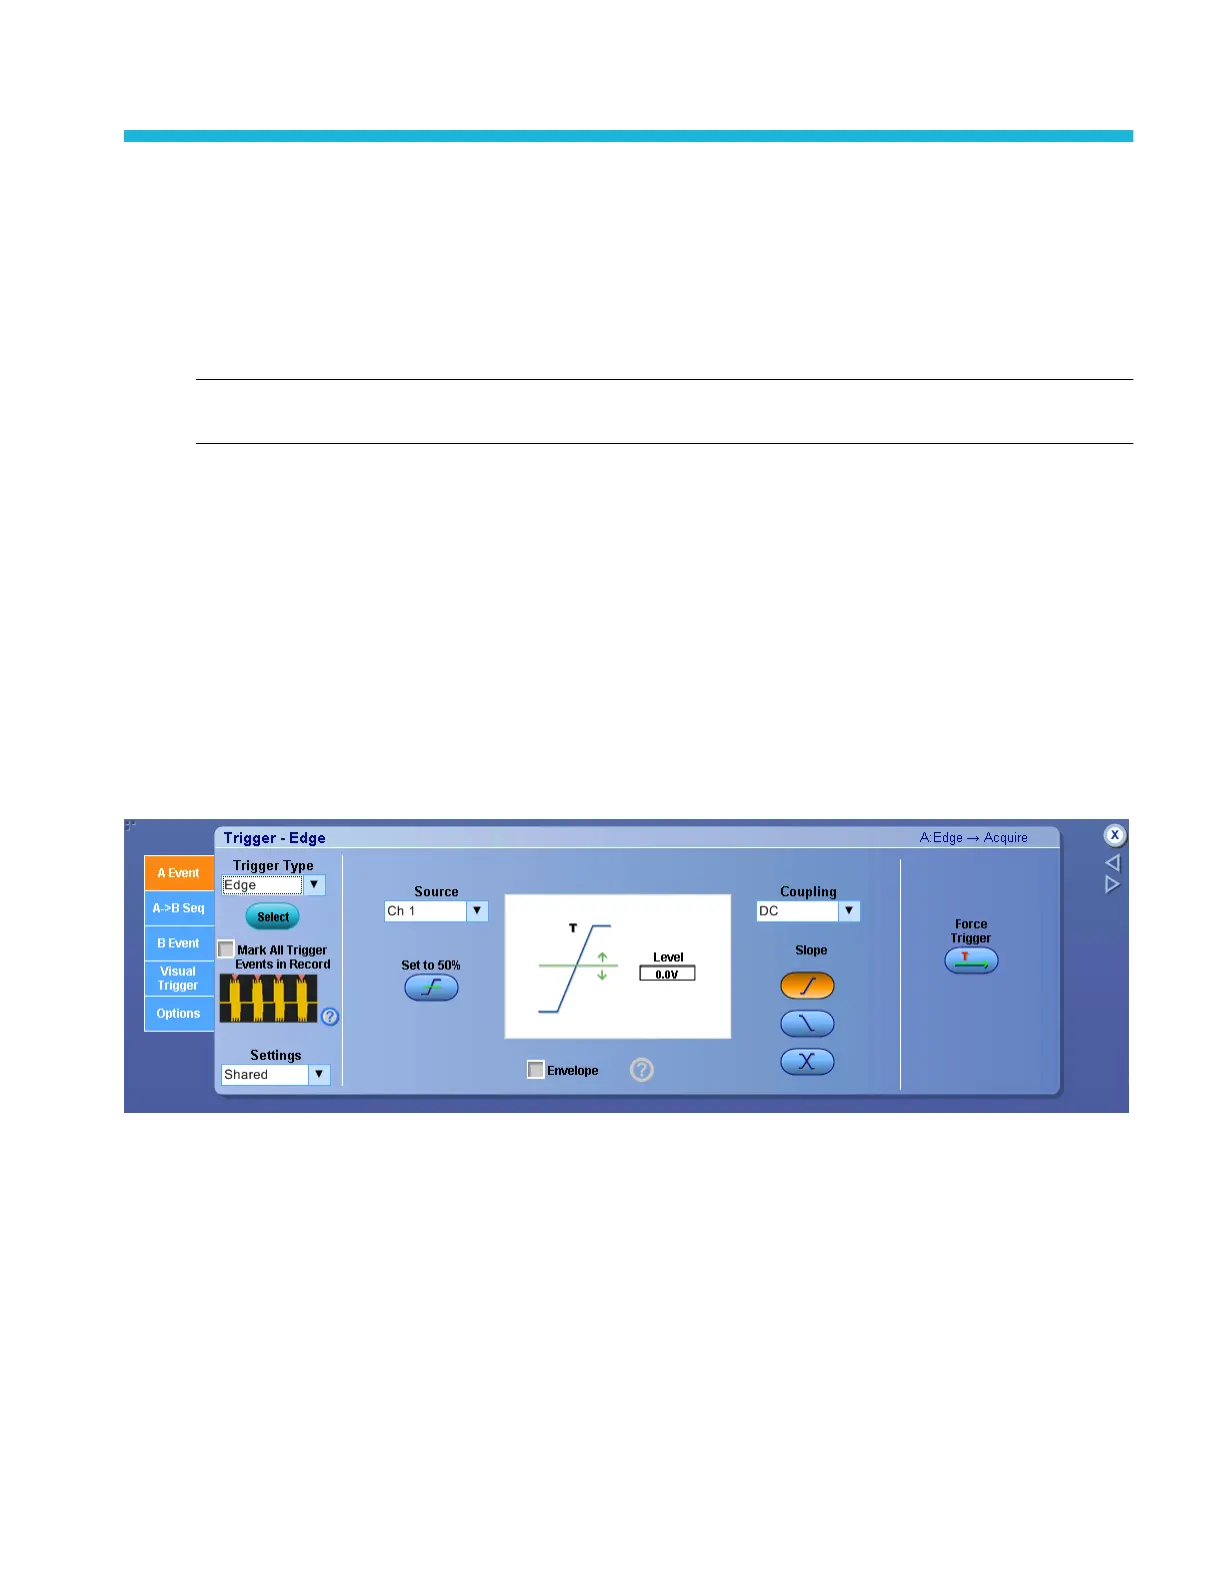
From the Trig menu, select A Event (Main) Trigger Setup.
NOTE. This online help documents features and options available for several instrument models. Your instrument may not have
every feature discussed in this online help, depending on its configuration.
To use
Use the Trigger Setup control window to set up the instrument to trigger on live waveforms.
For information on the controls, click the buttons.
■
Trigger Summary
■
A -> B (Delay)
■
A->B (No Delay)
■
B Event
■
Options
Behavior
This control window sets up the main trigger type, also known as the A Event trigger. When you click on the controls, the trigger
graphic displays a visual indicator of the trigger criteria. Depending on the trigger type, the instrument will update the graphic as
you define the trigger parameters.
The trigger expression near the top right side of the Trigger window provides a one-line summary of the conditions that must be
fulfilled before the instrument will trigger.
The trigger event establishes the time-zero point in the waveform record. All points in the record are located in time with respect
to the time-zero point. The instrument continuously acquires and retains sample points to fill the pretrigger portion of the
waveform record. When a trigger event occurs, the instrument starts acquiring samples to build the posttrigger portion of the
waveform record. Once a trigger is recognized, the instrument will not accept another trigger until the acquisition is complete and
the holdoff time has passed.
DPO70000SX, MSO/DPO70000DX, MSO/DPO70000C, DPO7000C, and MSO/DPO5000B Series 377
 Loading...