Rev. 000
Wheel Motor Installation
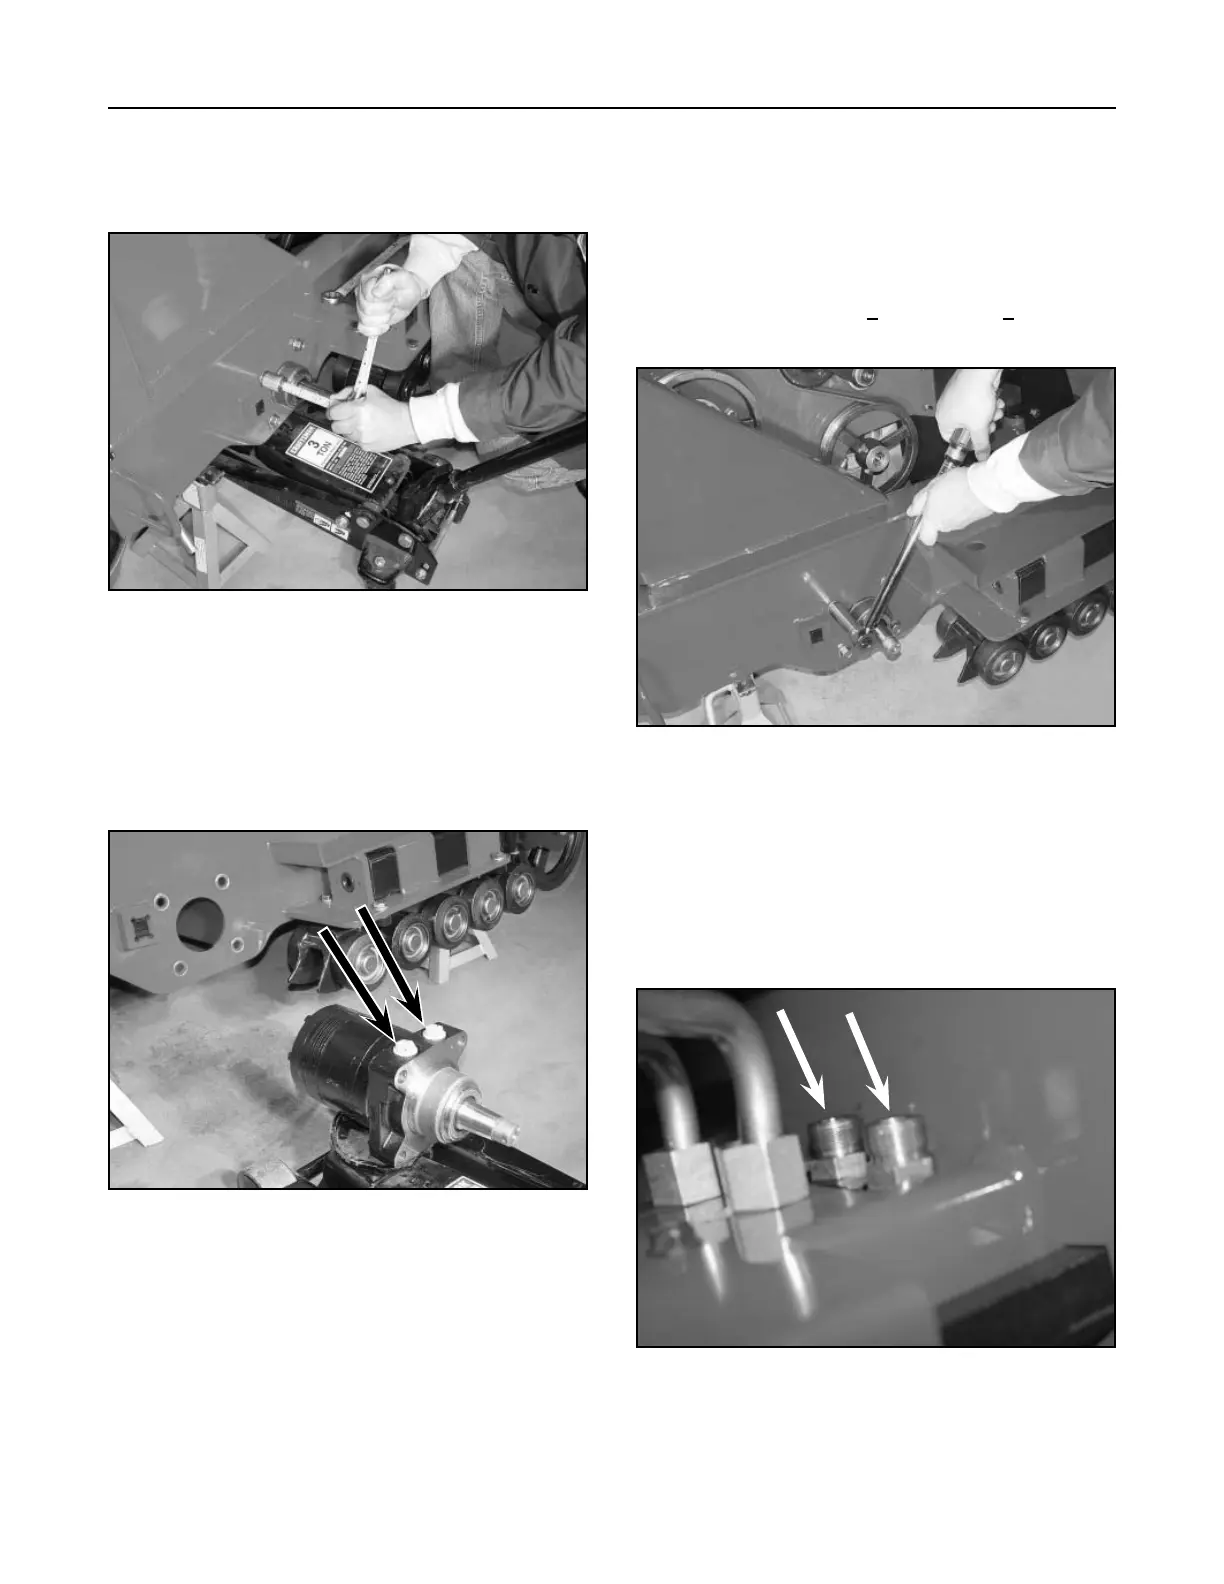
1. Position the wheel motor on a hydraulic floor
jack with the hydraulic line ports facing up. Slide
the wheel motor under the frame and raise
into the frame opening. Apply medium strength
threadlocking material to the mounting bolts and
torque the bolts to 75 + 8 ft-lbs. (102 + 11 Nm)
(Fig. 483).
Figure 483 DSC-0848
2. Remove the protective caps from the two open
ports.
Note: Before installing the hydraulic fittings,
replace the O-rings.
Install the two hydraulic fittings (Fig. 484).
Figure 484 DSC-0846
DRIVE SYSTEM
11. Install a hydraulic floor jack under the wheel
motor. Remove the 4 wheel motor mounting bolts
(Fig. 481).
Figure 481 DSC-0843
12. Before removing the wheel motor, install a
protective cap in the two open ports. Slide the
wheel motor inward from the frame until the
wheel motor shaft clears the frame and lower the
motor (Fig. 482).
Figure 482 DSC-0847
8-18
TX 413 Service Manual
Wheel Motors
For wheel motor service, refer to the Parker-Ross TF
wheel motor service manual (Toro P/N 492-4753).

 Loading...


