DisassemblingtheControlConsole
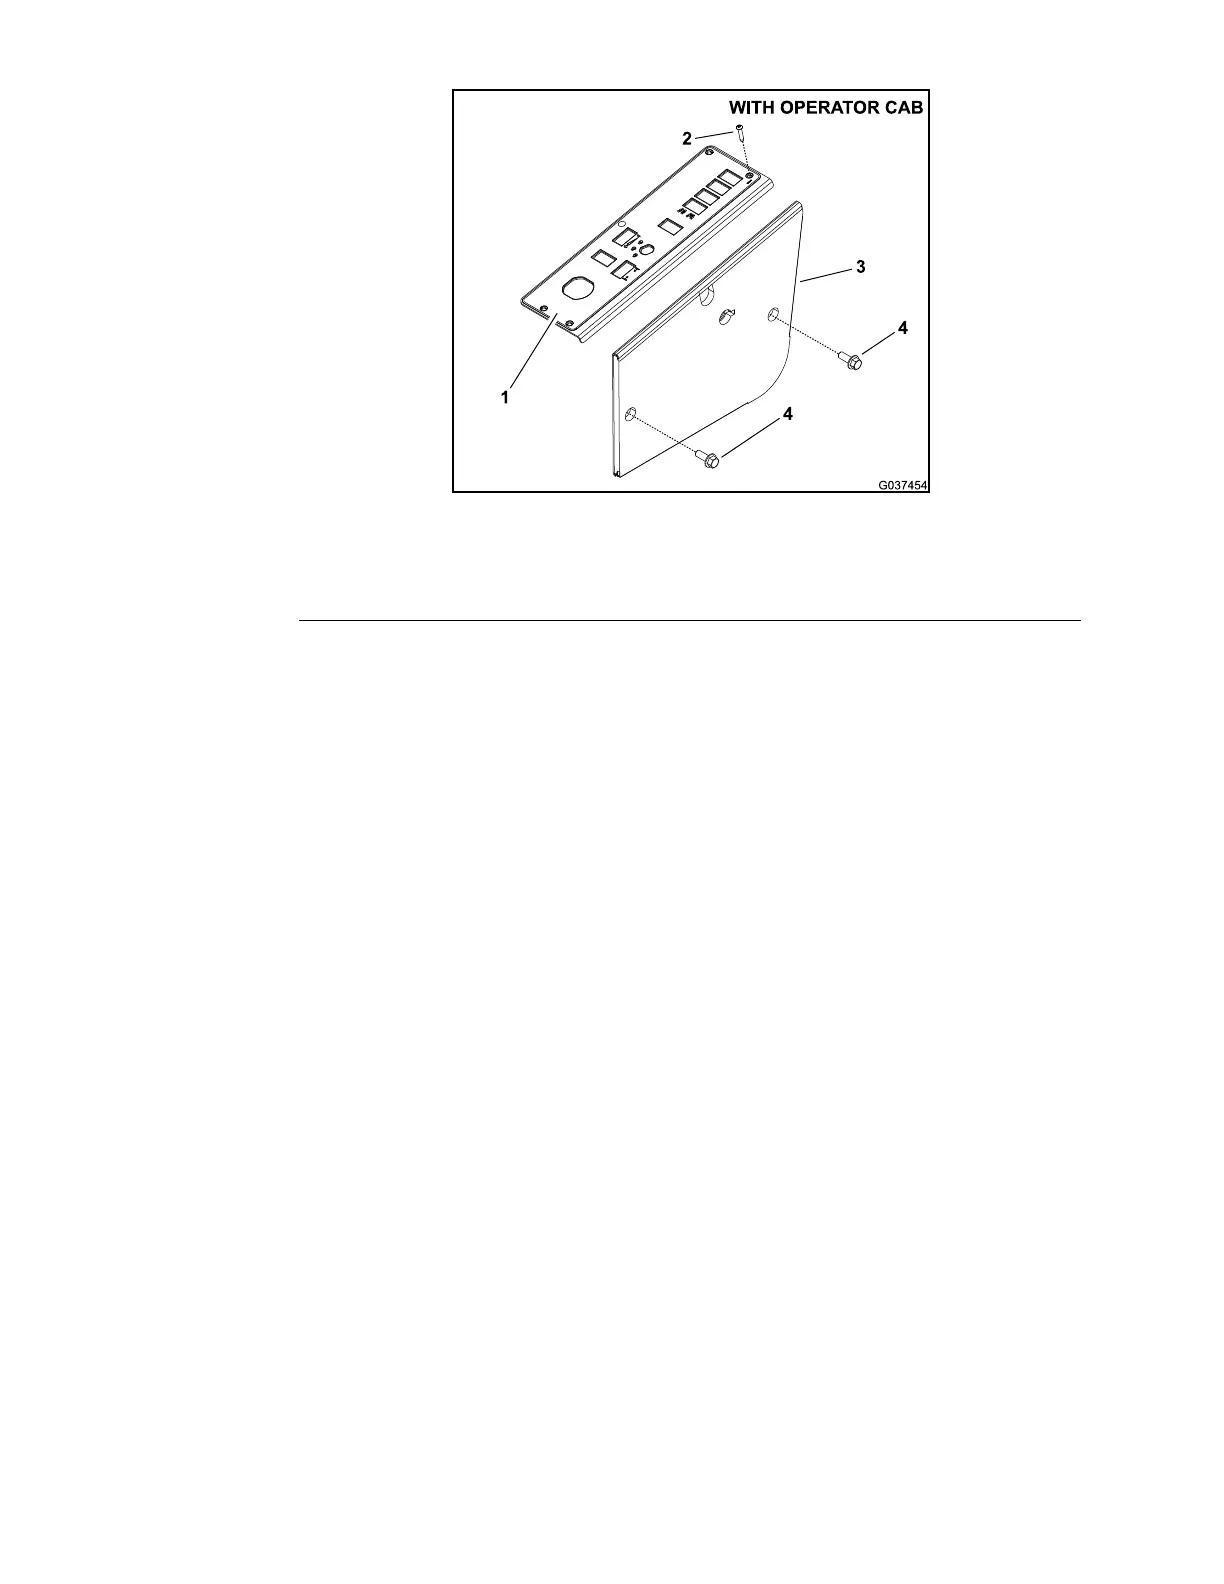
g037454
Figure294
1.Controlpanel
3.Accesspanel
2.Button-headtorxscrew(5each)4.Screw(2each)
1.Parkthemachineonalevelsurface,lowerthecuttingdeck,settheparking
brake,shutofftheengine,andremovethekeyfromthekeyswitch.
2.Disconnectthebatterycablesfromthebattery.Removethenegativebattery
cableandthenremovethepositivecable;refertoServicingtheBattery
(page5–110).
3.Removethe5screwsthatsecurethecontrolpaneltothemachine.
4.Onmachineswithanoperatorcab,removethe2screwsthatsecurethe
accesspanelandthenremovetheaccesspanel(Figure294).
5.Carefullyliftandsupportthecontrolpaneltogetaccesstotheelectrical
connections.
6.Forassemblypurposes,labelallthewireharnessconnectors.
7.Disconnectthewireharnessconnectorsfromalltheelectricalcomponents
onthecontrolpanel.
8.Removethecontrolpanelfromthemachine.
9.Ifnecessary,removethehydraulictankcoverasshowninFigure293.
AssemblingtheControlConsole
1.Ifthehydraulictankcoverwasremoved,installthehydraulictankcoveras
showninFigure293.
2.Usethelabelsthatyouattachedduringdisassemblytoconnectthewire
harnessconnectorstothecomponentsonthecontrolpanel.
3.Onmachineswithanoperatorcab,positiontheaccesspanelinplaceand
securewiththe2screws(Figure294).
4.Positionthecontrolpanelonthehydraulictankcoverandsecurethecontrol
panelwiththe5screws(Figure293).
5.Connectthebatterycablestothebattery.Connectthepositivecableand
thenconnectthenegativecable;refertoServicingtheBattery(page5–110).
Chassis:ServiceandRepairs
Page6–54
Groundsmaster360
16225SLRevC
 Loading...


