Versal ACAP Configuration
The Versal XCVC1902 ACAP boot process is described in the “Plaorm Boot, Control, and
Status” secon of the Versal ACAP Technical Reference Manual (AM011). The VCK190 board
supports a subset of the modes documented in the technical reference manual via onboard and
daughter card boot opons. The mode DIP switch SW1 conguraon opon sengs are listed in
the following table.
Table 5: Mode Switch SW1 Configuration Option Settings
Boot Mode
Mode Pins
[3:0]
2
Mode SW1 [4:1]
2
Comments
JTAG 0000
1, 3
ON, ON, ON, ON Supported with or without boot module attached
QSPI32 0010 ON, ON, OFF, ON
Supported only with boot module X-EBM-01 attached
Supports x1, x2, x4, and dual-parallel x8
SD1_3.0 1110 OFF, OFF, OFF, ON Supported with or without boot module attached
Notes:
1. Default switch setting.
2. Mode DIP SW1 poles [4:1] correspond to U1 XCVC1902 MODE[3:0].
3. Mode DIP SW1 individual switches ON=LOW (p/d to GND)=0, OFF=HIGH (p/u to VCCO)=1.
JTAG
The Vivado
®
, XilinxSDK, or third-party tools can establish a JTAG connecon to the Versal ACAP
in the two ways described here:
• FTDI FT4232 USB-to-JTAG/USB-UART device (U20) connected to USB 3.1 type-C connector
(J207), which requires:
○ Set boot mode SW1 for JTAG as indicated in the "Mode Switch SW1 Conguraon Opon
Sengs" table in Versal ACAP Conguraon
○ Set 2-pole DIP SW3[1:2] set to 01 (ON, OFF) for JTAG MUX channel 2 FT4232 U20 bridge
○ On the 3-pin JTAG MUX, enable header J37 (2-pin jumper block installed on pins 2-3) to
enable the JTAG MUX
○ Power-cycle the VCK190 board or press the power-on reset (POR) pushbuon (SW2)
(SW2 is callout 46 in the "Evaluaon Board Component Locaons" gure in Board
Component Locaon)
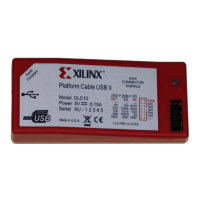
• JTAG pod at cable connector J36 (2 mm 2x7 shrouded/keyed), which requires:
○ Set boot mode SW1 for JTAG as indicated in the "Mode Switch SW1 Conguraon Opon
Sengs" table in Versal ACAP Conguraon
○ On the 3-pin JTAG MUX, enable header J37 (2-pin jumper block installed on pins 1-2) to
inhibit the JTAG MUX (hi-Z mode)
Chapter 2: Board Setup and Configuration
UG1366 (v1.0) January 7, 2021 www.xilinx.com
VCK190 Board User Guide 21
 Loading...
