Administrator’s Guide for Yealink Video Conferencing Systems
36
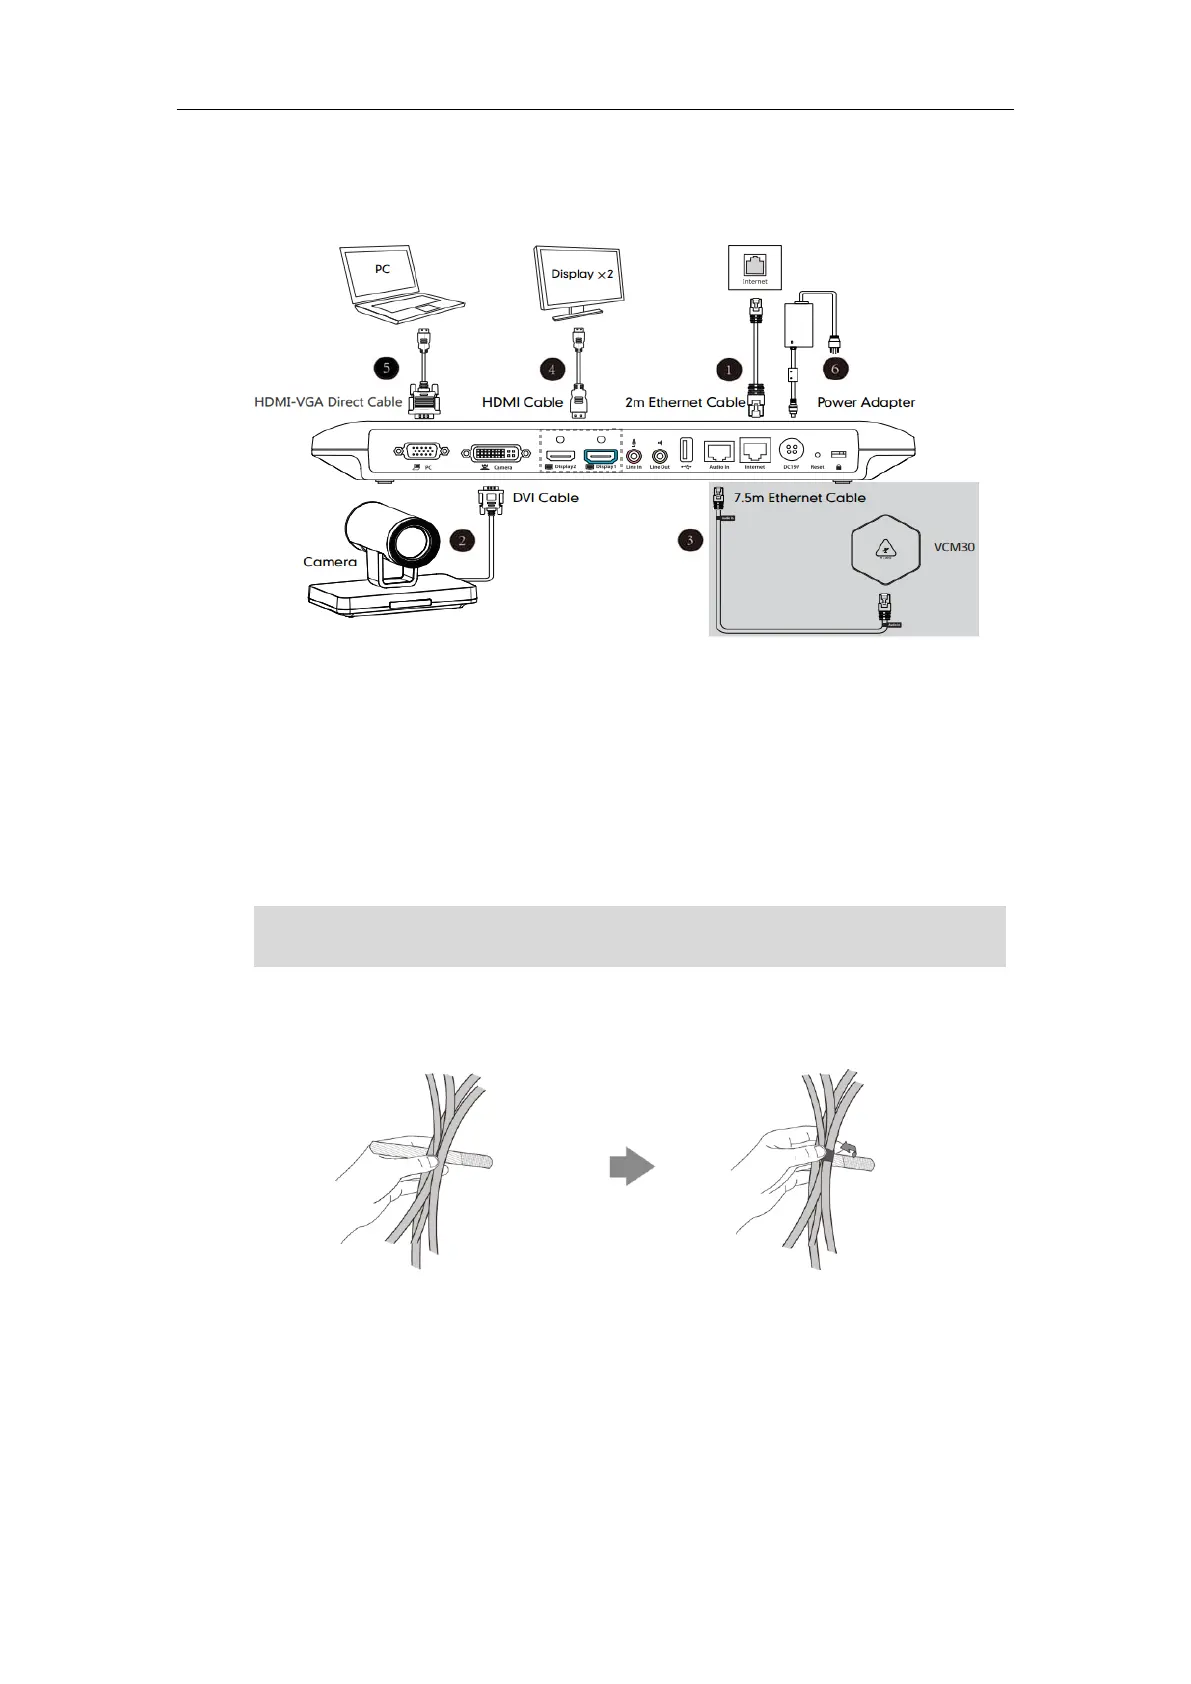
- Connect it to the Audio Out port on the VCM30 video conferencing microphone array
with the 7.5m Ethernet cable that labeled Audio In.
5. Locate the Display1 port on the VC120 Codec, and connect it to the HDMI port on the
display device with the supplied HDMI cable (Make sure the display device is powered on)
6. (Optional.) Locate the PC port of the VC120 Codec and connect it to the HDMI port on the
PC with the supplied HDMI-VGA direct cable for sharing content.
7. Connect the DC19V port on the VC120 Codec to an AC power outlet with the supplied
power adapter and power cord.
Note
You can fasten all cables with cable ties after all devices are connected.
Installing the Camera
You can choose to mount the camera on your TV or a wall, depending on your actual needs.
The VC120 video conferencing system should be used with Yealink original power adapter
(19V/3.42A) only. The use of the third-party power adapter may cause the damage to the system.
 Loading...