<11. Inspection and Maintenance>
11-6
IM 11M12A01-04E 11th Edition : Jul. 19, 2017-00
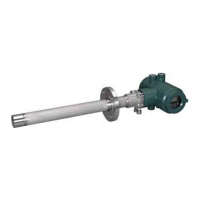
Replacement of heater assembly
Refer to Figure 11.4 as an aid in the following discussion.
Remove U-shaped pipe support
4
, U-shaped pipe
5
, Filter and the sensor (cell)
6
, following
Section 11.1.2, earlier in this manual.
Remove the two screws
15
that tighten the cover
12
and slide it to the ange side. Remove the
four bolts
10
to remove the converter
16
. Then remove the three connectors to which leadwire
from the heater and thermocouple is connected.
Loosen screw
19
until heater assembly
23
plate can be removed. There’s no need to remove
O-ring
18
which prevents screw
19
from dropping out. Pull out connector
13
. Loosen and
remove the screw for the heater assembly xation
8
with a special wrench (part no. K9470BX or
equivalent) and then remove the heater assembly
23
from the detector
24
.
To reassemble the heater assembly, reverse the above procedure:
Insert the heater assembly
23
into the detector
24
, while inserting the calibration pipe in the
detector
24
into the heater section in the heater assembly
23
as well as in the bracket hole. Coat
the screw for the heater assembly xation
8
with grease (Never-Seez: G7067ZA) and tighten
the screw for the heater assembly xation
8
with a special tool (part no. K9470BX or equivalent)
with a tightening torque of 12N·m ± 10%.
Next, to install the O-rings
22
on the calibration-gas and reference-gas pipes, disassemble the
connector
13
in the following procedure:
First, remove the screw
25
and then remove the plate
17
and two caps
20
. If the O-ring
22
remains in the hole, pull them out from the back. Pass the heater and thermocouple leadwire
through the connector
13
. Also, pass the calibration gas and reference gas pipes through the
opening of the connector
13
. If the O-ring
22
fails, replace it with a new one.
Push the two caps
20
into the associated opening of the connector
13
. Insert the plate
17
,
aligning it with the groove of the cap
20
, and tighten it with the screw
25
. If you attempt to insert
the calibration gas and reference gas pipes into the connector
13
without disassembling the
connector
13
, the O-ring may be damaged. Tighten screw
19
in the heater assembly
23
until
connector
13
can’t move.
Reassemble in reverse order to the above disassembly procedure.
When installing the cell assembly
6
, replace the metal O-ring
7
with a new one.
11.1.4 Replacement of Dust Filter
Set the dust lter
1
in place using a special pin spanner (with a pin 4.5 mm in diameter: part no.
K9471UX or equivalent). If a dust lter that has already been replaced once is used again, apply
grease (Never-Seez: G7067ZA) to the threads of the dust lter.
11.1.5 Replacement of O-ring
The detector uses three different types of O-rings
14
,
24
, and
22
. One O-ring alone
14
, or two
O-rings
21
and
22
are used. (For a pressure compensating model, two O-rings are used for
individual uses. Two O-rings
21
and
22
are used for reference gas sealing and require periodic
replacement.
Part No. Description
(7) K9470BJ Metal O-ring
(14) K9470ZS O-ring with grease
(21)
(22)
K9470ZP Two pairs of O-rings with grease
 Loading...