<3. Installation>
3-4
IM 11M12A01-04E 11th Edition : Jul. 19, 2017-00
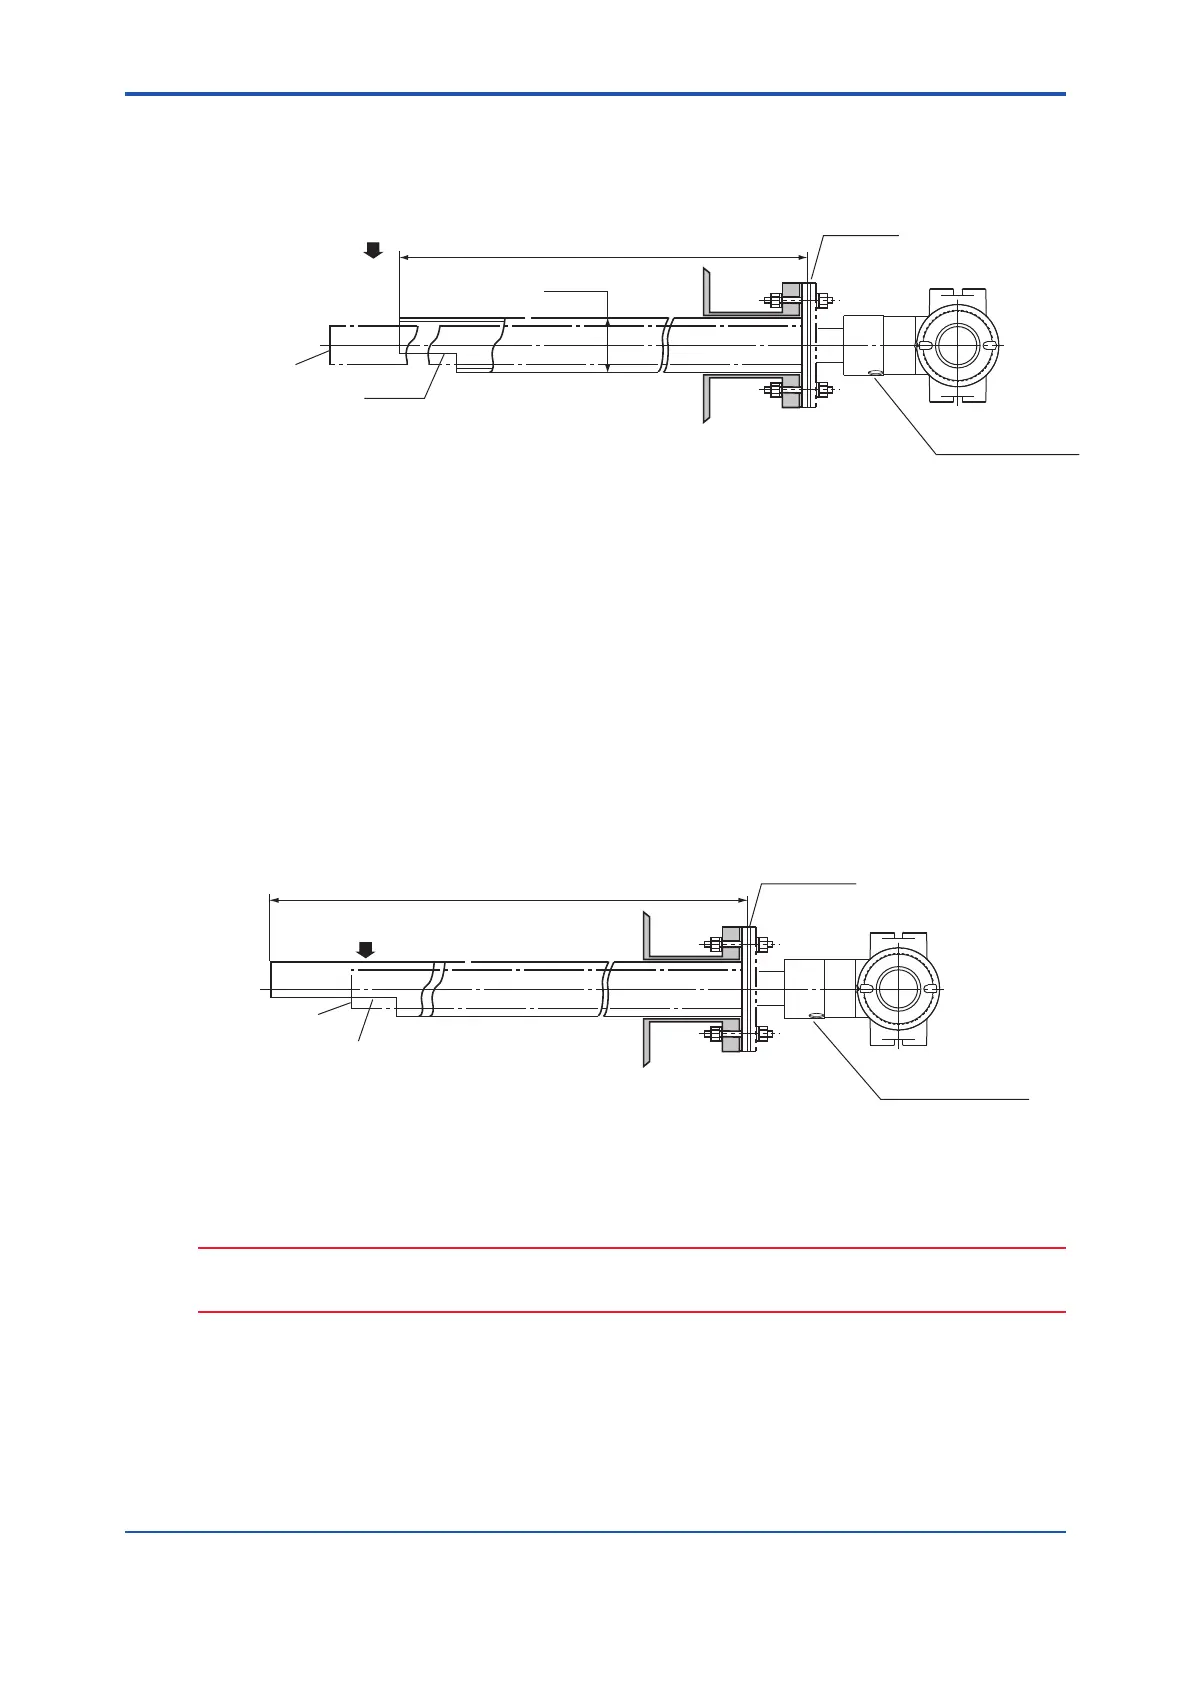
(2) Make sure that the sensor assembly mounting screws (four bolts) at the probe tip are not
loose.
(3) Mount the detector so that the calibration/reference gas inlet faces downward.
2050
Ø60.5
Notch
F3103E.ai
Gasket (t1.5)
Calibration gas inlet
Reference gas inlet
Direction of the sample gas flow
Detector top
Figure 3.4 Probe protector (supporting the mounting strength)
<Detector with a probe protector (Model ZO21R-L-- *B for dust wear protect>
The detector is used with a probe protector to prevent the sensor from being worn by dust
particles when there is a high concentration of dust and gas ow exceeds 10 m/sec (ne-carbon
boiler or uid-bed furnace).
(1) Put the gasket that is provided by user between the anges, and mount the probe protector
in the probe insertion hole. The probe protector should be installed so that the notch comes
to the downstream of the sample gas ow.
(2) Make sure that the sensor assembly mounting screws (four bolts) at the probe tip are not
loose.
(3) Where the detector is mounted horizontally, the calibration/reference gas inlet should face
downward.
Direction of the sample gas flow
Mount the protector so that the notch
is on the downstream side of gas flow.
F3104E.ai
1050,1550, 2050
Gasket (t1.5)
Detector top
Calibration gas inlet
Reference gas inlet
Figure 3.5 Mounting of detector with a probe protector (Dust wear protect)
CAUTION
When the probe protector is used in the ZR202G with pressure compensation (-P), instrument air
leaking from the probe protector may affect the measured value.
3.1.4 Installation of ZH21B Dust Protector
(1) Put the gasket that is provided by the user between the anges and mount the dust
protector in the probe insertion hole.
(2) Make sure that the cell assembly mounting screws (four) at the probe tip are not loose.
 Loading...