Steps
1. Power on the system.
2. To enter the System Setup, press F2.
3. Click Service Tag Settings.
4. Enter the service tag.
NOTE: You can enter the service tag only when the Service Tag field is empty. Ensure that you enter the correct
service tag. Once the service tag is entered, it cannot be updated or changed. Incorrectly entered service tag will lead to
system board replacement.
5. Click OK.
LOM card and rear I/O board
Removing the LOM card and rear I/O board
Prerequisites
1. Follow the safety guidelines listed in the Safety instructions.
2. Follow the procedure listed in the Before working inside your system.
3. Remove the system board.
Steps
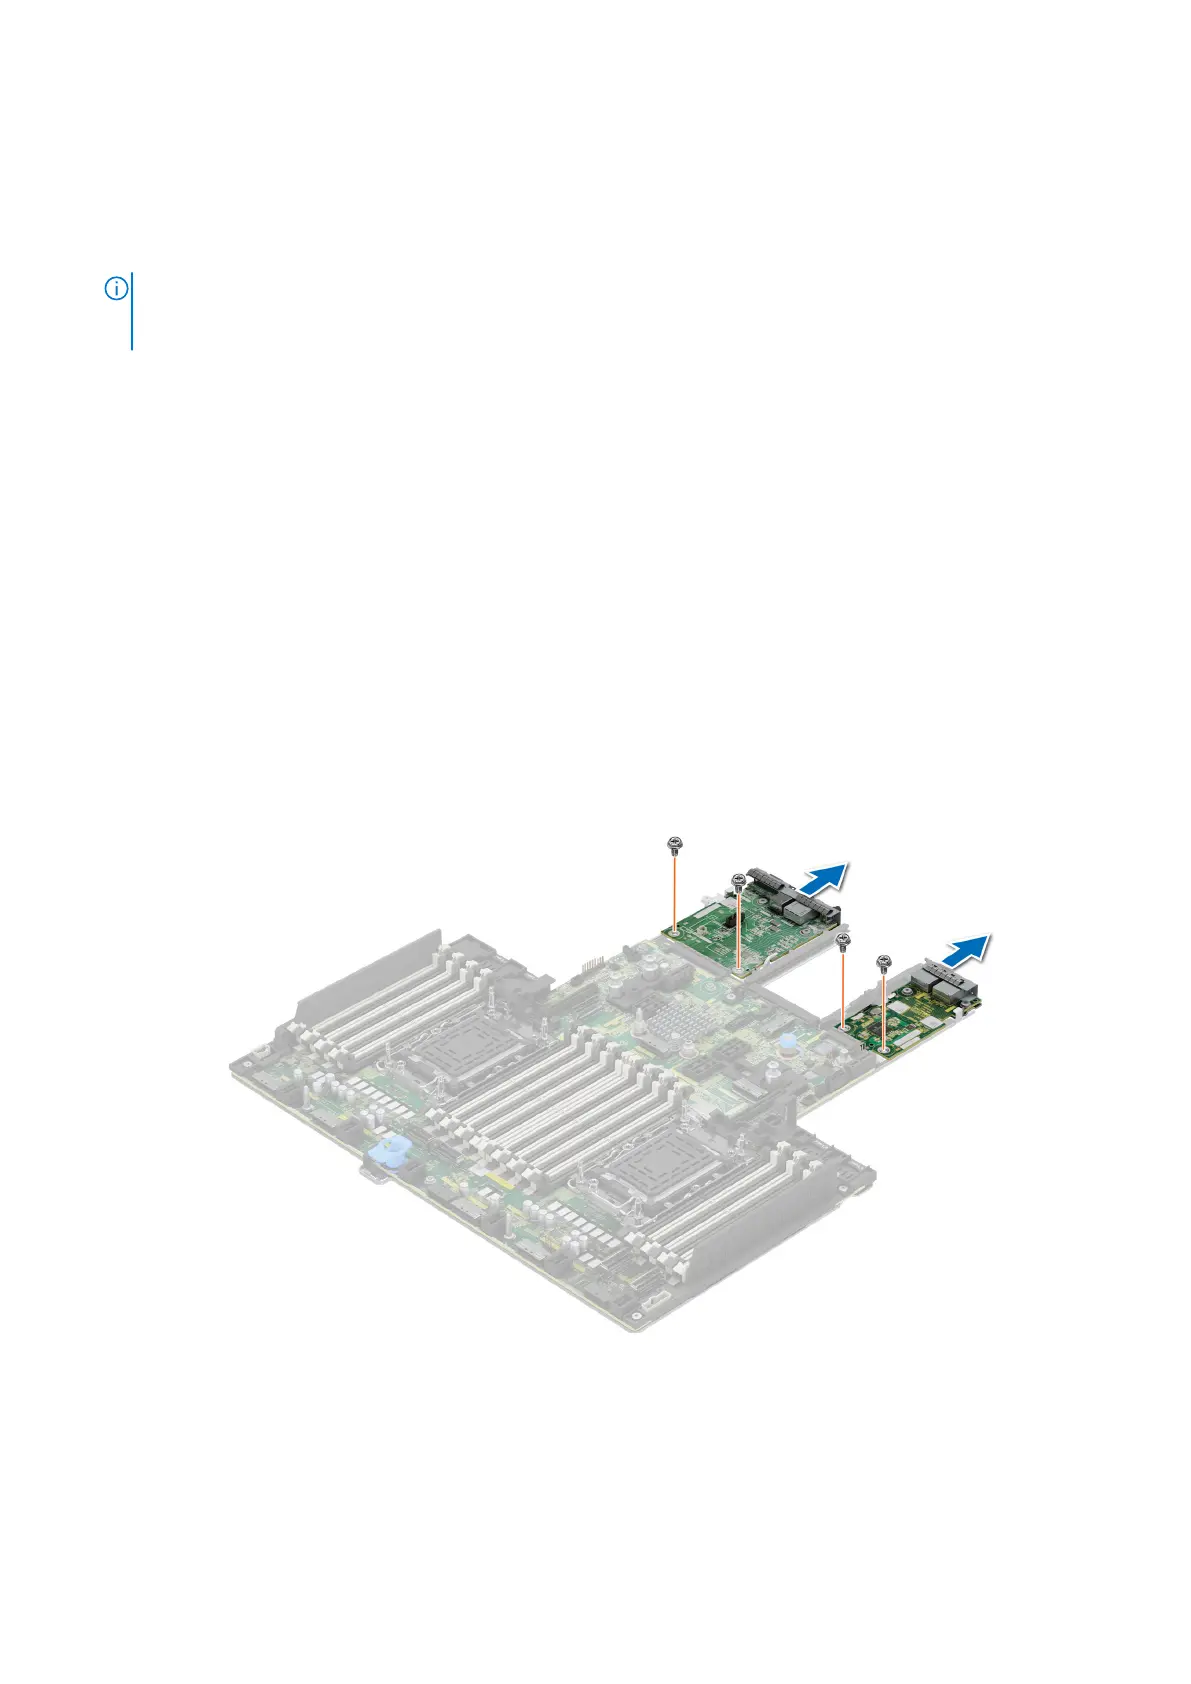
1. Using a Phillips # 2 screwdriver, remove the screws that secure the LAN on Motherboard (LOM) card and rear I/O board to
the system board.
2. Holding the edges, pull the LOM card or rear I/O board to disconnect from the connector on the system board.
Figure 179. Removing the LOM card and rear I/O board
Installing and removing system components
181
 Loading...