17Installation and Service Guide: Color Controller E-46A
Installing Hardware
Checking the customer site
Before you install the E-46A, check the following conditions at the site and inform the customer of any installation
requirements.
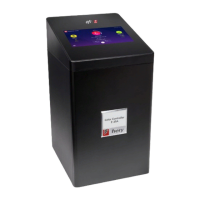
Figure 4: Space requirement for the E-46A without optional Fiery NX Station
Printer readiness
• Is the printer configured for use with the E-46A? (For the proper settings, see the documentation that accompanies
the printer.)
• Is there a adequate space available near the printer for the E-46A and the optional Fiery NX Station?
Make sure that adequate space is available for the E-46A and the furniture. Allow enough space at the connector
panel for the cables to route easily and at the side panel so that the E-46A does not interfere with use of or service
to the printer (such as clearing a paper jam). You may need to move the printer away from the wall so that
the interface connectors are accessible.
• Does the printer require service or adjustments?
Print the printer Test Page before you install the E-46A.
If the image indicates that the printer needs adjustment, inform the customer. After getting approval, complete the
necessary printer service.
Power
• Is a dedicated, grounded electrical outlet for the E-46A available near the printer?
Locate the grounded electrical outlet that will supply power to the E-46A. Do not run the E-46A and the printer on
the same circuit. If the customer has provided one, use a surge suppressor for the E-46A.
Network
• Make sure that the network is available at the time set for installation.
1 20cm+ (8 in.) 4 Side panel
2 E-46A 5 Fiery Quick Touch display panel
3 Connector panel 6 Front panel
1
3
4
1
2
2
1
3
6
6
5
Top view Left view

 Loading...