79Installation and Service Guide Color Controller E-46A
Replacing parts
12 Slide the power supply towards the front panel and take the power supply off from under the chassis bar.
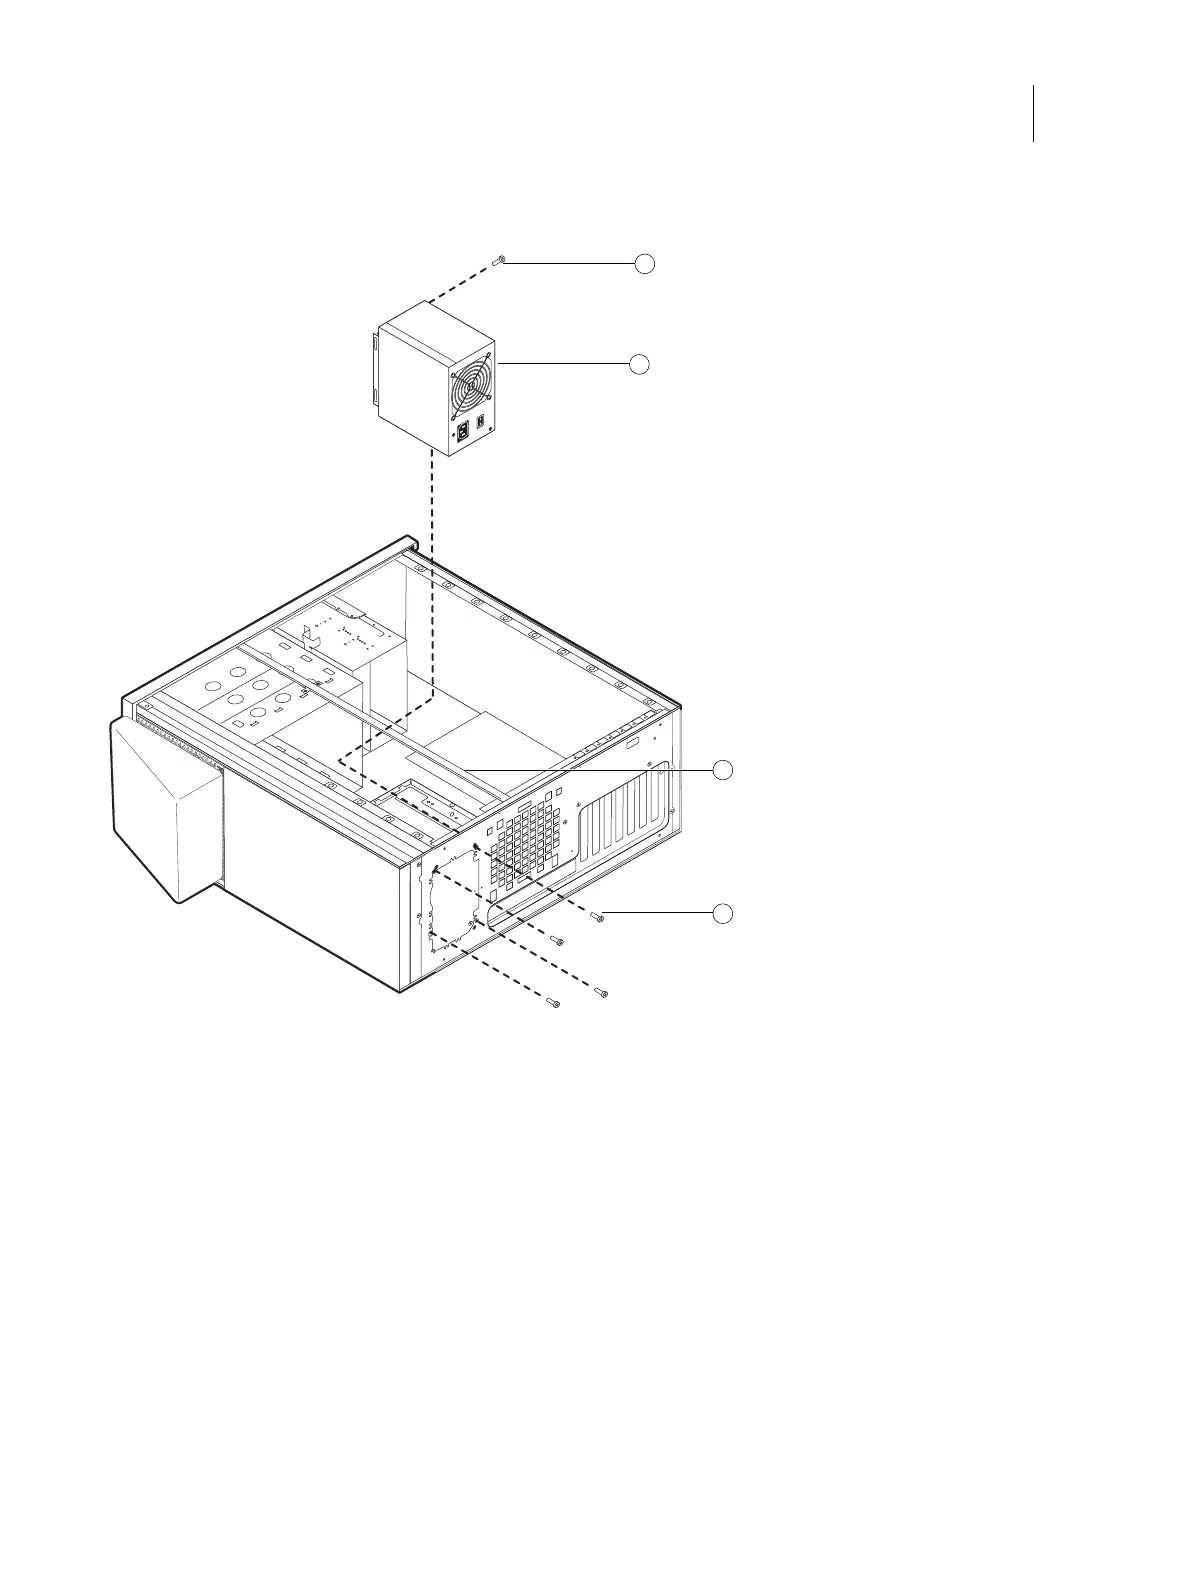
Figure 39: Removing/replacing the power supply
To replace the power supply
1 Make sure that the E-46A is in upright position.
2 Position the power supply inside the chassis (see Figure 39 on page 79).
Insert the power supply unit under the chassis bar, and place the power supply on top of the left and right chassis
bars. Position the power supply so that it is flush against the connector panel.
3 Install the inside screw with washer to secure the power supply unit to the chassis top.
1 Power supply unit
2 Chassis bar
3 Screw (1 of 4)
4 Inside screw
Note: To service the power supply, place the E-46A in an upright position.
1
3
4
2

 Loading...