77Installation and Service Guide Color Controller E-46A
Replacing parts
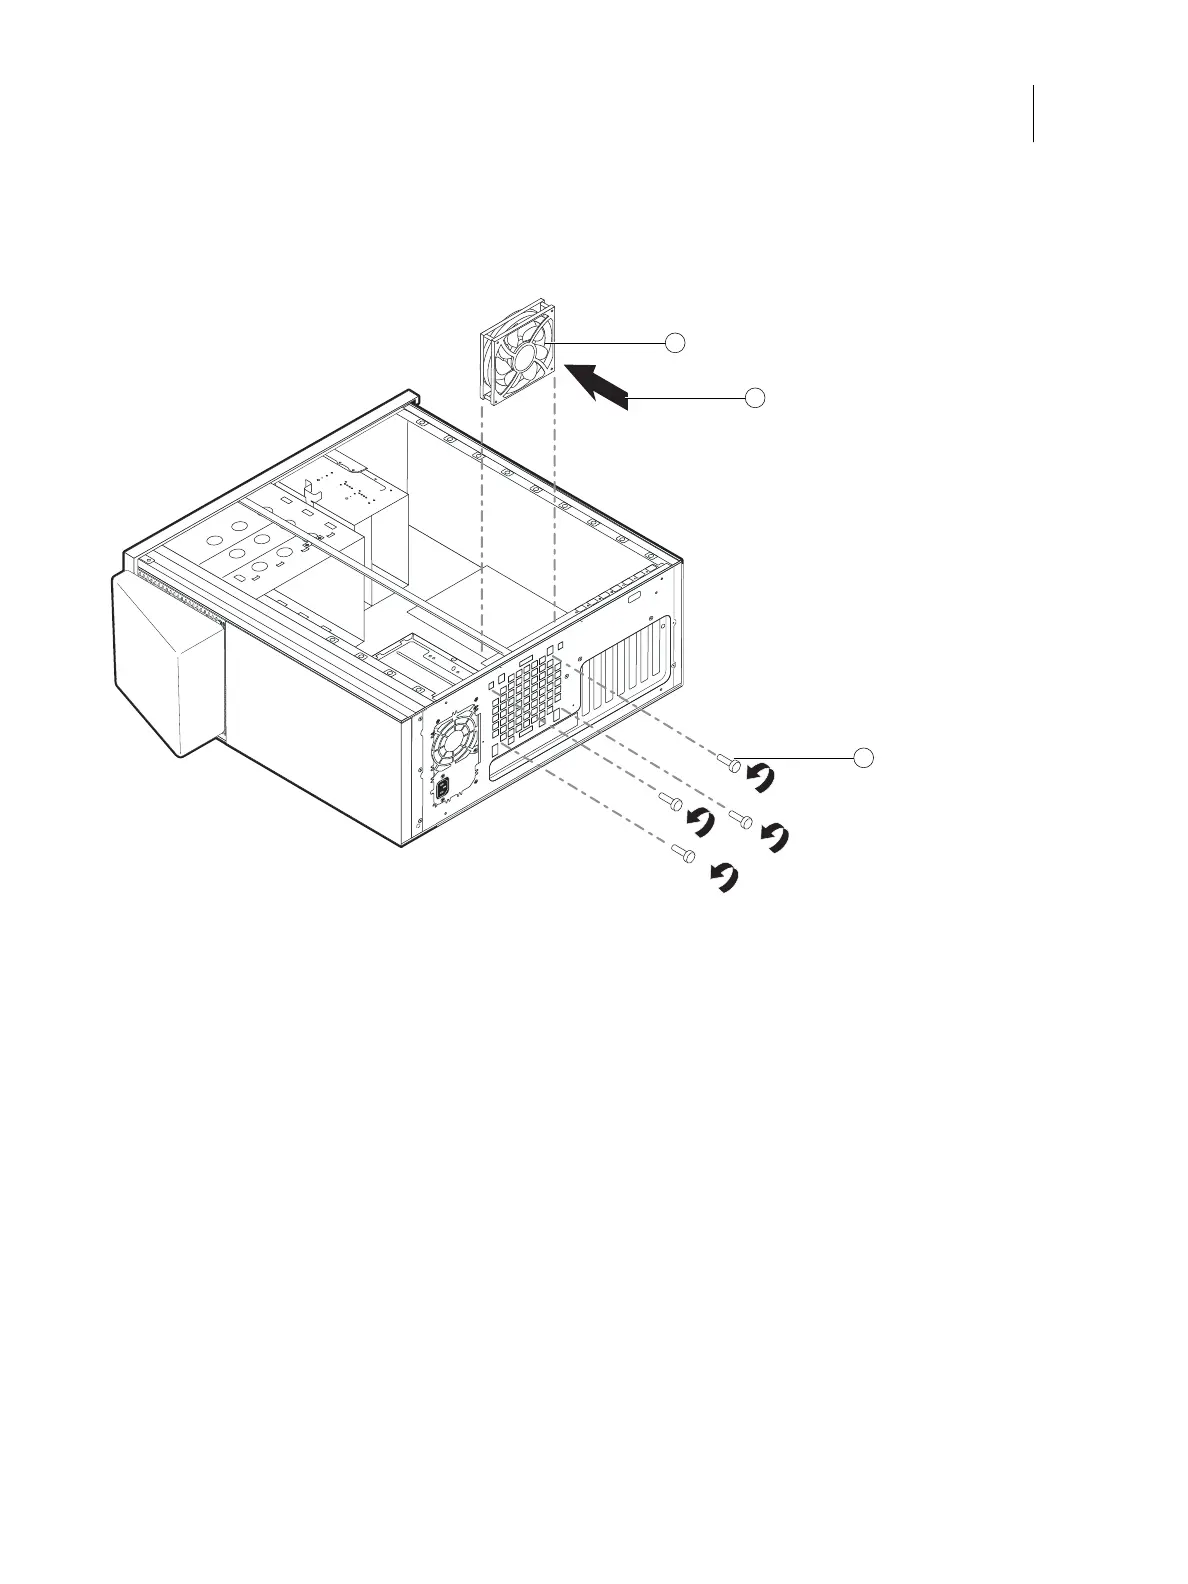
3 Remove the four screws from the connector panel, while holding the fan assembly from the inside.
Set aside the screws.
Figure 38: Removing/replacing the fan
4 Remove the fan from the chassis.
To replace the fan
1 Align the fan with the four holes on the connector panel.
2 Install the four screws you removed earlier to secure the fan assembly to the connector panel.
3 Connect the fan cable to motherboard connector FRONT FAN (J20).
4 Reassemble the E-46A and verify its functionality (see page 86).
1 Fan assembly 3 Screw (1/4)
2 Airflow direction
1
3
2

 Loading...