QX5
QXFXO4/QXISDN4/QXE1T1/QXFXS24; (SW Version 6.0.x) 54
QXFXO4/QXISDN4/QXE1T1/QXFXS24 Manual II: Administrator’s Guide
Defining patterns in the Call Routing Table avoids registering QX at the routing management server and gives you an option to establish a direct
connection to the destination or to use a SIP server for call routing.
The alternating Show Detailed View and Show Brief View buttons are used to display entries in the Call Routing table in detailed and brief views
correspondingly. The brief view displays the most important settings of the routing rules. The detailed view displays all settings of the routing rules as
they are configured in the Call Routing Wizard.
The alternating Hide disabled records and Show all records buttons are used to respectively hide or show disabled records in the Call Routing table.
The system does not consider the disabled records when parsing the table for the call route.
If the route has an Authentication or an Authentication&Accounting selected from the AAA Required checkbox group, it will have a link to the Users
List in the Call Routing table. The Users List page contains a list of authorized users defined from the
Local AAA Table and gives the option to
enable/disable authentication of each user for a particular route.
Since the Call Routing Table may have multiple entries that could match to same pattern, the table will be internally rearranged according to the rules
with the following consequences:
• The pattern matching best to the Best Matching Algorithm will have the higher position in the rearranged list,
• If multiple patterns equally match to the Best Matching Algorithm, the pattern with the lower metric will get the higher position in the rearranged
list,
• If the multiple patterns with the same metric have been matched to the Best Matching Algorithm, the pattern in the higher position in the table will
get the higher position in the rearranged list.
The pattern in the highest position of the rearranged list will be considered as the preferred one. The second and subsequent matching patterns will be
used, if the destination refused the call due to the configured Fail Reason.
The Enable/Disable functional buttons are used to enable/disable the selected route(s). Disabled routes will have no effect. Enabled routes will be parsed
when initiating routing calls. The State column in the Call Routing Table displays the current state of the routes (enabled/disabled).
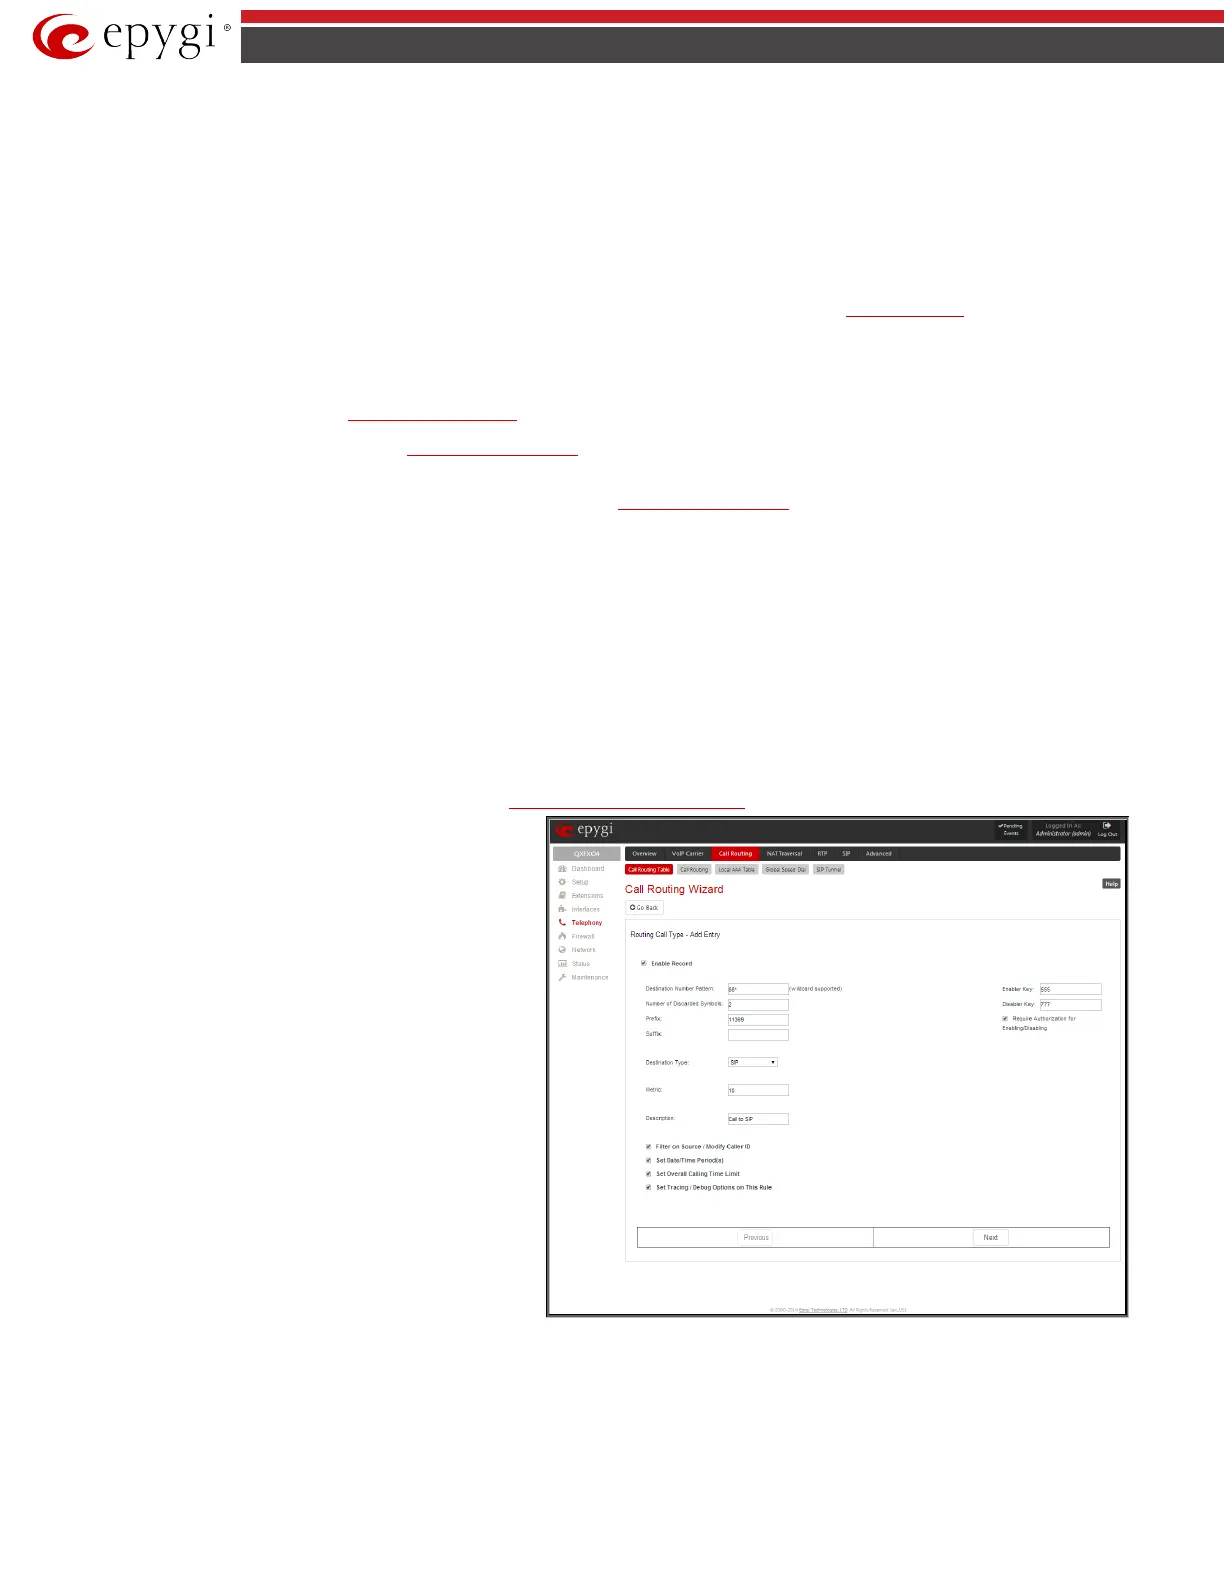
Add starts the Call Routing Wizard where a new routing pattern may be defined. The Call Routing Wizard is divided into several pages. Page 1 displays
the following components:
The Enable Record checkbox is used to enable the newly created routing rule. By default, this checkbox is selected, so the newly created routing rule will
be enabled. But if you wish to create a routing rule for a later use, disable it from this page. The new routing rule will be added to the Call Routing Table
but will be disabled and will not be considered when placing calls through the call routing unless it is enabled again.
The Destination Number Pattern text field specifies calls to which the rule should be applied. If a call, either inbound or outbound, has a destination
number that matches the specified pattern, it will be completed according to the current rule. A routing pattern may contain wildcards. For the list of
characters and wildcards allowed in this text field see chapter
Allowed Characters and Wildcards.
Number of Discarded Symbols
requires the number of
symbols that should be discarded from the beginning of the
routing pattern. The field should be empty if digits do not need
to be discarded. Only numeric values are allowed for this field,
otherwise the error message “Error: Number of Discarded
Symbols is incorrect - digits allowed only” will appear.
Prefix requires entering the symbols (letters, digits and any
characters supported in the SIP username) that will be placed in
front of the routing pattern instead of the discarded digits. The
following tags can be used for this field:
Fig.II- 67: Call Routing Wizard - page 1
• <callerid:range> - used to apply the complete or a part of caller ID (the caller’s number detected during the call) as a prefix. For example, <callerid:1-
3> indicates that the first 3 digits of the caller ID will be considered as a prefix, <callerid:3-end> indicates that the caller ID from its 3
rd
digit and up to
the end will be applied as a prefix. This tag can be used in combination with other digits at the beginning or at the end, as well as with wildcards.
• <dialednum:range> - used to apply the complete or a part of dialed number (the number dialed by the caller to place a call) as a prefix. For example,
<dialednum:1-3> indicates that the first 3 digits of the dialed number will be considered as a prefix, <dialednum:3-end> indicates that the dialed
 Loading...